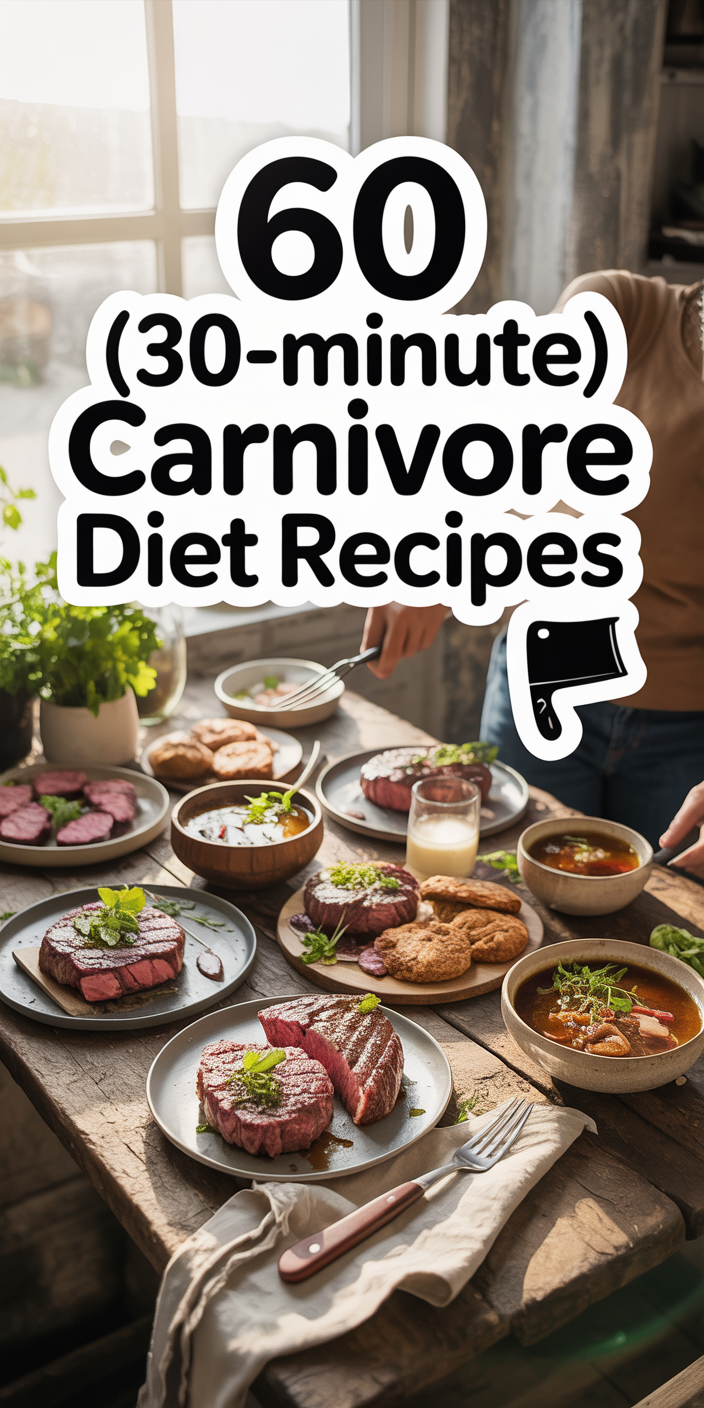
60 (30-Minute) Carnivore Diet Recipes: Quick and Delicious Animal-Based Meals
In our fast-paced modern world, finding time to prepare nutritious meals that align with specific dietary approaches can feel like an insurmountable challenge. For those following the carnivore diet, this challenge becomes even more pronounced, as the elimination of plant-based convenience foods requires a fundamental shift in meal planning and preparation strategies. The carnivore diet, which focuses exclusively on animal-based foods, has gained significant attention in recent years for its potential benefits in weight management, inflammation reduction, and metabolic health improvement.
The beauty of the carnivore diet lies in its simplicity, yet many newcomers find themselves overwhelmed by the perceived complexity of preparing varied, satisfying meals using only animal products. This comprehensive guide addresses that challenge head-on by providing sixty carefully crafted recipes that can each be completed in thirty minutes or less, proving that following a carnivore lifestyle doesn’t require hours in the kitchen or culinary expertise.
Each recipe in this collection has been designed with the busy individual in mind, whether you’re a working professional, a parent juggling multiple responsibilities, or someone simply seeking to streamline their meal preparation without sacrificing nutritional quality or flavor. The thirty-minute timeframe isn’t arbitrary; it represents the sweet spot where convenience meets quality, allowing you to prepare fresh, satisfying meals without the stress of lengthy cooking processes or complicated techniques.
The recipes span across all major animal protein categories, from traditional beef and chicken preparations to more adventurous organ meat dishes and seafood options. This diversity ensures that you’ll never find yourself bored with your meal choices, while also providing the nutritional variety that comes from consuming different types of animal proteins. Each recipe includes detailed instructions, timing guidelines, and practical tips that will help you execute the dish successfully, regardless of your current cooking skill level.
Beyond mere recipe collection, this guide serves as a comprehensive resource for understanding how to thrive on a carnivore diet while maintaining a realistic approach to meal preparation. You’ll discover essential cooking techniques that can be applied across multiple recipes, learn about the best cuts of meat for quick cooking, and understand how to maximize both flavor and nutritional value in minimal time. The goal is not just to feed yourself, but to create meals that are genuinely enjoyable and sustainable for long-term adherence to the carnivore lifestyle.
Understanding the Carnivore Diet: Foundations for Success
The carnivore diet represents one of the most restrictive yet potentially transformative dietary approaches available today. At its core, this eating pattern eliminates all plant-based foods and focuses exclusively on animal products, creating what many practitioners describe as the ultimate elimination diet. Understanding the fundamental principles behind this approach is crucial for anyone looking to implement it successfully, particularly when working within the constraints of quick meal preparation.
The historical roots of carnivorous eating patterns extend far beyond modern dietary trends. Archaeological evidence suggests that early humans relied heavily on animal proteins for survival, particularly during ice ages when plant foods were scarce. Scottish military surgeon John Rollo first documented the therapeutic use of an all-meat diet in the late 1700s, when he successfully used this approach to treat patients with diabetes, observing significant improvements in blood sugar control. This historical precedent provides important context for understanding why the carnivore diet continues to attract attention from both practitioners and researchers today.
From a physiological standpoint, the carnivore diet operates on several key mechanisms that distinguish it from other dietary approaches. The complete elimination of carbohydrates forces the body into a state of ketosis, where fat becomes the primary fuel source instead of glucose. This metabolic shift can lead to improved insulin sensitivity, reduced inflammation markers, and enhanced mental clarity for many individuals. The high protein content of the diet also provides superior satiety compared to carbohydrate-rich meals, often leading to natural calorie restriction without the hunger and cravings associated with traditional calorie-restricted diets.
The simplicity of food choices on a carnivore diet can be both liberating and challenging. On one hand, meal planning becomes straightforward when your options are limited to animal products. There’s no need to calculate complex macronutrient ratios or worry about combining different plant foods for complete amino acid profiles, as animal proteins naturally provide all essential amino acids in optimal ratios. On the other hand, this restriction requires creativity and skill in preparation methods to maintain variety and prevent meal fatigue.
Quality considerations become paramount when following a carnivore diet, as animal products will comprise 100% of your nutritional intake. Grass-fed beef, pasture-raised poultry, wild-caught fish, and organ meats from healthy animals provide superior nutrient density compared to conventionally raised alternatives. While these premium options may require a higher food budget, the elimination of all plant-based foods, processed items, and dining out expenses often balances the overall cost equation.
The carnivore diet’s approach to micronutrients challenges conventional nutritional wisdom, which typically emphasizes plant foods as primary sources of vitamins and minerals. However, animal products, particularly organ meats, are among the most nutrient-dense foods available. Liver, for example, contains higher concentrations of vitamin A, folate, and B vitamins than most plant sources. Muscle meats provide highly bioavailable forms of iron, zinc, and B12, while fatty fish supply omega-3 fatty acids in their most usable forms.
Hydration and electrolyte balance require special attention on a carnivore diet, particularly during the initial adaptation period. The elimination of carbohydrates leads to reduced water retention, which can result in the loss of important electrolytes like sodium, potassium, and magnesium. Many successful carnivore practitioners find that increasing salt intake and ensuring adequate hydration helps prevent common side effects like fatigue, headaches, and muscle cramps during the transition period.
The social aspects of following a carnivore diet cannot be overlooked, particularly in cultures where meals are central to social interaction. Dining out becomes more challenging, though not impossible, as most restaurants can accommodate requests for plain grilled meats and seafood. Meal sharing with family and friends may require additional planning and communication to ensure that suitable options are available for all participants.
Individual variation in response to the carnivore diet is significant, with some people experiencing rapid improvements in energy, digestion, and overall well-being, while others may require longer adaptation periods or find that the approach doesn’t suit their particular physiology. Factors such as previous dietary patterns, metabolic health status, activity levels, and genetic variations all influence how well someone adapts to and thrives on a carnivore diet.
The thirty-minute meal preparation timeframe addressed in this guide acknowledges the reality that most people cannot spend hours preparing elaborate meals, regardless of their dietary approach. Quick preparation methods don’t necessarily mean compromising on quality or nutrition; rather, they require strategic planning, efficient techniques, and a solid understanding of how different cooking methods affect various cuts of meat and types of animal proteins.
Essential Cooking Techniques for Quick Carnivore Meals
Mastering a handful of fundamental cooking techniques forms the backbone of successful thirty-minute carnivore meal preparation. These methods, when properly understood and executed, can transform simple animal proteins into satisfying, flavorful meals without requiring extensive time investments or complex equipment. The key lies in understanding how different cooking methods affect various types of meat and seafood, allowing you to choose the most appropriate technique for each specific protein and desired outcome.
Searing represents perhaps the most crucial technique in the carnivore cook’s arsenal, as it provides the foundation for developing deep, complex flavors in a short amount of time. The Maillard reaction, which occurs when proteins and amino acids are exposed to high heat, creates hundreds of new flavor compounds that give properly seared meats their characteristic taste and aroma. To achieve optimal searing results, the meat surface must be dry, the pan must be properly preheated, and the protein should not be moved until a proper crust has formed. This technique works exceptionally well for steaks, chops, fish fillets, and even organ meats like liver and heart.
The reverse searing method, while taking slightly longer than traditional searing, offers superior control over doneness and can still be completed within thirty minutes for most cuts. This technique involves slowly cooking the protein in a low oven until it reaches the desired internal temperature, then finishing with a high-heat sear to develop the crust. This method is particularly effective for thicker cuts of meat where achieving the perfect internal temperature while maintaining a proper crust can be challenging with traditional searing alone.
Pan-frying extends beyond simple searing by utilizing moderate heat and often incorporating cooking fats to create different textures and flavors. This technique is ideal for ground meats, smaller cuts, and proteins that benefit from gentle cooking. The choice of cooking fat becomes crucial here, as different fats impart distinct flavors and have varying smoke points. Butter provides rich flavor but requires careful temperature control, while tallow and ghee offer higher smoke points and neutral flavors that complement rather than compete with the meat’s natural taste.
Grilling, whether on an outdoor grill or indoor grill pan, provides unique flavor development through direct heat exposure and, in the case of outdoor grilling, smoke infusion. The key to successful quick grilling lies in proper heat management and understanding how different cuts respond to direct heat. Thinner cuts like fish fillets and chicken cutlets cook rapidly and require careful attention to prevent overcooking, while denser proteins like beef steaks can handle higher heat and longer exposure times.
Braising and slow cooking techniques can be adapted for quicker preparation by using smaller cuts of meat, higher temperatures, or pressure cooking methods. While traditional braising might take hours, cutting larger roasts into smaller portions or using naturally tender cuts can reduce cooking times significantly while still achieving the moist, tender results associated with these methods. This approach works particularly well for tougher cuts that benefit from moist heat cooking.
Oven roasting provides excellent results for larger portions and allows for hands-off cooking while you prepare other components of your meal. The key to quick roasting lies in using appropriate temperatures and understanding how different cuts respond to dry heat. Higher temperatures can significantly reduce cooking times, though they require more careful monitoring to prevent overcooking. This method is particularly effective for chicken pieces, pork chops, and fish fillets.
Temperature control and monitoring become critical skills when working within tight time constraints. Understanding the relationship between internal temperature and doneness allows you to achieve consistent results while minimizing the risk of overcooking. Digital instant-read thermometers provide the most reliable method for monitoring doneness, particularly for thicker cuts where visual cues may be misleading.
Resting periods, while often overlooked in quick cooking scenarios, remain important for optimal results. Even a brief five-minute rest allows juices to redistribute throughout the meat, resulting in more tender and flavorful final products. This resting time can be used productively to prepare simple sides or clean up cooking equipment.
Batch cooking strategies can significantly improve efficiency when preparing carnivore meals. Cooking larger quantities of certain proteins and storing them properly allows for quick reheating and incorporation into different meals throughout the week. This approach works particularly well for ground meats, which can be seasoned differently for various applications, and for proteins that maintain their quality well when reheated.
Understanding how different cuts of meat respond to various cooking methods enables you to make informed decisions about preparation techniques based on available time, desired outcomes, and the specific characteristics of your chosen protein. Tender cuts like ribeye steaks and fish fillets require minimal cooking time and gentle handling, while tougher cuts like chuck roast benefit from longer, slower cooking methods that may need to be adapted for quicker preparation.
The importance of proper seasoning timing cannot be overstated when working with quick cooking methods. Salt, in particular, affects protein structure and moisture retention, with different timing producing different results. Salting immediately before cooking provides surface seasoning and helps with browning, while salting 30-60 minutes in advance allows for deeper penetration and can improve texture through protein modification.
Equipment selection plays a crucial role in achieving optimal results within time constraints. Heavy-bottomed pans provide even heat distribution and better temperature control, while thin pans may create hot spots and uneven cooking. Cast iron skillets excel at heat retention and developing excellent sears, though they require longer preheating times. Stainless steel pans offer excellent browning capabilities and easy cleanup, making them ideal for quick meal preparation.
Beef Recipes: The Foundation of Carnivore Cooking
Beef serves as the cornerstone of most carnivore diets, providing exceptional nutritional density, satisfying protein content, and unparalleled versatility in preparation methods. The recipes in this section showcase the diverse range of flavors and textures achievable with different cuts of beef, from premium steaks to economical ground meat options, and even nutrient-dense organ meats that many carnivore practitioners consider essential for optimal health.
Recipe 1: Classic Pan-Seared Ribeye
Prep Time: 5 minutes | Cook Time: 8-12 minutes | Total Time: 15-20 minutes
The ribeye steak represents the gold standard of carnivore dining, combining exceptional marbling with tender texture and rich, beefy flavor. This preparation method maximizes the natural qualities of the cut while ensuring consistent results every time. The key to success lies in proper temperature control and allowing the meat to develop a beautiful crust while maintaining the desired internal doneness.
Ingredients:
- 1 ribeye steak (1-1.5 inches thick, 12-16 oz)
- 2 tablespoons grass-fed butter or beef tallow
- Sea salt to taste
- Freshly ground black pepper
- Optional: garlic powder
Begin by removing the ribeye from refrigeration 20-30 minutes before cooking to allow it to reach room temperature, which promotes even cooking throughout the steak. Pat the surface completely dry with paper towels, as any surface moisture will inhibit proper browning and crust formation. Season generously with salt and pepper on both sides, pressing the seasonings gently into the meat surface.
Heat a heavy-bottomed skillet, preferably cast iron, over medium-high heat until it begins to smoke lightly. Add the butter or tallow and swirl to coat the pan bottom. Carefully place the ribeye in the hot pan and resist the urge to move it for the first 3-4 minutes, allowing a proper crust to develop. The steak should sizzle vigorously upon contact with the pan.
After the initial searing period, flip the steak using tongs and sear the second side for another 3-4 minutes for medium-rare doneness. For thicker steaks or different doneness preferences, adjust timing accordingly or use an instant-read thermometer to monitor internal temperature. Remove the steak from heat and allow it to rest for 5 minutes before slicing, during which time the internal temperature will continue to rise slightly and juices will redistribute throughout the meat.
Cooking Tips: The resting period is crucial for optimal texture and flavor. Use this time to prepare any additional components or simply clean your cooking equipment. For enhanced flavor, consider basting the steak with the hot fat during the final minute of cooking.
Variations: Experiment with different seasonings such as smoked paprika or cumin for varied flavor profiles. Some practitioners prefer cooking in pure beef tallow for a more intense beef flavor, while others enjoy the richness that butter provides.
Recipe 2: Quick Beef Burgers
Prep Time: 10 minutes | Cook Time: 8-10 minutes | Total Time: 20 minutes
Ground beef offers incredible versatility and quick cooking times, making it ideal for busy weeknight meals. These burgers focus on highlighting the natural beef flavor while providing satisfying protein and fat content. The key to exceptional burgers lies in proper fat content, gentle handling, and avoiding overcooking.
Ingredients:
- 1 pound ground beef (80/20 fat ratio preferred)
- 1 teaspoon sea salt
- 1/2 teaspoon black pepper
- 2 tablespoons beef tallow or butter
- Optional: 1/2 teaspoon garlic powder
- Optional: aged cheese slices for topping
Gently combine the ground beef with salt, pepper, and any optional seasonings, being careful not to overmix, which can result in dense, tough burgers. Divide the mixture into four equal portions and shape into patties slightly larger than your desired final size, as they will shrink during cooking. Create a small indentation in the center of each patty to prevent excessive puffing during cooking.
Heat a large skillet over medium-high heat and add the cooking fat. When the fat is hot and shimmering, carefully place the burger patties in the pan, ensuring they don’t touch each other. Cook for 3-4 minutes without moving them, allowing a proper crust to form on the bottom surface.
Flip the burgers carefully and cook for an additional 3-4 minutes for medium doneness, adjusting time based on thickness and preference. If using cheese, add slices during the final minute of cooking and cover the pan briefly to encourage melting. Remove from heat and allow to rest for 2-3 minutes before serving.
Cooking Tips: Resist the urge to press down on the burgers while cooking, as this expels valuable juices and can result in dry final products. The natural fat content should provide sufficient moisture and flavor without additional manipulation.
Variations: Consider mixing different ground meats such as beef and lamb for unique flavor combinations. Some practitioners enjoy adding small amounts of organ meat to their ground beef for enhanced nutritional density.
Recipe 3: Ground Beef Scramble
Prep Time: 5 minutes | Cook Time: 12-15 minutes | Total Time: 20 minutes
This versatile preparation transforms simple ground beef into a satisfying meal that works equally well for breakfast, lunch, or dinner. The technique involves browning the meat thoroughly to develop deep flavors while maintaining a tender texture that pairs beautifully with eggs or stands alone as a complete meal.
Ingredients:
- 1 pound ground beef
- 4-6 large eggs (optional)
- 3 tablespoons butter or beef tallow
- 1 teaspoon salt
- 1/2 teaspoon black pepper
- Optional: 1/2 teaspoon paprika
Heat a large skillet over medium heat and add half of the cooking fat. When melted and hot, add the ground beef, breaking it into small, uniform pieces with a wooden spoon or spatula. Season with salt, pepper, and any optional spices, stirring to distribute evenly throughout the meat.
Cook the beef, stirring occasionally, until it develops a deep brown color and slightly crispy edges, approximately 8-10 minutes. The goal is to achieve thorough browning while maintaining moisture within the meat pieces. If the pan becomes too dry during cooking, add small amounts of additional fat as needed.
If incorporating eggs, create small wells in the cooked beef and crack the eggs directly into these spaces. Gently scramble the eggs with the beef, cooking until the eggs reach your desired consistency. Alternatively, serve the seasoned ground beef alongside separately prepared eggs.
Cooking Tips: Proper browning is essential for developing complex flavors in this simple preparation. Don’t rush the process by using excessive heat, which can result in uneven cooking and tough texture.
Variations: This base preparation can be seasoned with various spice combinations to create different flavor profiles. Consider adding small amounts of liver or heart for enhanced nutritional content.
Recipe 4: Beef Liver and Onions
Prep Time: 10 minutes | Cook Time: 15 minutes | Total Time: 25 minutes
Beef liver represents one of the most nutrient-dense foods available, providing exceptional concentrations of vitamin A, B vitamins, iron, and other essential nutrients. This classic preparation method ensures tender results while minimizing the strong flavor that some find challenging in organ meats.
Ingredients:
- 1 pound beef liver, sliced 1/2 inch thick
- 2 large onions, sliced thin
- 4 tablespoons butter or beef tallow
- Salt and pepper to taste
- Optional: 1/4 cup bone broth
Begin by soaking the liver slices in cold water for 10-15 minutes to remove excess blood and reduce the intensity of flavor. Pat completely dry and season with salt and pepper on both sides. Meanwhile, heat half of the cooking fat in a large skillet over medium heat.
Add the sliced onions to the hot fat and cook slowly, stirring occasionally, until they become golden brown and caramelized, approximately 8-10 minutes. The slow cooking process develops natural sweetness that complements the liver’s rich flavor. Remove the onions from the pan and set aside.
Increase heat to medium-high and add the remaining fat to the same pan. When hot, add the liver slices and cook for 2-3 minutes per side, being careful not to overcook, which results in tough, grainy texture. The liver should remain slightly pink in the center for optimal tenderness.
Return the caramelized onions to the pan and toss gently with the liver. If desired, add a small amount of bone broth to create a light sauce. Serve immediately while hot.
Cooking Tips: Liver cooks very quickly and becomes tough when overcooked. Watch carefully and err on the side of undercooking rather than overcooking for the best texture and flavor.
Variations: Some practitioners prefer to soak liver in milk before cooking, though this isn’t necessary for high-quality, fresh liver. Consider serving with crispy bacon for additional fat and complementary flavors.
Recipe 5: Minute Steaks with Butter
Prep Time: 5 minutes | Cook Time: 6-8 minutes | Total Time: 15 minutes
Minute steaks, also known as cube steaks, offer an economical way to enjoy tender beef in minimal time. These thin, tenderized cuts cook extremely quickly and benefit from simple preparation methods that highlight their natural flavors while adding richness through quality fats.
Ingredients:
- 4 minute steaks (about 1/4 inch thick)
- 4 tablespoons butter
- Salt and pepper to taste
- Optional: garlic powder
Season the minute steaks on both sides with salt, pepper, and any optional seasonings. Heat a large skillet over medium-high heat and add half of the butter. When the butter is melted and beginning to foam, carefully add the steaks to the pan.
Cook for 2-3 minutes per side, being careful not to overcook these thin cuts. The steaks should develop a light brown color while remaining tender throughout. Remove the steaks from the pan and set aside on a warm plate.
Add the remaining butter to the hot pan and allow it to melt and foam. Swirl the pan to incorporate any browned bits from the bottom, creating a simple pan sauce. Pour this butter sauce over the resting steaks and serve immediately.
Cooking Tips: These thin cuts cook very rapidly, so have all components ready before beginning the cooking process. The residual heat from the pan will continue cooking the steaks even after removal, so err on the side of undercooking.
Variations: Consider adding fresh herbs like thyme or rosemary to the butter for enhanced flavor complexity. Some practitioners enjoy finishing with a squeeze of lemon juice, though this moves away from strict carnivore principles.
Recipe 6: Beef Heart Skewers
Prep Time: 15 minutes | Cook Time: 10-12 minutes | Total Time: 27 minutes
Beef heart provides exceptional nutritional density while offering a unique texture and flavor that many carnivore practitioners find appealing. This preparation method transforms the organ meat into an approachable, flavorful dish that showcases its natural qualities while ensuring tender results.
Ingredients:
- 1 pound beef heart, trimmed and cut into 1-inch cubes
- 3 tablespoons beef tallow or butter
- 1 teaspoon salt
- 1/2 teaspoon black pepper
- Optional: 1/2 teaspoon smoked paprika
Prepare the beef heart by removing any visible fat, connective tissue, and blood vessels, then cutting into uniform cubes for even cooking. Thread the cubes onto metal skewers, leaving small spaces between pieces to ensure proper heat circulation.
Season the skewered heart generously with salt, pepper, and any optional spices, pressing the seasonings into the meat surface. Allow to rest at room temperature for 10-15 minutes while preparing your cooking surface.
Heat a grill pan or outdoor grill to medium-high heat and brush with cooking fat. Place the skewers on the hot surface and cook for 2-3 minutes per side, turning to ensure even browning on all surfaces. The total cooking time should be 8-10 minutes for tender, slightly pink centers.
Remove from heat and allow to rest for 3-5 minutes before serving. The heart should be tender and juicy with a slightly firm texture that’s distinct from regular muscle meat.
Cooking Tips: Heart muscle is naturally lean, so don’t overcook or it will become tough and dry. The meat should remain slightly pink in the center for optimal texture and flavor.
Variations: Consider marinating the heart cubes in salt water for 30 minutes before cooking to further tenderize the meat and reduce any strong flavors.
Recipe 7: Quick Beef Stir-Fry
Prep Time: 10 minutes | Cook Time: 8-10 minutes | Total Time: 20 minutes
This adaptation of traditional stir-fry techniques focuses exclusively on beef while maintaining the quick cooking methods and high heat that characterize this cooking style. The result is tender, flavorful beef with excellent texture and satisfying richness.
Ingredients:
- 1 pound beef sirloin or flank steak, sliced thin against the grain
- 3 tablespoons beef tallow or ghee
- 1 teaspoon salt
- 1/2 teaspoon black pepper
- Optional: 1/2 teaspoon garlic powder
- Optional: 1/4 teaspoon red pepper flakes
Slice the beef as thinly as possible against the grain, which helps ensure tender results even with quick cooking methods. Season the sliced beef with salt, pepper, and any optional seasonings, tossing to distribute evenly.
Heat a large skillet or wok over high heat until it begins to smoke lightly. Add the cooking fat and swirl to coat the cooking surface. When the fat is hot and shimmering, add the seasoned beef in a single layer, working in batches if necessary to avoid overcrowding.
Cook without stirring for 2-3 minutes to allow proper browning, then stir or toss quickly and continue cooking for another 2-3 minutes until the beef is cooked through but still tender. The high heat and quick cooking time preserve the meat’s natural juices while developing excellent flavor through browning.
Remove from heat immediately and serve while hot. The beef should be tender, well-browned, and juicy throughout.
Cooking Tips: The key to successful stir-frying is maintaining high heat throughout the cooking process. Don’t overcrowd the pan, as this will cause the temperature to drop and result in steaming rather than proper browning.
Variations: Different cuts of beef will produce varying textures and flavors. Experiment with ribeye, strip steak, or even ground beef for different results using the same basic technique.
Recipe 8: Reverse-Seared Filet Mignon
Prep Time: 5 minutes | Cook Time: 20-25 minutes | Total Time: 30 minutes
The reverse sear method provides exceptional control over doneness while ensuring even cooking throughout thick cuts of premium beef. This technique is particularly well-suited to filet mignon, which benefits from gentle cooking followed by high-heat searing for optimal texture and flavor development.
Ingredients:
- 2 filet mignon steaks (6-8 oz each, 1.5-2 inches thick)
- 2 tablespoons butter or beef tallow
- Salt and pepper to taste
- Optional: fresh thyme sprigs
Preheat your oven to 275°F (135°C) and season the filet mignon generously with salt and pepper on all surfaces. Place the seasoned steaks on a wire rack set over a baking sheet, which allows for even air circulation around the meat.
Cook in the preheated oven for 15-20 minutes, or until the internal temperature reaches 10-15 degrees below your target doneness temperature. For medium-rare, remove when the internal temperature reaches 115-120°F (46-49°C).
While the steaks finish in the oven, heat a heavy skillet over high heat until it begins to smoke. Add the cooking fat and swirl to coat the pan. Remove the steaks from the oven and immediately sear in the hot pan for 1-2 minutes per side to develop a beautiful crust.
Remove from heat and allow to rest for 5 minutes before serving. The result should be perfectly even doneness throughout with an excellent crust on the exterior.
Cooking Tips: Use an instant-read thermometer for the most accurate results, as visual cues can be misleading with this method. The final searing step happens very quickly, so have everything ready before removing the steaks from the oven.
Variations: This method works excellently with other thick cuts such as ribeye or strip steaks. Adjust oven time based on thickness and desired doneness.
Recipe 9: Beef Tongue Slices
Prep Time: 10 minutes | Cook Time: 20 minutes | Total Time: 30 minutes
Beef tongue offers unique texture and exceptional flavor when properly prepared. This quick preparation method produces tender, flavorful results that showcase why tongue is considered a delicacy in many culinary traditions. The key lies in proper preparation and not overcooking this naturally tender organ meat.
Ingredients:
- 1 pound beef tongue, peeled and sliced 1/2 inch thick
- 3 tablespoons butter or beef tallow
- Salt and pepper to taste
- Optional: 1/2 teaspoon paprika
If using fresh tongue, it may need to be peeled before slicing. Score the surface lightly and use a sharp knife to remove the outer skin, revealing the tender meat beneath. Slice the peeled tongue into uniform pieces approximately 1/2 inch thick.
Season the tongue slices on both sides with salt, pepper, and any optional seasonings. Heat a large skillet over medium heat and add the cooking fat. When the fat is hot and melted, add the tongue slices in a single layer.
Cook for 4-5 minutes per side, allowing the slices to develop a golden-brown color while maintaining their tender texture. The tongue should be heated through and lightly browned but not overcooked, which can result in tough, chewy texture.
Remove from heat and allow to rest briefly before serving. The tongue should be tender, flavorful, and have a unique texture that’s both firm and yielding.
Cooking Tips: Tongue has a naturally tender texture when fresh, so avoid overcooking which can make it tough. If you’re new to organ meats, tongue offers an excellent introduction due to its mild flavor and appealing texture.
Variations: Some practitioners enjoy tongue prepared with stronger seasonings such as cumin or chili powder. Consider serving alongside other organ meats for a varied nutritional profile.
Recipe 10: Ground Beef Meatballs
Prep Time: 15 minutes | Cook Time: 12-15 minutes | Total Time: 30 minutes
These carnivore-friendly meatballs eliminate traditional binding agents while maintaining excellent texture and flavor through proper technique and quality ingredients. The result is tender, juicy meatballs that work well as a main dish or as components in other preparations.
Ingredients:
- 1 pound ground beef (80/20 fat ratio)
- 1 large egg
- 1 teaspoon salt
- 1/2 teaspoon black pepper
- 3 tablespoons beef tallow or butter
- Optional: 1/2 teaspoon garlic powder
Gently combine the ground beef, egg, salt, pepper, and any optional seasonings in a large bowl, being careful not to overmix which can result in dense meatballs. The egg serves as a natural binder while adding richness and helping maintain moisture during cooking.
Form the mixture into uniform meatballs approximately 1.5 inches in diameter, rolling gently between your palms. Place the formed meatballs on a plate and allow them to rest for 5-10 minutes, which helps them hold together during cooking.
Heat a large skillet over medium heat and add the cooking fat. When hot, carefully add the meatballs, leaving space between each one to ensure even browning. Cook for 3-4 minutes per side, turning carefully to brown all surfaces.
Continue cooking, turning occasionally, until the meatballs are cooked through and have developed a rich brown color on all sides, approximately 12-15 minutes total. The internal temperature should reach 160°F (71°C) for food safety.
Cooking Tips: Handle the meat mixture gently to maintain tender texture in the finished meatballs. If the mixture seems too wet, allow it to rest for a few minutes before forming, as the salt will help bind the ingredients.
Variations: Consider mixing different ground meats such as beef and pork for varied flavor profiles. Some practitioners enjoy adding small amounts of organ meat for enhanced nutritional density.
Recipe 11: Chuck Roast Steaks
Prep Time: 5 minutes | Cook Time: 20-25 minutes | Total Time: 30 minutes
Chuck roast, when sliced into steaks, offers an economical alternative to premium cuts while providing excellent flavor and satisfying texture. This preparation method transforms a typically tough cut into tender, flavorful steaks through proper cooking technique and timing.
Ingredients:
- 2 pounds chuck roast, sliced into 1-inch thick steaks
- 3 tablespoons beef tallow or butter
- Salt and pepper to taste
- Optional: 1/2 teaspoon smoked paprika
Slice the chuck roast against the grain into steaks approximately 1 inch thick, which helps break down the muscle fibers and ensures more tender results. Season the steaks generously on both sides with salt, pepper, and any optional seasonings.
Heat a large, heavy skillet over medium heat and add the cooking fat. When the fat is hot and melted, carefully add the chuck steaks, being careful not to overcrowd the pan. Work in batches if necessary to maintain proper heat.
Sear the steaks for 4-5 minutes per side to develop a good crust, then reduce heat to medium-low and continue cooking for an additional 8-10 minutes per side, depending on thickness and desired doneness. Chuck roast benefits from slightly longer cooking times than premium cuts.
Remove from heat and allow to rest for 5 minutes before serving. The steaks should be tender throughout with a well-developed crust and rich, beefy flavor.
Cooking Tips: Chuck roast contains more connective tissue than premium cuts, so it benefits from slightly longer cooking times and moderate heat to break down these tough fibers properly.
Variations: Consider finishing the steaks with herb butter or serving alongside bone marrow for additional richness and flavor complexity.
Recipe 12: Beef Short Ribs (Pressure Cooker Method)
Prep Time: 10 minutes | Cook Time: 20 minutes | Total Time: 30 minutes
Using a pressure cooker dramatically reduces the cooking time for traditionally slow-cooked cuts like short ribs while still achieving tender, fall-off-the-bone results. This method is perfect for busy weeknight meals when you want the satisfaction of braised beef without the time investment.
Ingredients:
- 2 pounds beef short ribs, cut into individual pieces
- 2 tablespoons beef tallow
- 1 cup bone broth
- Salt and pepper to taste
- Optional: 1/2 teaspoon thyme
Season the short ribs generously with salt and pepper on all surfaces. Heat the pressure cooker using the sauté function and add the beef tallow. When hot, brown the short ribs on all sides, approximately 2-3 minutes per side, to develop flavor through the Maillard reaction.
Add the bone broth to the pressure cooker, scraping up any browned bits from the bottom of the pot. These browned bits add significant flavor to the final dish. Secure the pressure cooker lid and set to high pressure for 15 minutes.
Allow for natural pressure release for 5 minutes, then carefully perform a quick release for any remaining pressure. The short ribs should be tender and easily pierced with a fork when properly cooked.
Remove the ribs from the cooking liquid and serve immediately. The cooking liquid can be reduced on the stovetop for a few minutes to create a concentrated sauce if desired.
Cooking Tips: Browning the ribs before pressure cooking is essential for developing deep, complex flavors. Don’t skip this step even when time is limited, as it makes a significant difference in the final result.
Variations: Consider adding different herbs or spices to the cooking liquid for varied flavor profiles. Some practitioners enjoy adding a small amount of apple cider vinegar to help tenderize the meat further.
Recipe 13: Sirloin Tips with Garlic
Prep Time: 10 minutes | Cook Time: 15 minutes | Total Time: 25 minutes
Sirloin tips offer excellent value and quick cooking times while providing satisfying protein and rich beef flavor. This preparation highlights the natural qualities of the meat while adding aromatic elements that enhance the overall dining experience.
Ingredients:
- 1.5 pounds sirloin tips, cut into 2-inch pieces
- 4 cloves garlic, minced
- 3 tablespoons butter or beef tallow
- Salt and pepper to taste
- Optional: 1/4 teaspoon red pepper flakes
Cut the sirloin tips into uniform pieces to ensure even cooking, removing any excess fat or connective tissue. Season the pieces generously with salt and pepper, tossing to distribute the seasonings evenly.
Heat a large skillet over medium-high heat and add half of the cooking fat. When hot and shimmering, add the seasoned sirloin tips in a single layer, being careful not to overcrowd the pan. Work in batches if necessary.
Sear the tips for 2-3 minutes per side, turning to brown all surfaces evenly. The goal is to develop a good crust while maintaining tender interiors. Total cooking time should be 8-10 minutes for medium doneness.
Add the minced garlic and remaining fat to the pan during the final 2 minutes of cooking, stirring gently to prevent the garlic from burning while allowing it to become fragrant and lightly golden.
Remove from heat and allow to rest for 3-5 minutes before serving. The sirloin tips should be tender, well-browned, and aromatic from the garlic.
Cooking Tips: Garlic burns easily at high temperatures, so add it near the end of the cooking process to prevent bitter flavors from developing.
Variations: Consider using different aromatics such as fresh thyme or rosemary for varied flavor profiles. Some practitioners enjoy finishing with a pat of herb butter.
Recipe 14: Beef Kidney Sauté
Prep Time: 15 minutes | Cook Time: 10 minutes | Total Time: 25 minutes
Beef kidneys provide exceptional nutritional density and unique flavors when properly prepared. This quick sauté method ensures tender results while minimizing any strong flavors that some find challenging in organ meats. Proper preparation is key to success with this nutrient-dense ingredient.
Ingredients:
- 1 pound beef kidneys, cleaned and sliced
- 3 tablespoons butter
- 1 medium onion, sliced thin
- Salt and pepper to taste
- Optional: 2 tablespoons bone broth
Prepare the kidneys by removing the outer membrane and any visible fat or connective tissue. Slice into uniform pieces approximately 1/2 inch thick, removing the white core if present. Soak in cold water for 10 minutes, then pat completely dry.
Heat a large skillet over medium heat and add half of the butter. When melted and hot, add the sliced onions and cook until golden and caramelized, approximately 5-6 minutes. Remove the onions and set aside.
Increase heat to medium-high and add the remaining butter to the same pan. When hot, add the prepared kidney slices and cook quickly, approximately 2-3 minutes per side. Kidneys cook very rapidly and become tough when overcooked.
Return the caramelized onions to the pan and toss gently with the kidneys. If desired, add a small amount of bone broth to create a light sauce. Season with salt and pepper and serve immediately.
Cooking Tips: Kidneys have a naturally strong flavor that some find challenging. Proper cleaning and quick cooking help minimize this while preserving the nutritional benefits.
Variations: Some practitioners prefer to soak kidneys in milk before cooking to further reduce strong flavors, though this isn’t necessary with high-quality, fresh kidneys.
Recipe 15: Grilled Beef Kabobs
Prep Time: 15 minutes | Cook Time: 12-15 minutes | Total Time: 30 minutes
These beef kabobs showcase the versatility of grilling while providing an interactive, visually appealing meal that’s perfect for both indoor and outdoor cooking. The key to success lies in proper meat selection, uniform cutting, and careful attention to cooking times.
Ingredients:
- 2 pounds beef sirloin or ribeye, cut into 1.5-inch cubes
- 4 tablespoons beef tallow or olive oil
- 1 teaspoon salt
- 1/2 teaspoon black pepper
- Optional: 1/2 teaspoon smoked paprika
- Optional: 1/4 teaspoon garlic powder
Cut the beef into uniform cubes to ensure even cooking, removing any excess fat or connective tissue. Thread the cubes onto metal skewers, leaving small spaces between pieces to allow for proper heat circulation and even cooking.
Season the skewered beef generously with salt, pepper, and any optional spices, brushing with some of the cooking fat to help the seasonings adhere and prevent sticking during grilling.
Preheat your grill or grill pan to medium-high heat and brush the cooking surface with the remaining fat. Place the kabobs on the hot grill and cook for 3-4 minutes per side, turning to ensure even browning on all surfaces.
Continue cooking, turning every 3-4 minutes, until the beef reaches your desired doneness, approximately 12-15 minutes total for medium-rare. The exterior should be well-browned while the interior remains tender and juicy.
Remove from heat and allow to rest for 3-5 minutes before serving. The beef should be tender, well-seasoned, and have excellent grill marks from proper cooking technique.
Cooking Tips: Metal skewers conduct heat and help cook the meat from the inside, while also being reusable and easy to clean. If using wooden skewers, soak them in water for 30 minutes before use to prevent burning.
Variations: Different cuts of beef will produce varying textures and flavors. Experiment with different seasoning combinations to create unique flavor profiles while maintaining carnivore diet principles.
Chicken Recipes: Versatile Poultry for Every Meal
Chicken provides exceptional versatility in carnivore meal planning, offering lean protein options alongside fattier cuts that provide satisfying richness and flavor. The recipes in this section explore the full range of chicken preparations, from classic roasted pieces to more adventurous organ meat dishes that maximize nutritional density while maintaining appealing flavors and textures.
Recipe 16: Crispy Chicken Thighs
Prep Time: 10 minutes | Cook Time: 20 minutes | Total Time: 30 minutes
Chicken thighs represent the perfect balance of flavor, fat content, and cooking convenience for carnivore practitioners. This preparation method ensures crispy skin while maintaining juicy, tender meat underneath. The natural fat content of thighs makes them nearly foolproof for quick cooking methods.
Ingredients:
- 6 bone-in, skin-on chicken thighs
- 2 tablespoons duck fat or butter
- 1 teaspoon salt
- 1/2 teaspoon black pepper
- Optional: 1/2 teaspoon paprika
- Optional: 1/4 teaspoon garlic powder
Pat the chicken thighs completely dry with paper towels, paying special attention to the skin surface, as any moisture will prevent proper crisping. Season generously on both sides with salt, pepper, and any optional seasonings, pressing the spices into the skin.
Heat a large, oven-safe skillet over medium-high heat and add the cooking fat. When hot and shimmering, place the chicken thighs skin-side down in the pan, being careful not to overcrowd. The skin should sizzle immediately upon contact.
Cook without moving for 8-10 minutes, allowing the skin to render its fat and become golden brown and crispy. Resist the urge to check too early, as moving the thighs prematurely will prevent proper crisping.
Flip the thighs carefully and continue cooking for another 8-10 minutes, or until the internal temperature reaches 165°F (74°C). The skin should be deeply golden and crispy, while the meat remains juicy and tender.
Remove from heat and allow to rest for 5 minutes before serving. The resting period allows juices to redistribute throughout the meat while maintaining the crispy skin texture.
Cooking Tips: The key to crispy skin is starting with completely dry chicken and not moving it too early in the cooking process. The natural fat in the skin will render out and create the crispy texture you’re seeking.
Variations: Different seasonings can create varied flavor profiles while maintaining the same basic technique. Consider using smoked paprika for a deeper flavor or herbs like thyme for aromatic complexity.
Recipe 17: Grilled Chicken Breast
Prep Time: 10 minutes | Cook Time: 15-18 minutes | Total Time: 28 minutes
Chicken breast, while naturally lean, can be transformed into a satisfying carnivore meal through proper preparation and cooking techniques. The key lies in maintaining moisture while developing excellent flavor through proper seasoning and cooking methods.
Ingredients:
- 4 boneless, skinless chicken breasts (6-8 oz each)
- 3 tablespoons olive oil or melted butter
- 1 teaspoon salt
- 1/2 teaspoon black pepper
- Optional: 1/2 teaspoon dried herbs (thyme or rosemary)
Pound the chicken breasts to an even thickness of approximately 3/4 inch, which ensures even cooking and prevents the exterior from overcooking while the interior reaches safe temperature. This step is crucial for lean cuts like breast meat.
Season the chicken generously on both sides with salt, pepper, and any optional herbs. Brush with oil or melted butter to help prevent sticking and add richness to the naturally lean meat.
Preheat your grill or grill pan to medium-high heat and brush the cooking surface with oil to prevent sticking. Place the seasoned chicken breasts on the hot grill and cook for 6-7 minutes per side without moving them.
Check for doneness using an instant-read thermometer; the internal temperature should reach 165°F (74°C) for food safety. Remove from heat immediately upon reaching temperature to prevent overcooking and drying out.
Allow the chicken to rest for 5 minutes before slicing, during which time the internal temperature will continue to rise slightly and juices will redistribute throughout the meat.
Cooking Tips: Chicken breast can become dry very quickly when overcooked, so use a thermometer for the most accurate results. The resting period is crucial for maintaining moisture in this lean cut.
Variations: Consider marinating the chicken in salt water (brine) for 30 minutes before cooking to enhance moisture retention and flavor penetration.
Recipe 18: Chicken Liver Pâté
Prep Time: 15 minutes | Cook Time: 12 minutes | Total Time: 27 minutes
Chicken liver provides exceptional nutritional density in a form that’s more approachable than beef liver for many people. This quick pâté preparation creates a smooth, rich spread that showcases the liver’s natural flavors while providing concentrated nutrition.
Ingredients:
- 1 pound chicken livers, cleaned and trimmed
- 6 tablespoons butter
- 1 medium onion, diced fine
- 1/2 teaspoon salt
- 1/4 teaspoon black pepper
- Optional: 2 tablespoons heavy cream
Clean the chicken livers by removing any visible connective tissue, green spots, or blood clots. Pat completely dry and season with salt and pepper. Meanwhile, heat half of the butter in a large skillet over medium heat.
Add the diced onion to the hot butter and cook until softened and lightly golden, approximately 5-6 minutes. The onions provide sweetness that balances the rich flavor of the liver.
Increase heat to medium-high and add the cleaned chicken livers to the pan with the onions. Cook for 3-4 minutes per side, until the livers are browned on the outside but still slightly pink in the center. Overcooking will result in grainy texture.
Transfer the cooked livers and onions to a food processor along with the remaining butter and any optional cream. Process until smooth and creamy, scraping down the sides as needed to ensure even blending.
Taste and adjust seasoning as needed, then transfer to a serving dish or storage container. The pâté can be served immediately while warm or chilled for firmer texture.
Cooking Tips: Chicken livers cook very quickly and become grainy when overcooked. They should remain slightly pink in the center for the smoothest final texture.
Variations: Some practitioners enjoy adding hard-boiled eggs to the mixture for additional richness and protein content. Consider garnishing with crispy bacon bits for textural contrast.
Recipe 19: Buffalo Chicken Wings
Prep Time: 10 minutes | Cook Time: 20 minutes | Total Time: 30 minutes
Chicken wings provide the perfect combination of skin, fat, and meat that makes them ideal for carnivore diets. This buffalo-style preparation adds bold flavors while maintaining the high fat content that makes wings so satisfying.
Ingredients:
- 2 pounds chicken wings, split into flats and drumettes
- 4 tablespoons butter
- 2 tablespoons hot sauce (check ingredients for carnivore compliance)
- 1 teaspoon salt
- 1/2 teaspoon black pepper
- Optional: 1/4 teaspoon garlic powder
Pat the chicken wings completely dry and season with salt, pepper, and any optional seasonings. Proper drying is essential for achieving crispy skin during cooking.
Heat a large skillet over medium-high heat and add the wings in a single layer, working in batches if necessary to avoid overcrowding. Cook for 8-10 minutes per side, until the skin is golden brown and crispy.
While the wings cook, melt the butter in a small saucepan and whisk in the hot sauce to create a smooth buffalo sauce. Keep warm until ready to use.
When the wings are cooked through and crispy (internal temperature of 165°F/74°C), remove from heat and immediately toss with the buffalo sauce while still hot. The heat from the wings will help the sauce adhere properly.
Serve immediately while hot and crispy. The wings should have crispy skin with tender, juicy meat and a spicy, buttery coating.
Cooking Tips: Achieving crispy skin requires starting with dry wings and not overcrowding the pan. The natural fat in the skin will render out during cooking, creating the desired crispy texture.
Variations: Different hot sauces will create varied flavor profiles, though be sure to check ingredients for carnivore compliance. Some practitioners prefer using just butter and spices for a milder flavor.
Recipe 20: Chicken Drumsticks
Prep Time: 5 minutes | Cook Time: 25 minutes | Total Time: 30 minutes
Chicken drumsticks offer excellent value and rich flavor while providing the satisfying experience of eating meat off the bone. This simple preparation method ensures juicy, flavorful results with minimal effort and maximum satisfaction.
Ingredients:
- 8 chicken drumsticks
- 2 tablespoons olive oil or melted butter
- 1 teaspoon salt
- 1/2 teaspoon black pepper
- Optional: 1/2 teaspoon paprika
- Optional: 1/4 teaspoon garlic powder
Preheat your oven to 425°F (220°C) and line a baking sheet with parchment paper for easy cleanup. Pat the drumsticks dry and brush with oil or melted butter to promote browning and prevent sticking.
Season the drumsticks generously with salt, pepper, and any optional spices, rolling them to ensure even coverage on all surfaces. The seasoning will help create a flavorful crust during roasting.
Arrange the seasoned drumsticks on the prepared baking sheet, leaving space between each piece for proper air circulation. This spacing ensures even cooking and browning.
Roast for 20-25 minutes, turning once halfway through cooking, until the skin is golden brown and the internal temperature reaches 165°F (74°C). The skin should be crispy and the meat should be tender and juicy.
Remove from oven and allow to rest for 5 minutes before serving. The resting period allows juices to redistribute while maintaining the crispy skin texture.
Cooking Tips: Turning the drumsticks halfway through cooking ensures even browning on all surfaces. Use a meat thermometer to check doneness, as cooking times can vary based on size.
Variations: Different spice combinations can create varied flavor profiles. Consider using smoked paprika for deeper flavor or herbs like rosemary for aromatic complexity.
Recipe 21: Rotisserie-Style Chicken
Prep Time: 10 minutes | Cook Time: 20 minutes | Total Time: 30 minutes
This quick adaptation of rotisserie chicken flavors can be achieved using chicken pieces rather than a whole bird, significantly reducing cooking time while maintaining the characteristic flavors and textures associated with this popular preparation method.
Ingredients:
- 3 pounds mixed chicken pieces (thighs, drumsticks, breasts)
- 3 tablespoons olive oil or melted butter
- 1 teaspoon salt
- 1/2 teaspoon black pepper
- 1/2 teaspoon paprika
- 1/4 teaspoon garlic powder
- Optional: 1/4 teaspoon dried thyme
Preheat your oven to 450°F (230°C) for high-heat roasting that will create crispy skin while cooking the meat through quickly. Pat all chicken pieces completely dry with paper towels.
Combine all seasonings in a small bowl to create a spice blend. Brush the chicken pieces with oil or melted butter, then coat evenly with the spice mixture, pressing gently to help the seasonings adhere.
Arrange the seasoned chicken pieces on a large baking sheet, skin-side up, leaving space between pieces for proper air circulation. The high heat and spacing will ensure crispy skin and even cooking.
Roast for 18-22 minutes, depending on the size of the pieces, until the skin is golden brown and crispy and the internal temperature reaches 165°F (74°C). Larger pieces may require additional cooking time.
Remove from oven and allow to rest for 5 minutes before serving. The chicken should have crispy, flavorful skin with juicy, tender meat underneath.
Cooking Tips: High heat is essential for achieving crispy skin in a short time. Don’t overcrowd the pan, as this will cause steaming rather than proper roasting.
Variations: Different herb and spice combinations can create varied flavor profiles while maintaining the same basic technique. Consider adding smoked paprika for deeper flavor complexity.
Recipe 22: Chicken Heart Skewers
Prep Time: 15 minutes | Cook Time: 10 minutes | Total Time: 25 minutes
Chicken hearts provide exceptional nutritional density while offering a unique texture and mild flavor that makes them an excellent introduction to organ meats for carnivore practitioners. This skewer preparation makes them approachable and visually appealing.
Ingredients:
- 1 pound chicken hearts, cleaned and trimmed
- 3 tablespoons butter or duck fat
- 1 teaspoon salt
- 1/2 teaspoon black pepper
- Optional: 1/2 teaspoon paprika
Clean the chicken hearts by removing any visible fat, connective tissue, or blood clots. Pat completely dry and thread onto metal skewers, leaving small spaces between hearts for even cooking.
Season the skewered hearts generously with salt, pepper, and any optional spices, pressing the seasonings into the meat surface. Allow to rest at room temperature for 10 minutes while preparing your cooking surface.
Heat a grill pan or outdoor grill to medium-high heat and brush with cooking fat to prevent sticking. Place the skewers on the hot surface and cook for 2-3 minutes per side, turning to ensure even browning.
Continue cooking, turning every 2-3 minutes, until the hearts are cooked through but still tender, approximately 8-10 minutes total. The hearts should be lightly browned on all surfaces with tender, juicy interiors.
Remove from heat and allow to rest for 2-3 minutes before serving. The hearts should be tender, well-seasoned, and have a unique texture that’s both firm and yielding.
Cooking Tips: Chicken hearts cook quickly and can become tough when overcooked. They should remain tender and slightly pink in the center for optimal texture and flavor.
Variations: Different seasonings can create varied flavor profiles. Consider using herbs like thyme or rosemary for aromatic complexity, or spices like cumin for international flavor influences.
Recipe 23: Pan-Fried Chicken Cutlets
Prep Time: 10 minutes | Cook Time: 12 minutes | Total Time: 22 minutes
Chicken cutlets offer quick cooking times and tender results when properly prepared. This method ensures even cooking while developing excellent flavor through proper browning techniques and careful temperature control.
Ingredients:
- 4 chicken breast cutlets (pounded to 1/2 inch thickness)
- 4 tablespoons butter or ghee
- 1 teaspoon salt
- 1/2 teaspoon black pepper
- Optional: 1/4 teaspoon garlic powder
If starting with whole chicken breasts, slice them horizontally to create thinner cutlets, then pound to an even 1/2 inch thickness. This ensures quick, even cooking throughout the meat.
Season the cutlets on both sides with salt, pepper, and any optional seasonings. Allow to rest at room temperature for 10 minutes, which helps the seasoning penetrate and ensures more even cooking.
Heat a large skillet over medium-high heat and add half of the butter or ghee. When the fat is hot and foaming, carefully add the seasoned cutlets, being careful not to overcrowd the pan.
Cook for 3-4 minutes per side, until golden brown and cooked through. The internal temperature should reach 165°F (74°C) for food safety. Remove the cutlets and set aside on a warm plate.
Add the remaining butter to the hot pan and allow it to melt and foam, scraping up any browned bits from the bottom. Pour this butter sauce over the resting cutlets and serve immediately.
Cooking Tips: Thin cutlets cook very quickly, so have everything ready before beginning the cooking process. The residual heat will continue cooking the meat even after removal from the pan.
Variations: Consider adding fresh herbs to the finishing butter for enhanced flavor complexity. Different seasonings can create varied flavor profiles while maintaining the same basic technique.
Recipe 24: Chicken Gizzard Stir-Fry
Prep Time: 15 minutes | Cook Time: 12 minutes | Total Time: 27 minutes
Chicken gizzards provide unique texture and excellent nutritional value while offering an economical protein option for carnivore practitioners. This stir-fry method ensures tender results while developing excellent flavors through high-heat cooking.
Ingredients:
- 1 pound chicken gizzards, cleaned and sliced
- 3 tablespoons duck fat or ghee
- 1 teaspoon salt
- 1/2 teaspoon black pepper
- Optional: 1/2 teaspoon garlic powder
- Optional: 1/4 teaspoon red pepper flakes
Clean the chicken gizzards by removing any visible fat or connective tissue, then slice into uniform pieces approximately 1/2 inch thick. This ensures even cooking and tender results.
Season the sliced gizzards with salt, pepper, and any optional seasonings, tossing to distribute evenly. Allow to rest at room temperature for 10 minutes while preparing your cooking surface.
Heat a large skillet or wok over high heat until it begins to smoke lightly. Add the cooking fat and swirl to coat the cooking surface. When the fat is hot and shimmering, add the seasoned gizzards.
Stir-fry for 8-10 minutes, stirring frequently to ensure even cooking and browning. The gizzards should develop a golden-brown color while becoming tender throughout. High heat and constant movement prevent overcooking.
Remove from heat when the gizzards are tender and well-browned. Serve immediately while hot. The gizzards should have a unique, slightly chewy texture with excellent flavor from the high-heat cooking.
Cooking Tips: Gizzards have a naturally firm texture that becomes tender with proper cooking. Don’t overcook, as they can become tough and rubbery.
Variations: Different seasonings can create varied flavor profiles. Consider using international spice blends for unique flavor combinations while maintaining carnivore diet principles.
Recipe 25: Bacon-Wrapped Chicken
Prep Time: 15 minutes | Cook Time: 15 minutes | Total Time: 30 minutes
This combination of chicken and bacon provides excellent fat content while creating visually appealing and flavorful results. The bacon fat bastes the chicken during cooking, ensuring moist, tender results with crispy bacon exterior.
Ingredients:
- 4 boneless, skinless chicken breasts (6 oz each)
- 8 strips bacon
- 1 teaspoon salt
- 1/2 teaspoon black pepper
- Optional: 1/4 teaspoon garlic powder
Pound the chicken breasts to an even thickness of approximately 3/4 inch, which ensures even cooking and makes wrapping easier. Season on both sides with salt, pepper, and any optional seasonings.
Wrap each seasoned chicken breast with 2 strips of bacon, overlapping slightly and securing with toothpicks if necessary. The bacon should cover most of the chicken surface for even fat distribution during cooking.
Heat a large, oven-safe skillet over medium heat. Place the bacon-wrapped chicken seam-side down in the pan and cook for 4-5 minutes to render the bacon fat and begin browning.
Flip carefully and continue cooking for another 4-5 minutes, then transfer the entire pan to a preheated 400°F (200°C) oven for 6-8 minutes to finish cooking through.
Check for doneness using an instant-read thermometer; the internal temperature should reach 165°F (74°C). Remove from oven and allow to rest for 5 minutes before serving.
Cooking Tips: The bacon fat will render during cooking, providing natural basting for the chicken. Don’t add additional fat to the pan, as the bacon provides sufficient fat for cooking.
Variations: Different types of bacon will create varied flavor profiles. Consider using thick-cut bacon for more substantial fat content and flavor.
Recipe 26: Chicken Skin Crisps
Prep Time: 10 minutes | Cook Time: 15 minutes | Total Time: 25 minutes
Chicken skin, when properly prepared, creates satisfying, crispy snacks that provide excellent fat content and rich flavor. This preparation method transforms what might otherwise be discarded into a valuable component of carnivore meals.
Ingredients:
- Skin from 4-6 chicken breasts or thighs
- 1/2 teaspoon salt
- Optional: 1/4 teaspoon black pepper
- Optional: 1/4 teaspoon paprika
Remove the skin from chicken pieces carefully, keeping it in large pieces when possible. Pat the skin completely dry with paper towels, as any moisture will prevent proper crisping.
Season the skin pieces on both sides with salt and any optional seasonings. Arrange on a baking sheet lined with parchment paper, stretching the skin pieces flat for even cooking.
Preheat your oven to 400°F (200°C) and bake the seasoned skin for 12-15 minutes, until golden brown and crispy. The skin will render its fat during cooking, creating the desired crispy texture.
Remove from oven when the skin is deeply golden and crispy throughout. Allow to cool slightly before serving, as the skin will continue to crisp as it cools.
The finished skin crisps should be golden brown, crispy, and well-seasoned. They can be eaten as snacks or used as garnishes for other dishes.
Cooking Tips: Proper drying is essential for achieving crispy results. The skin will shrink significantly during cooking as the fat renders out.
Variations: Different seasonings can create varied flavor profiles. Consider using herbs or spices that complement your main dishes for cohesive meal planning.
Recipe 27: Spicy Chicken Tenders
Prep Time: 10 minutes | Cook Time: 15 minutes | Total Time: 25 minutes
Chicken tenders provide quick cooking times and appealing presentation while offering lean protein that can be enhanced with bold seasonings and proper cooking techniques. This spicy preparation adds excitement to simple chicken preparations.
Ingredients:
- 2 pounds chicken tenders
- 3 tablespoons butter or ghee
- 1 teaspoon salt
- 1/2 teaspoon black pepper
- 1/2 teaspoon paprika
- 1/4 teaspoon cayenne pepper
- Optional: 1/4 teaspoon garlic powder
Pat the chicken tenders completely dry and season with all spices, tossing to ensure even coverage. Allow to rest at room temperature for 10 minutes to allow the seasonings to penetrate the meat.
Heat a large skillet over medium-high heat and add the cooking fat. When hot and shimmering, add the seasoned chicken tenders in a single layer, working in batches if necessary to avoid overcrowding.
Cook for 3-4 minutes per side, until golden brown and cooked through. The internal temperature should reach 165°F (74°C) for food safety. The tenders should develop a golden crust while remaining tender inside.
Remove from heat and allow to rest for 3-5 minutes before serving. The tenders should be well-seasoned, tender, and have excellent color from proper browning.
Cooking Tips: Chicken tenders cook very quickly due to their small size, so watch carefully to prevent overcooking. The spices will create a flavorful crust during cooking.
Variations: Adjust the spice levels according to your heat tolerance. Different spice combinations can create varied flavor profiles while maintaining the same basic cooking technique.
Pork Recipes: Rich Flavors and Satisfying Fats
Pork provides exceptional versatility in carnivore cooking, offering everything from lean tenderloin to rich, fatty cuts like belly and shoulder. The natural fat content in many pork cuts makes them particularly satisfying for carnivore practitioners, while the mild flavor profile accepts a wide range of seasonings and preparation methods.
Recipe 28: Perfect Pork Chops
Prep Time: 5 minutes | Cook Time: 12-15 minutes | Total Time: 20 minutes
Pork chops represent one of the most accessible and satisfying cuts for quick carnivore meals. This preparation method ensures juicy, flavorful results while developing excellent browning that enhances both appearance and taste. The key lies in proper temperature control and timing.
Ingredients:
- 4 bone-in pork chops (1 inch thick)
- 2 tablespoons lard or butter
- 1 teaspoon salt
- 1/2 teaspoon black pepper
- Optional: 1/2 teaspoon sage
- Optional: 1/4 teaspoon garlic powder
Remove pork chops from refrigeration 20-30 minutes before cooking to allow them to reach room temperature, which promotes even cooking throughout the meat. Pat completely dry and season generously on both sides with salt, pepper, and any optional seasonings.
Heat a large, heavy skillet over medium-high heat and add the cooking fat. When the fat is hot and shimmering, carefully place the seasoned pork chops in the pan, ensuring they don’t touch each other.
Sear for 4-5 minutes per side without moving them, allowing a golden-brown crust to develop. The chops should sizzle vigorously upon contact with the hot fat. After searing both sides, reduce heat to medium and continue cooking.
Cook for an additional 3-4 minutes per side, or until the internal temperature reaches 145°F (63°C) for medium doneness. Modern pork is safe to eat at this temperature and will be juicy and slightly pink in the center.
Remove from heat and allow to rest for 5 minutes before serving. The resting period allows juices to redistribute throughout the meat while the internal temperature continues to rise slightly.
Cooking Tips: Pork chops can become dry when overcooked, so use a meat thermometer for the most accurate results. The resting period is crucial for maintaining moisture in the finished chops.
Variations: Different herbs and spices can create varied flavor profiles. Consider using thyme, rosemary, or paprika for different taste experiences while maintaining carnivore diet principles.
Recipe 29: Bacon-Wrapped Pork Tenderloin
Prep Time: 10 minutes | Cook Time: 20 minutes | Total Time: 30 minutes
Pork tenderloin is naturally lean, making it perfect for wrapping in bacon to add fat content and flavor while ensuring moist, tender results. This combination creates an elegant presentation that’s suitable for both everyday meals and special occasions.
Ingredients:
- 2 pork tenderloins (about 1 pound each)
- 12-16 strips bacon
- 1 teaspoon salt
- 1/2 teaspoon black pepper
- Optional: 1/2 teaspoon dried thyme
Preheat your oven to 425°F (220°C) and line a baking sheet with parchment paper. Pat the pork tenderloins dry and season all surfaces with salt, pepper, and any optional herbs.
Wrap each tenderloin with bacon strips, overlapping slightly and ensuring complete coverage. The bacon should be snug but not overly tight, as it will shrink during cooking. Secure with toothpicks if necessary.
Place the bacon-wrapped tenderloins on the prepared baking sheet and roast for 18-22 minutes, or until the internal temperature reaches 145°F (63°C). The bacon should be crispy and golden brown.
Remove from oven and allow to rest for 5 minutes before slicing. The bacon fat will have basted the tenderloin during cooking, ensuring moist, flavorful results throughout.
Slice into medallions and serve immediately. The tenderloin should be tender and juicy with crispy bacon exterior providing rich flavor and satisfying texture contrast.
Cooking Tips: The bacon provides natural basting during cooking, so no additional fat is needed. Monitor the bacon to ensure it doesn’t burn while the tenderloin cooks through.
Variations: Different types of bacon will create varied flavor profiles. Consider using thick-cut or flavored bacon for enhanced taste complexity.
Recipe 30: Ground Pork Patties
Prep Time: 10 minutes | Cook Time: 12 minutes | Total Time: 22 minutes
Ground pork offers excellent flavor and natural fat content that makes it ideal for quick patty preparations. This method creates satisfying, well-seasoned patties that work well for any meal and provide excellent protein and fat content for carnivore practitioners.
Ingredients:
- 1.5 pounds ground pork
- 1 teaspoon salt
- 1/2 teaspoon black pepper
- 1/2 teaspoon sage
- 2 tablespoons lard or butter
- Optional: 1/4 teaspoon red pepper flakes
Gently combine the ground pork with salt, pepper, sage, and any optional seasonings, being careful not to overmix which can result in dense, tough patties. The natural fat content in pork helps maintain moisture during cooking.
Divide the seasoned mixture into 6 equal portions and shape into patties slightly larger than your desired final size, as they will shrink during cooking. Create a small indentation in the center of each patty to prevent excessive puffing.
Heat a large skillet over medium heat and add the cooking fat. When hot and melted, carefully place the pork patties in the pan, ensuring they don’t touch each other for even cooking.
Cook for 5-6 minutes per side without moving them, allowing a golden-brown crust to develop. The patties should be cooked through with an internal temperature of 160°F (71°C) for food safety.
Remove from heat and allow to rest for 3-5 minutes before serving. The patties should be well-browned, juicy, and well-seasoned throughout.
Cooking Tips: Ground pork has higher fat content than ground beef, which helps prevent drying during cooking. Don’t press down on the patties while cooking, as this expels valuable juices.
Variations: Different herb and spice combinations can create varied flavor profiles. Consider using fennel seeds for Italian-inspired flavors or cumin for southwestern influences.
Recipe 31: Pork Belly Bites
Prep Time: 10 minutes | Cook Time: 20 minutes | Total Time: 30 minutes
Pork belly provides exceptional fat content and rich flavor that makes it particularly satisfying for carnivore practitioners. This preparation method creates crispy exterior with tender interior, showcasing the natural qualities of this premium cut.
Ingredients:
- 2 pounds pork belly, skin removed, cut into 2-inch cubes
- 1 teaspoon salt
- 1/2 teaspoon black pepper
- Optional: 1/2 teaspoon smoked paprika
- Optional: 1/4 teaspoon garlic powder
Cut the pork belly into uniform cubes for even cooking, removing the skin if present. Pat the cubes completely dry and season on all surfaces with salt, pepper, and any optional seasonings.
Heat a large, heavy skillet over medium heat. Add the seasoned pork belly cubes in a single layer, being careful not to overcrowd the pan. The natural fat content will render during cooking.
Cook for 4-5 minutes per side, turning to brown all surfaces evenly. The goal is to render the fat while developing a golden-brown crust on all sides. Total cooking time should be 16-20 minutes.
Continue cooking until the exterior is crispy and golden brown while the interior remains tender. The rendered fat will accumulate in the pan and can be saved for other cooking purposes.
Remove from heat and allow to rest briefly before serving. The pork belly should have crispy exterior with rich, tender interior and excellent flavor from proper browning.
Cooking Tips: Pork belly contains significant fat that will render during cooking, so start with a dry pan and allow the natural fat to provide the cooking medium.
Variations: Different seasonings can create varied flavor profiles. Consider using five-spice powder for Asian-inspired flavors or herbs like thyme for European influences.
Recipe 32: Ham Steaks with Butter
Prep Time: 5 minutes | Cook Time: 10 minutes | Total Time: 15 minutes
Ham steaks provide quick cooking convenience while offering rich, smoky flavors that many carnivore practitioners enjoy. This simple preparation enhances the natural flavors while adding richness through quality butter and proper browning techniques.
Ingredients:
- 4 ham steaks (1/2 inch thick)
- 4 tablespoons butter
- Black pepper to taste
- Optional: 1/4 teaspoon mustard powder
Pat the ham steaks dry and season lightly with black pepper. Ham is typically already salted during the curing process, so additional salt is usually unnecessary.
Heat a large skillet over medium heat and add half of the butter. When melted and hot, add the ham steaks and cook for 3-4 minutes per side, until heated through and lightly browned.
The goal is to warm the ham thoroughly while developing light browning for enhanced flavor. Ham steaks are already cooked during processing, so they only need reheating and browning.
Remove the ham steaks from the pan and add the remaining butter, allowing it to melt and foam. Swirl the pan to incorporate any browned bits, creating a simple butter sauce.
Pour the butter sauce over the ham steaks and serve immediately. The ham should be hot throughout with enhanced flavor from the browning and butter.
Cooking Tips: Ham steaks are pre-cooked, so the goal is reheating and flavor enhancement rather than cooking through. Don’t overcook, as this can make them tough and dry.
Variations: Different types of ham will provide varied flavor profiles. Consider using thick-cut ham steaks for more substantial portions and enhanced presentation.
Recipe 33: Pork Shoulder Steaks
Prep Time: 5 minutes | Cook Time: 20-25 minutes | Total Time: 30 minutes
Pork shoulder, when sliced into steaks, provides excellent value while offering rich flavor and satisfying texture. This preparation method transforms a typically slow-cooking cut into quick-cooking steaks through proper technique and timing.
Ingredients:
- 2 pounds pork shoulder, sliced into 1-inch thick steaks
- 2 tablespoons lard or butter
- 1 teaspoon salt
- 1/2 teaspoon black pepper
- Optional: 1/2 teaspoon paprika
Slice the pork shoulder against the grain into steaks approximately 1 inch thick, which helps break down muscle fibers for more tender results. Season generously on both sides with salt, pepper, and any optional seasonings.
Heat a large, heavy skillet over medium heat and add the cooking fat. When hot and melted, add the pork shoulder steaks, being careful not to overcrowd the pan.
Sear for 4-5 minutes per side to develop a golden-brown crust, then reduce heat to medium-low and continue cooking for an additional 8-10 minutes per side, depending on thickness.
Pork shoulder benefits from slightly longer cooking times than premium cuts to break down connective tissue and achieve tender results. The internal temperature should reach 145°F (63°C) for food safety.
Remove from heat and allow to rest for 5 minutes before serving. The steaks should be tender throughout with well-developed crust and rich, porky flavor.
Cooking Tips: Pork shoulder contains more connective tissue than premium cuts, so it benefits from moderate heat and slightly longer cooking times to achieve optimal tenderness.
Variations: Consider finishing with herb butter or serving alongside crispy pork rinds for additional texture and flavor complexity.
Recipe 34: Crispy Pork Rinds
Prep Time: 10 minutes | Cook Time: 15 minutes | Total Time: 25 minutes
Pork rinds provide exceptional fat content and satisfying crunch that makes them ideal snacks or garnishes for carnivore practitioners. This preparation method creates crispy, flavorful results from fresh pork skin.
Ingredients:
- 1 pound pork skin, cut into 2-inch pieces
- 1 teaspoon salt
- Optional: 1/2 teaspoon black pepper
- Optional: 1/4 teaspoon paprika
Cut the pork skin into uniform pieces for even cooking, removing any excess fat if necessary. Pat completely dry and season with salt and any optional seasonings.
Heat a large skillet over medium heat and add the seasoned pork skin pieces in a single layer. The natural fat will render during cooking, providing the cooking medium.
Cook for 12-15 minutes, stirring occasionally, until the skin pieces are golden brown and crispy throughout. The fat will render out during cooking, leaving crispy, puffed rinds.
Remove the crispy rinds from the pan and drain briefly on paper towels to remove excess fat. The rendered fat can be saved for other cooking purposes.
Serve immediately while hot and crispy, or allow to cool for storage. The rinds should be golden brown, crispy, and well-seasoned throughout.
Cooking Tips: Proper drying is essential for achieving crispy results. The skin will puff and become crispy as the fat renders out during cooking.
Variations: Different seasonings can create varied flavor profiles. Consider using spice blends or herbs for unique taste combinations.
Recipe 35: Pork Liver and Bacon
Prep Time: 10 minutes | Cook Time: 15 minutes | Total Time: 25 minutes
Pork liver provides exceptional nutritional density while offering milder flavor than beef liver for many people. This preparation combines liver with bacon for enhanced flavor and fat content, creating an approachable organ meat dish.
Ingredients:
- 1 pound pork liver, sliced 1/2 inch thick
- 6 strips bacon, chopped
- 1 medium onion, sliced
- Salt and pepper to taste
- Optional: 2 tablespoons bone broth
Prepare the pork liver by removing any visible connective tissue or blood spots, then slice into uniform pieces. Pat completely dry and season with salt and pepper on both sides.
Cook the chopped bacon in a large skillet over medium heat until crispy and golden brown, approximately 5-6 minutes. Remove the bacon and set aside, leaving the rendered fat in the pan.
Add the sliced onions to the bacon fat and cook until golden and caramelized, approximately 5-6 minutes. The onions provide sweetness that complements the rich liver flavor.
Increase heat to medium-high and add the seasoned liver slices to the pan with the onions. Cook for 2-3 minutes per side, being careful not to overcook, which results in tough texture.
Return the crispy bacon to the pan and toss gently with the liver and onions. If desired, add a small amount of bone broth to create a light sauce. Serve immediately while hot.
Cooking Tips: Pork liver cooks very quickly and becomes tough when overcooked. It should remain slightly pink in the center for optimal tenderness and flavor.
Variations: Different herbs and seasonings can enhance the flavor profile. Consider using sage or thyme for aromatic complexity that complements both liver and bacon.
Recipe 36: Sausage and Eggs
Prep Time: 5 minutes | Cook Time: 15 minutes | Total Time: 20 minutes
This classic combination provides excellent protein and fat content while offering satisfying flavors and textures. The key lies in proper cooking technique for both components and timing to ensure everything finishes simultaneously.
Ingredients:
- 1 pound pork sausage (check ingredients for carnivore compliance)
- 6-8 large eggs
- 2 tablespoons butter
- Salt and pepper to taste
Heat a large skillet over medium heat and add the sausage, breaking it into small, uniform pieces with a wooden spoon. Cook for 8-10 minutes, stirring occasionally, until browned and cooked through.
The sausage should develop good browning while maintaining moisture. If the pan becomes too dry during cooking, the natural fat from the sausage should provide sufficient cooking medium.
Create wells in the cooked sausage and crack the eggs directly into these spaces. Alternatively, push the sausage to one side of the pan and add butter to the empty space for cooking eggs separately.
Cook the eggs to your desired doneness, whether scrambled with the sausage or prepared separately. The combination of sausage fat and butter provides excellent flavor for the eggs.
Season with salt and pepper as needed, keeping in mind that many sausages are already well-seasoned. Serve immediately while hot.
Cooking Tips: Choose sausages with minimal non-carnivore ingredients for best compliance with dietary principles. The natural fat from sausage provides excellent cooking medium for eggs.
Variations: Different types of sausage will create varied flavor profiles. Consider using breakfast sausage, Italian sausage, or other varieties based on your flavor preferences.
Recipe 37: Pork Ribs (Quick Method)
Prep Time: 10 minutes | Cook Time: 20 minutes | Total Time: 30 minutes
While pork ribs traditionally require long cooking times, this quick method using smaller portions and higher heat can produce satisfying results in minimal time. The key lies in proper preparation and technique adaptation.
Ingredients:
- 2 pounds pork ribs, cut into individual pieces
- 2 tablespoons lard or butter
- 1 teaspoon salt
- 1/2 teaspoon black pepper
- 1/2 teaspoon paprika
- Optional: 1/4 teaspoon garlic powder
Cut the pork ribs into individual pieces for faster cooking, or ask your butcher to do this for you. Season all surfaces generously with salt, pepper, paprika, and any optional seasonings.
Heat a large, heavy skillet over medium-high heat and add the cooking fat. When hot, add the seasoned rib pieces and sear on all sides to develop browning, approximately 2-3 minutes per side.
After browning, reduce heat to medium-low, cover the pan, and continue cooking for 12-15 minutes, turning occasionally to ensure even cooking. The ribs should become tender while maintaining good color.
Check for doneness by ensuring the meat is cooked through and tender. While these won’t be as fall-off-the-bone tender as slow-cooked ribs, they should be satisfying and flavorful.
Remove from heat and allow to rest for 5 minutes before serving. The ribs should be well-browned, tender, and well-seasoned throughout.
Cooking Tips: This quick method won’t produce the same tenderness as traditional slow cooking, but it provides satisfying results when time is limited.
Variations: Different spice combinations can create varied flavor profiles. Consider using dry rubs or finishing with herb butter for enhanced flavor complexity.
Lamb Recipes: Rich, Distinctive Flavors
Lamb provides unique, rich flavors that many carnivore practitioners find particularly satisfying. The natural fat content and distinctive taste profile of lamb make it an excellent choice for varied meal planning, while its tender texture responds well to quick cooking methods that preserve its natural qualities.
Recipe 38: Lamb Chops with Herbs
Prep Time: 10 minutes | Cook Time: 12 minutes | Total Time: 22 minutes
Lamb chops represent one of the most elegant and flavorful quick-cooking options available to carnivore practitioners. This preparation method highlights the natural richness of lamb while adding aromatic herbs that complement rather than mask the meat’s distinctive character.
Ingredients:
- 8 lamb rib chops (1 inch thick)
- 3 tablespoons olive oil or lamb fat
- 1 teaspoon salt
- 1/2 teaspoon black pepper
- 1 teaspoon fresh rosemary, chopped
- Optional: 1/2 teaspoon garlic powder
Remove lamb chops from refrigeration 30 minutes before cooking to allow them to reach room temperature, which ensures even cooking throughout. Pat completely dry and season generously on both sides with salt, pepper, rosemary, and any optional seasonings.
Heat a large, heavy skillet over medium-high heat and add the cooking fat. When hot and shimmering, carefully place the seasoned lamb chops in the pan, ensuring they don’t touch each other for proper browning.
Sear for 3-4 minutes per side for medium-rare doneness, or adjust timing based on thickness and preference. Lamb is best served medium-rare to medium for optimal tenderness and flavor development.
The internal temperature should reach 130-135°F (54-57°C) for medium-rare doneness. Remove from heat immediately upon reaching desired temperature to prevent overcooking.
Allow to rest for 5 minutes before serving. The resting period allows juices to redistribute throughout the meat while the internal temperature continues to rise slightly.
Cooking Tips: Lamb chops cook quickly due to their size, so watch carefully to prevent overcooking. The natural fat content helps maintain moisture during cooking.
Variations: Different herbs can create varied flavor profiles. Consider using thyme, oregano, or mint for different aromatic experiences that complement lamb’s natural flavors.
Recipe 39: Ground Lamb Burgers
Prep Time: 10 minutes | Cook Time: 10 minutes | Total Time: 20 minutes
Ground lamb offers rich flavor and excellent fat content that creates naturally juicy, satisfying burgers. This preparation method showcases lamb’s distinctive taste while ensuring tender, flavorful results that work well for any meal.
Ingredients:
- 1.5 pounds ground lamb
- 1 teaspoon salt
- 1/2 teaspoon black pepper
- 1/2 teaspoon dried mint
- 2 tablespoons olive oil or lamb fat
- Optional: 1/4 teaspoon cumin
Gently combine the ground lamb with salt, pepper, mint, and any optional seasonings, being careful not to overmix which can result in dense burgers. The natural fat content in lamb helps maintain moisture during cooking.
Divide the seasoned mixture into 4-6 equal portions and shape into patties slightly larger than your desired final size, as they will shrink during cooking. Create a small indentation in the center to prevent excessive puffing.
Heat a large skillet over medium-high heat and add the cooking fat. When hot, carefully place the lamb patties in the pan, ensuring they don’t touch each other for even cooking.
Cook for 4-5 minutes per side for medium doneness, being careful not to overcook which can result in dry burgers. Lamb is best served medium-rare to medium for optimal flavor and texture.
Remove from heat and allow to rest for 3-5 minutes before serving. The burgers should be well-browned on the outside with juicy, flavorful interiors.
Cooking Tips: Ground lamb has higher fat content than most ground beef, which helps prevent drying during cooking. Don’t press down on the patties while cooking.
Variations: Different herb and spice combinations can create varied flavor profiles. Consider using Mediterranean herbs or Middle Eastern spices for international flavor influences.
Recipe 40: Lamb Shoulder Steaks
Prep Time: 5 minutes | Cook Time: 20 minutes | Total Time: 25 minutes
Lamb shoulder, when sliced into steaks, provides excellent value while offering rich flavor and satisfying texture. This preparation method transforms a typically slow-cooking cut into quick-cooking steaks through proper technique and timing.
Ingredients:
- 2 pounds lamb shoulder, sliced into 1-inch thick steaks
- 2 tablespoons olive oil or lamb fat
- 1 teaspoon salt
- 1/2 teaspoon black pepper
- 1/2 teaspoon dried oregano
- Optional: 1/4 teaspoon garlic powder
Slice the lamb shoulder against the grain into steaks approximately 1 inch thick, which helps break down muscle fibers for more tender results. Season generously on both sides with salt, pepper, oregano, and any optional seasonings.
Heat a large, heavy skillet over medium-high heat and add the cooking fat. When hot, add the lamb shoulder steaks, being careful not to overcrowd the pan for proper browning.
Sear for 4-5 minutes per side to develop a golden-brown crust, then reduce heat to medium and continue cooking for an additional 6-8 minutes per side, depending on thickness and desired doneness.
Lamb shoulder benefits from slightly longer cooking times than premium cuts to break down connective tissue while maintaining the rich flavor that makes lamb so appealing.
Remove from heat and allow to rest for 5 minutes before serving. The steaks should be tender throughout with well-developed crust and rich, distinctive lamb flavor.
Cooking Tips: Lamb shoulder contains more connective tissue than premium cuts, so it benefits from moderate heat and slightly longer cooking times for optimal tenderness.
Variations: Consider finishing with herb butter or serving alongside other lamb preparations for a varied lamb-focused meal.
Recipe 41: Lamb Liver with Onions
Prep Time: 10 minutes | Cook Time: 15 minutes | Total Time: 25 minutes
Lamb liver provides exceptional nutritional density while offering milder flavor than beef liver for many people. This classic preparation method ensures tender results while developing complementary flavors through proper technique and timing.
Ingredients:
- 1 pound lamb liver, sliced 1/2 inch thick
- 2 large onions, sliced thin
- 4 tablespoons butter or lamb fat
- Salt and pepper to taste
- Optional: 1/4 cup bone broth
Prepare the lamb liver by removing any visible connective tissue or blood spots, then slice into uniform pieces. Soak in cold water for 10 minutes to remove excess blood, then pat completely dry.
Heat half of the cooking fat in a large skillet over medium heat. Add the sliced onions and cook slowly, stirring occasionally, until golden brown and caramelized, approximately 8-10 minutes.
The slow cooking process develops natural sweetness in the onions that complements the rich flavor of the liver. Remove the onions from the pan and set aside.
Increase heat to medium-high and add the remaining fat to the same pan. When hot, add the liver slices and cook for 2-3 minutes per side, being careful not to overcook which results in tough texture.
Return the caramelized onions to the pan and toss gently with the liver. If desired, add a small amount of bone broth to create a light sauce. Serve immediately while hot.
Cooking Tips: Lamb liver cooks very quickly and becomes tough when overcooked. It should remain slightly pink in the center for optimal tenderness and flavor.
Variations: Different herbs and seasonings can enhance the flavor profile. Consider using fresh thyme or rosemary for aromatic complexity that complements lamb’s natural flavors.
Recipe 42: Grilled Lamb Kabobs
Prep Time: 15 minutes | Cook Time: 12 minutes | Total Time: 27 minutes
Lamb kabobs showcase the meat’s natural flavors while providing an interactive, visually appealing meal that’s perfect for both indoor and outdoor cooking. The key to success lies in proper meat selection and careful attention to cooking times.
Ingredients:
- 2 pounds lamb leg or shoulder, cut into 1.5-inch cubes
- 4 tablespoons olive oil
- 1 teaspoon salt
- 1/2 teaspoon black pepper
- 1 teaspoon dried oregano
- Optional: 1/2 teaspoon garlic powder
Cut the lamb into uniform cubes for even cooking, removing any excess fat or connective tissue. Thread the cubes onto metal skewers, leaving small spaces between pieces for proper heat circulation.
Season the skewered lamb generously with salt, pepper, oregano, and any optional spices, brushing with olive oil to help the seasonings adhere and prevent sticking during grilling.
Preheat your grill or grill pan to medium-high heat and brush the cooking surface with oil. Place the kabobs on the hot grill and cook for 3-4 minutes per side, turning to ensure even browning.
Continue cooking, turning every 3-4 minutes, until the lamb reaches your desired doneness, approximately 10-12 minutes total for medium-rare. The exterior should be well-browned while the interior remains tender and juicy.
Remove from heat and allow to rest for 3-5 minutes before serving. The lamb should be tender, well-seasoned, and have excellent grill marks from proper cooking technique.
Cooking Tips: Lamb is best served medium-rare to medium for optimal flavor and texture. Use a meat thermometer for the most accurate results.
Variations: Different herb and spice combinations can create varied flavor profiles. Consider using Mediterranean or Middle Eastern seasonings for international flavor influences.
Recipe 43: Lamb Shank Slices
Prep Time: 10 minutes | Cook Time: 20 minutes | Total Time: 30 minutes
Lamb shanks, when sliced crosswise, provide rich flavor and satisfying texture while reducing the cooking time typically required for this cut. This preparation method showcases the natural richness of shank meat through proper technique.
Ingredients:
- 2 lamb shanks, sliced crosswise into 1-inch thick rounds
- 3 tablespoons olive oil or lamb fat
- 1 teaspoon salt
- 1/2 teaspoon black pepper
- 1/2 teaspoon rosemary
- Optional: 1/4 cup bone broth
Have your butcher slice the lamb shanks crosswise into rounds, or use a sharp knife to cut through the bone and meat. Season the shank slices on both sides with salt, pepper, and rosemary.
Heat a large, heavy skillet over medium-high heat and add the cooking fat. When hot, add the seasoned shank slices and sear for 4-5 minutes per side to develop browning.
After browning both sides, reduce heat to medium-low, cover the pan, and continue cooking for 10-12 minutes, turning once halfway through. The meat should become tender while maintaining good color.
If desired, add a small amount of bone broth to the pan during the final few minutes of cooking to create a light sauce and help tenderize the meat further.
Remove from heat and allow to rest for 5 minutes before serving. The shank slices should be tender, well-browned, and full of rich lamb flavor.
Cooking Tips: Shank meat benefits from slightly longer cooking times than premium cuts due to its connective tissue content. The bone adds flavor during cooking.
Variations: Consider adding different herbs or finishing with herb butter for enhanced flavor complexity while maintaining carnivore diet principles.
Recipe 44: Lamb Heart Preparation
Prep Time: 15 minutes | Cook Time: 12 minutes | Total Time: 27 minutes
Lamb heart provides exceptional nutritional density while offering unique texture and mild flavor that makes it an excellent introduction to organ meats. This preparation method ensures tender, flavorful results that showcase the heart’s natural qualities.
Ingredients:
- 2 lamb hearts (about 1 pound total), cleaned and sliced
- 3 tablespoons olive oil or lamb fat
- 1 teaspoon salt
- 1/2 teaspoon black pepper
- 1/2 teaspoon thyme
- Optional: 1/4 teaspoon garlic powder
Clean the lamb hearts by removing any visible fat, connective tissue, or blood vessels, then slice into uniform pieces approximately 1/2 inch thick. Pat completely dry and season with salt, pepper, and thyme.
Heat a large skillet over medium-high heat and add the cooking fat. When hot and shimmering, add the seasoned heart slices in a single layer, being careful not to overcrowd the pan.
Cook for 2-3 minutes per side, turning to brown all surfaces evenly. Heart muscle is naturally lean and cooks quickly, so avoid overcooking which can result in tough texture.
The heart should be lightly browned on the outside while remaining tender and slightly pink in the center. Total cooking time should be 8-10 minutes for optimal results.
Remove from heat and allow to rest for 3-5 minutes before serving. The heart should be tender, well-seasoned, and have a unique texture that’s both firm and yielding.
Cooking Tips: Heart muscle is naturally lean and tender when fresh, so avoid overcooking which can make it tough. It should remain slightly pink in the center.
Variations: Different herbs and seasonings can enhance the flavor profile. Consider using rosemary or oregano for aromatic complexity that complements lamb’s natural flavors.
Recipe 45: Lamb Kidney Sauté
Prep Time: 15 minutes | Cook Time: 10 minutes | Total Time: 25 minutes
Lamb kidneys provide exceptional nutritional density and unique flavors when properly prepared. This quick sauté method ensures tender results while minimizing any strong flavors that some find challenging in organ meats.
Ingredients:
- 1 pound lamb kidneys, cleaned and sliced
- 3 tablespoons butter or lamb fat
- 1 medium onion, sliced thin
- Salt and pepper to taste
- Optional: 2 tablespoons bone broth
- Optional: 1/2 teaspoon fresh thyme
Prepare the kidneys by removing the outer membrane and any visible fat or connective tissue. Slice into uniform pieces approximately 1/2 inch thick, removing the white core if present. Soak in cold water for 10 minutes, then pat dry.
Heat half of the cooking fat in a large skillet over medium heat. Add the sliced onions and cook until golden and caramelized, approximately 5-6 minutes, then remove and set aside.
Increase heat to medium-high and add the remaining fat to the same pan. When hot, add the prepared kidney slices and cook quickly, approximately 2-3 minutes per side.
Kidneys cook very rapidly and become tough when overcooked, so watch carefully and remove from heat as soon as they’re cooked through but still tender.
Return the caramelized onions to the pan and toss gently with the kidneys. If desired, add bone broth and fresh thyme for enhanced flavor. Serve immediately while hot.
Cooking Tips: Kidneys have a naturally strong flavor that proper cleaning and quick cooking help minimize while preserving nutritional benefits.
Variations: Some practitioners prefer to soak kidneys in milk before cooking to further reduce strong flavors, though this isn’t necessary with high-quality, fresh kidneys.
Seafood Recipes: Ocean Treasures for Carnivore Dining
Seafood provides exceptional variety in carnivore meal planning, offering everything from rich, fatty fish to delicate shellfish. The natural oils in many fish species provide essential fatty acids while the quick cooking times make seafood ideal for thirty-minute meal preparation. These recipes showcase the diverse flavors and textures available from ocean and freshwater sources.
Recipe 46: Pan-Seared Salmon
Prep Time: 5 minutes | Cook Time: 12 minutes | Total Time: 17 minutes
Salmon represents one of the most nutritionally dense and flavorful fish options available to carnivore practitioners. This preparation method ensures crispy skin while maintaining moist, flaky flesh that showcases the fish’s natural richness and omega-3 fatty acid content.
Ingredients:
- 4 salmon fillets (6 oz each), skin-on
- 3 tablespoons butter or ghee
- 1 teaspoon salt
- 1/2 teaspoon black pepper
- Optional: 1/4 teaspoon dill
Pat the salmon fillets completely dry, paying special attention to the skin side, as any moisture will prevent proper crisping. Score the skin lightly with a sharp knife to prevent curling during cooking.
Season the fillets on both sides with salt, pepper, and any optional herbs, pressing the seasonings gently into the flesh. Allow to rest at room temperature for 10 minutes while preparing your cooking surface.
Heat a large, heavy skillet over medium-high heat and add the cooking fat. When hot and shimmering, place the salmon fillets skin-side down in the pan, pressing gently to ensure good contact.
Cook skin-side down for 8-10 minutes without moving them, allowing the skin to become golden brown and crispy. The fish should be cooked about 3/4 of the way through from the bottom.
Flip carefully and cook for an additional 2-3 minutes to finish cooking through. The internal temperature should reach 145°F (63°C) for food safety, though many prefer salmon slightly less done.
Remove from heat and allow to rest for 2-3 minutes before serving. The salmon should have crispy skin with moist, flaky flesh and rich, buttery flavor.
Cooking Tips: The key to crispy skin is starting with completely dry fish and not moving it too early in the cooking process. Most of the cooking happens skin-side down.
Variations: Different herbs and seasonings can create varied flavor profiles. Consider using lemon pepper or fresh herbs like thyme for enhanced aromatic complexity.
Recipe 47: Grilled Shrimp Skewers
Prep Time: 15 minutes | Cook Time: 8 minutes | Total Time: 23 minutes
Shrimp provide quick cooking convenience while offering sweet, delicate flavors that pair beautifully with simple seasonings. This grilling method ensures even cooking while developing excellent flavor through proper heat application and timing.
Ingredients:
- 2 pounds large shrimp, peeled and deveined
- 4 tablespoons olive oil or melted butter
- 1 teaspoon salt
- 1/2 teaspoon black pepper
- 1/2 teaspoon paprika
- Optional: 1/4 teaspoon garlic powder
Thread the cleaned shrimp onto metal skewers, piercing through both the head and tail ends to prevent spinning during cooking. Leave small spaces between shrimp for even heat circulation.
Season the skewered shrimp generously with salt, pepper, paprika, and any optional seasonings, brushing with oil or melted butter to help seasonings adhere and prevent sticking.
Preheat your grill or grill pan to medium-high heat and brush the cooking surface with oil. The cooking surface should be hot enough that the shrimp sizzle immediately upon contact.
Place the seasoned skewers on the hot grill and cook for 2-3 minutes per side, turning once when the first side is pink and slightly charred. Shrimp cook very quickly and become tough when overcooked.
Remove from heat immediately when the shrimp are pink throughout and slightly charred on the outside. Total cooking time should be 6-8 minutes depending on size.
Allow to rest briefly before serving. The shrimp should be tender, well-seasoned, and have excellent grill marks from proper cooking technique.
Cooking Tips: Shrimp cook very quickly and become rubbery when overcooked. They should be pink throughout but still tender and juicy.
Variations: Different seasonings can create varied flavor profiles. Consider using Cajun spices or herbs like oregano for international flavor influences.
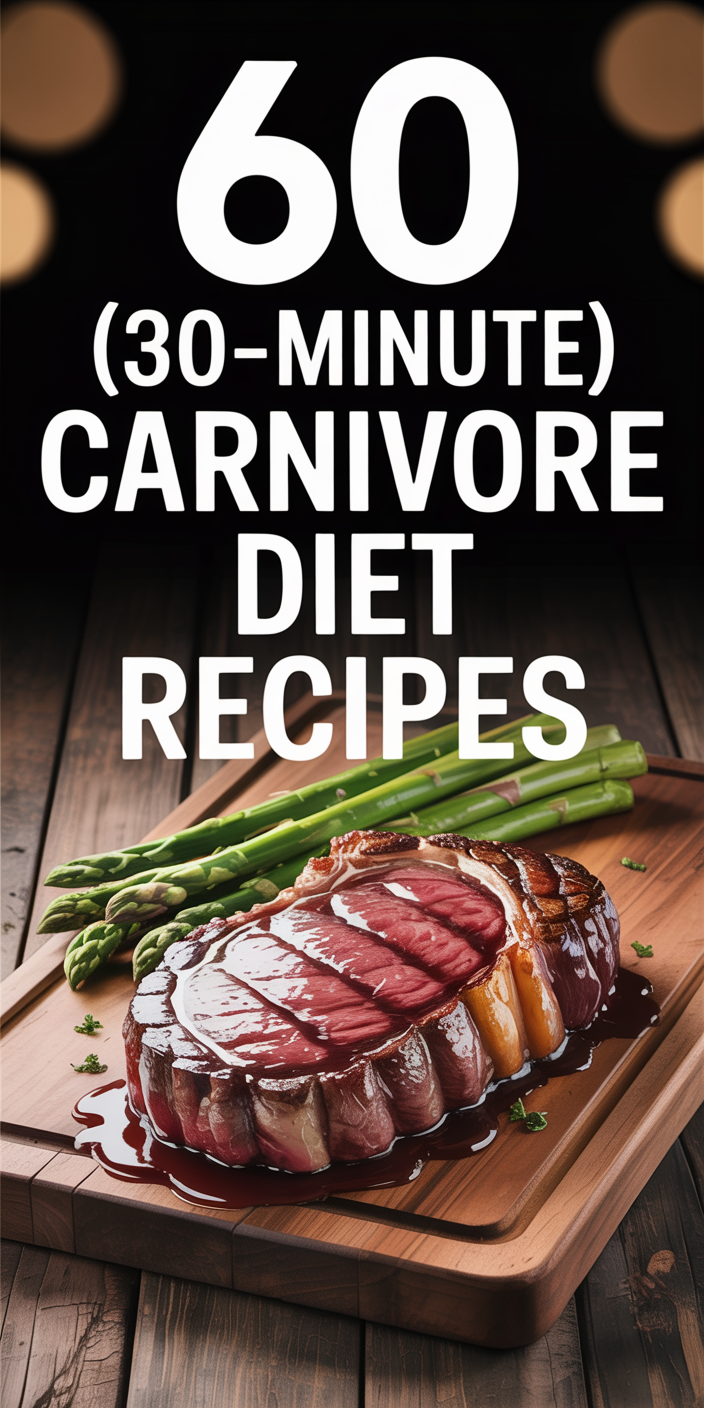
Recipe 48: Butter-Poached Lobster
Prep Time: 10 minutes | Cook Time: 15 minutes | Total Time: 25 minutes
Lobster represents the pinnacle of luxury seafood, and this butter-poaching method ensures tender, flavorful results while highlighting the sweet, delicate flavor of the lobster meat. This technique provides restaurant-quality results in minimal time.
Ingredients:
- 4 lobster tails (6-8 oz each)
- 8 tablespoons butter
- 1/2 teaspoon salt
- 1/4 teaspoon white pepper
- Optional: 1 tablespoon fresh chives, chopped
Remove the lobster meat from the shells by cutting through the top of the shell with kitchen shears and carefully extracting the meat in one piece. Remove the dark vein if present.
Cut the lobster meat into large chunks and season lightly with salt and white pepper. The delicate flavor of lobster requires minimal seasoning to avoid masking its natural sweetness.
Melt the butter in a large, heavy saucepan over low heat, being careful not to let it brown or bubble vigorously. The butter should be hot but not simmering for proper poaching.
Add the seasoned lobster chunks to the hot butter and poach gently for 8-10 minutes, turning occasionally to ensure even cooking. The lobster should be opaque throughout when properly cooked.
Remove the lobster from the butter using a slotted spoon and serve immediately. Reserve the butter for drizzling over the lobster or for use in other preparations.
Garnish with fresh chives if desired and serve while hot. The lobster should be tender, sweet, and infused with rich butter flavor.
Cooking Tips: Gentle heat is essential for proper poaching. The butter should not bubble vigorously, as this can make the lobster tough and rubbery.
Variations: Different herbs can enhance the flavor profile. Consider using tarragon or dill for aromatic complexity that complements lobster’s delicate flavor.
Recipe 49: Seared Scallops
Prep Time: 10 minutes | Cook Time: 6 minutes | Total Time: 16 minutes
Scallops provide sweet, delicate flavors and tender texture that make them ideal for quick, elegant meals. This searing method develops excellent caramelization while maintaining the scallops’ natural sweetness and tender interior.
Ingredients:
- 1.5 pounds large sea scallops
- 3 tablespoons butter or ghee
- 1 teaspoon salt
- 1/2 teaspoon white pepper
- Optional: 1/4 teaspoon fresh thyme
Remove scallops from refrigeration and pat completely dry with paper towels. Remove the side muscle if still attached, as it can be tough and chewy when cooked.
Season the scallops on both sides with salt and white pepper, being careful not to over-season these delicate shellfish. Allow to rest at room temperature for 10 minutes.
Heat a large, heavy skillet over high heat until it begins to smoke lightly. Add the cooking fat and swirl to coat the pan bottom evenly.
Place the seasoned scallops in the hot pan, ensuring they don’t touch each other for proper browning. Cook for 2-3 minutes without moving them, allowing a golden crust to develop.
Flip the scallops carefully and cook for another 2-3 minutes until the second side is golden brown and the scallops are cooked through but still tender in the center.
Remove from heat immediately and serve while hot. The scallops should have golden-brown crusts with tender, sweet interiors and excellent caramelization.
Cooking Tips: Proper drying is essential for achieving good searing. Scallops should be golden brown on both sides but still tender and slightly translucent in the center.
Variations: Different herbs and seasonings can enhance the flavor profile. Consider using fresh herbs or a light dusting of paprika for color and flavor complexity.
Recipe 50: Grilled Mackerel
Prep Time: 10 minutes | Cook Time: 12 minutes | Total Time: 22 minutes
Mackerel provides exceptional omega-3 fatty acid content while offering rich, distinctive flavors that many carnivore practitioners find particularly satisfying. This grilling method showcases the fish’s natural oils while developing excellent flavor through proper technique.
Ingredients:
- 4 whole mackerel (1 pound each), cleaned and gutted
- 4 tablespoons olive oil
- 1 teaspoon salt
- 1/2 teaspoon black pepper
- Optional: 1/2 teaspoon dried oregano
Score the skin of the mackerel diagonally in 2-3 places on each side to prevent curling during cooking and allow for even heat penetration. Pat completely dry inside and out.
Season the mackerel inside and out with salt, pepper, and any optional herbs, rubbing the seasonings into the skin and cavity. Brush with olive oil to prevent sticking and promote browning.
Preheat your grill to medium-high heat and clean the grates thoroughly. Oil the grates well to prevent the fish from sticking during cooking.
Place the seasoned mackerel on the hot grill and cook for 5-6 minutes per side, turning once when the first side is well-browned and the fish releases easily from the grates.
The fish is done when the flesh flakes easily with a fork and the internal temperature reaches 145°F (63°C). The skin should be crispy and well-charred.
Remove from grill and allow to rest for 3-5 minutes before serving. The mackerel should have crispy skin with moist, flaky flesh and rich, distinctive flavor.
Cooking Tips: Mackerel has high oil content that can cause flare-ups on the grill. Keep a spray bottle handy to control flames if necessary.
Variations: Different herbs and seasonings can complement mackerel’s rich flavor. Consider using Mediterranean herbs or simple lemon pepper for enhanced taste.
Recipe 51: Crab Cakes (No Breading)
Prep Time: 15 minutes | Cook Time: 10 minutes | Total Time: 25 minutes
These carnivore-friendly crab cakes eliminate traditional binding agents while maintaining excellent texture and flavor through proper technique and quality ingredients. The focus remains on showcasing the sweet, delicate flavor of the crab meat.
Ingredients:
- 1 pound fresh crab meat, picked over for shells
- 2 large eggs
- 3 tablespoons butter or ghee
- 1/2 teaspoon salt
- 1/4 teaspoon white pepper
- Optional: 1 tablespoon fresh chives, chopped
Gently pick through the crab meat to remove any remaining shell pieces, being careful not to break up the meat more than necessary. The goal is to maintain large, appealing chunks.
Beat the eggs lightly and combine with the crab meat, salt, white pepper, and any optional herbs. Mix gently to avoid breaking up the crab meat while ensuring even distribution.
Form the mixture into 6-8 patties, pressing gently to hold together. The mixture will be more delicate than traditional crab cakes due to the absence of breadcrumbs.
Heat a large skillet over medium heat and add the cooking fat. When hot and melted, carefully place the crab cakes in the pan, leaving space between each one.
Cook for 4-5 minutes per side, turning carefully to avoid breaking. The cakes should be golden brown on both sides and heated through.
Remove from heat and serve immediately while hot. The crab cakes should be tender, well-seasoned, and showcase the sweet flavor of the crab meat.
Cooking Tips: Handle the crab mixture gently to maintain texture. These cakes are more delicate than traditional versions, so turn carefully during cooking.
Variations: Different herbs can enhance the flavor profile. Consider using dill or tarragon for aromatic complexity that complements crab’s delicate flavor.
Recipe 52: Sardine Scramble
Prep Time: 5 minutes | Cook Time: 8 minutes | Total Time: 13 minutes
Sardines provide exceptional nutritional density and convenience while offering rich flavors that pair beautifully with eggs. This preparation method creates a satisfying, protein-rich meal that showcases both ingredients effectively.
Ingredients:
- 2 cans sardines in olive oil, drained
- 6 large eggs
- 3 tablespoons butter
- 1/2 teaspoon salt
- 1/4 teaspoon black pepper
- Optional: 1/4 teaspoon paprika
Drain the sardines and break them into large chunks, removing any visible bones if desired. Beat the eggs lightly and season with salt, pepper, and any optional spices.
Heat a large skillet over medium-low heat and add half of the butter. When melted and hot, add the sardine chunks and warm through for 2-3 minutes.
Add the beaten eggs to the pan with the sardines and scramble gently, stirring frequently to create creamy, soft curds. Add the remaining butter during cooking for richness.
Continue cooking until the eggs reach your desired consistency, approximately 4-5 minutes total. The eggs should be creamy and well-combined with the sardines.
Remove from heat and serve immediately while hot. The scramble should be creamy, well-seasoned, and showcase both the eggs and sardines effectively.
Cooking Tips: Low heat and gentle stirring are essential for creamy scrambled eggs. Don’t rush the process, as high heat will create tough, rubbery eggs.
Variations: Different canned fish can create varied flavor profiles. Consider using mackerel or salmon for different taste experiences.
Recipe 53: Tuna Steaks
Prep Time: 10 minutes | Cook Time: 8 minutes | Total Time: 18 minutes
Tuna steaks provide meaty texture and rich flavor while offering quick cooking times that make them ideal for busy meal preparation. This searing method develops excellent crust while maintaining the tender, pink interior that makes tuna so appealing.
Ingredients:
- 4 tuna steaks (6 oz each, 1 inch thick)
- 3 tablespoons olive oil
- 1 teaspoon salt
- 1/2 teaspoon black pepper
- Optional: 1/2 teaspoon sesame seeds
Pat the tuna steaks completely dry and season on both sides with salt, pepper, and any optional seasonings. Allow to rest at room temperature for 10 minutes while preparing your cooking surface.
Heat a large, heavy skillet over high heat until it begins to smoke lightly. Add the olive oil and swirl to coat the pan bottom evenly.
Place the seasoned tuna steaks in the hot pan and sear for 2-3 minutes per side for rare to medium-rare doneness. Tuna is best served with a pink center for optimal texture and flavor.
The exterior should develop a golden-brown crust while the interior remains pink and tender. Adjust cooking time based on thickness and desired doneness.
Remove from heat immediately and allow to rest for 2-3 minutes before slicing. The tuna should have excellent searing with tender, pink interior.
Slice against the grain and serve immediately. The tuna should be well-seared on the outside with tender, flaky interior and rich, meaty flavor.
Cooking Tips: High heat is essential for proper searing. Tuna is best served rare to medium-rare for optimal texture and flavor.
Variations: Different seasonings can create varied flavor profiles. Consider using black pepper crusts or simple herb seasonings for enhanced complexity.
Recipe 54: Oysters Rockefeller (Carnivore Style)
Prep Time: 15 minutes | Cook Time: 10 minutes | Total Time: 25 minutes
This carnivore adaptation of the classic Oysters Rockefeller eliminates plant-based ingredients while maintaining the rich, indulgent character that makes this dish so appealing. The focus remains on showcasing the oysters’ natural brininess.
Ingredients:
- 24 fresh oysters on the half shell
- 6 tablespoons butter
- 4 strips bacon, cooked and crumbled
- 1/4 teaspoon salt
- 1/8 teaspoon white pepper
- Optional: 1 tablespoon fresh chives, chopped
Preheat your oven to 450°F (230°C) and arrange the oysters on a baking sheet, nestling them in rock salt or crumpled foil to keep them level if desired.
Cook the bacon until crispy, then crumble into small pieces. Melt the butter and combine with the crumbled bacon, salt, white pepper, and any optional herbs.
Spoon the butter and bacon mixture over each oyster, dividing evenly among all shells. The mixture should cover each oyster generously for rich flavor.
Bake for 8-10 minutes, until the oysters are heated through and the butter mixture is bubbling and lightly golden. Don’t overcook, as oysters become tough quickly.
Remove from oven and serve immediately while hot. The oysters should be tender, briny, and enhanced by the rich butter and bacon flavors.
Cooking Tips: Fresh oysters are essential for this preparation. Don’t overcook, as oysters become tough and rubbery when exposed to high heat for too long.
Variations: Different herbs can enhance the flavor profile. Consider using tarragon or dill for aromatic complexity that complements oysters’ briny flavor.
Recipe 55: Mussels in Butter
Prep Time: 10 minutes | Cook Time: 12 minutes | Total Time: 22 minutes
Mussels provide sweet, tender meat while offering quick cooking times and elegant presentation. This butter preparation showcases the mussels’ natural flavors while creating a rich, satisfying dish that’s perfect for carnivore dining.
Ingredients:
- 3 pounds fresh mussels, cleaned and debearded
- 6 tablespoons butter
- 1/2 cup bone broth or water
- 1/2 teaspoon salt
- 1/4 teaspoon black pepper
- Optional: 2 tablespoons fresh parsley, chopped
Clean the mussels thoroughly under cold running water, removing any beards and scrubbing the shells clean. Discard any mussels that are open and don’t close when tapped.
Heat a large, heavy pot over medium-high heat and add half of the butter. When melted and hot, add the cleaned mussels and toss to coat with butter.
Add the bone broth or water to the pot and cover immediately. Steam for 8-10 minutes, shaking the pot occasionally, until the mussels open completely.
Remove the lid and add the remaining butter, salt, pepper, and any optional herbs. Toss gently to combine and coat the mussels with the seasoned butter.
Discard any mussels that haven’t opened during cooking, as these may not be safe to eat. Serve immediately in bowls with the cooking liquid.
The mussels should be tender, well-seasoned, and bathed in rich, flavorful butter sauce that can be enjoyed with the shellfish.
Cooking Tips: Fresh mussels are essential for this preparation. Any mussels that don’t open during cooking should be discarded for food safety.
Variations: Different herbs and seasonings can enhance the flavor profile. Consider using thyme or oregano for aromatic complexity that complements mussels’ sweet flavor.
Egg-Based Recipes: Versatile Protein Foundations
Eggs provide exceptional versatility in carnivore meal planning, offering complete protein profiles alongside rich, satisfying fats. These recipes showcase the diverse preparation methods possible with eggs while maintaining strict adherence to carnivore principles. From simple scrambles to more elaborate preparations, eggs serve as both standalone meals and complementary components to other animal proteins.
Recipe 56: Carnivore Omelet
Prep Time: 5 minutes | Cook Time: 8 minutes | Total Time: 13 minutes
The carnivore omelet eliminates traditional vegetable fillings while focusing on rich, satisfying animal-based ingredients that provide exceptional flavor and nutritional density. This preparation method ensures creamy, tender eggs with flavorful fillings that showcase the best of carnivore ingredients.
Ingredients:
- 6 large eggs
- 4 tablespoons butter
- 1/2 cup cooked bacon, crumbled
- 1/4 cup aged cheese, grated (optional)
- 1/2 teaspoon salt
- 1/4 teaspoon black pepper
Beat the eggs thoroughly with salt and pepper until well combined and slightly frothy. This incorporation of air helps create a lighter, more tender omelet texture.
Heat a large, non-stick skillet over medium-low heat and add half of the butter. When melted and foaming, pour in the beaten eggs and allow them to set for 30 seconds without stirring.
Using a spatula, gently push the cooked edges toward the center while tilting the pan to allow uncooked egg to flow underneath. Continue this process for 3-4 minutes until the eggs are mostly set but still slightly wet on top.
Add the crumbled bacon and optional cheese to one half of the omelet, then carefully fold the other half over the filling using a spatula. The residual heat will finish cooking the eggs and melt the cheese.
Slide the omelet onto a warm plate and top with the remaining butter, allowing it to melt over the surface. Serve immediately while hot and creamy.
Cooking Tips: Low heat and patience are essential for creating tender, creamy omelets. High heat will create tough, rubbery eggs that lack the desired smooth texture.
Variations: Different cooked meats and cheeses can create varied flavor profiles. Consider using ham, sausage, or different cheese varieties for unique taste combinations.
Recipe 57: Scrambled Eggs with Bacon
Prep Time: 5 minutes | Cook Time: 12 minutes | Total Time: 17 minutes
This classic combination provides exceptional protein and fat content while offering satisfying flavors and textures that make it suitable for any meal. The key lies in proper timing and technique to ensure both components finish simultaneously with optimal texture.
Ingredients:
- 8 strips bacon
- 8 large eggs
- 3 tablespoons butter
- 1/2 teaspoon salt
- 1/4 teaspoon black pepper
Cook the bacon in a large skillet over medium heat until crispy and golden brown, approximately 8-10 minutes. Remove the bacon and drain on paper towels, leaving 2 tablespoons of fat in the pan.
Beat the eggs thoroughly with salt and pepper until well combined. The thorough beating incorporates air and helps create creamy, fluffy scrambled eggs.
Reduce heat to medium-low and add the butter to the bacon fat in the pan. When melted and hot, pour in the beaten eggs and allow them to set for 30 seconds.
Using a spatula, gently stir the eggs from the outside toward the center, creating large, soft curds. Continue stirring gently every 30 seconds, allowing the eggs to cook slowly and evenly.
When the eggs are almost set but still slightly wet, crumble the cooked bacon and fold it into the eggs. Remove from heat immediately, as the residual heat will finish cooking the eggs.
Serve immediately while hot and creamy. The eggs should be soft, fluffy, and well-combined with crispy bacon pieces throughout.
Cooking Tips: Low heat and gentle stirring are essential for creamy scrambled eggs. Don’t rush the process, as high heat will create tough, rubbery eggs.
Variations: Different types of bacon or other cooked meats can create varied flavor profiles. Consider using thick-cut bacon or Canadian bacon for different textures.
Recipe 58: Egg and Cheese Cups
Prep Time: 10 minutes | Cook Time: 15 minutes | Total Time: 25 minutes
These individual egg cups provide portion control and elegant presentation while showcasing the combination of eggs and cheese in a convenient, portable format. This preparation method ensures even cooking while creating appealing individual servings.
Ingredients:
- 8 large eggs
- 1/2 cup heavy cream
- 1 cup aged cheese, grated
- 4 strips bacon, cooked and crumbled
- 1/2 teaspoon salt
- 1/4 teaspoon black pepper
- Butter for greasing
Preheat your oven to 375°F (190°C) and generously butter 8 muffin cups or ramekins. This prevents sticking and ensures easy removal of the finished egg cups.
Beat the eggs with heavy cream, salt, and pepper until well combined and slightly frothy. The cream adds richness and helps create a custard-like texture in the finished cups.
Divide half of the grated cheese among the prepared muffin cups, then pour the egg mixture over the cheese, filling each cup about 3/4 full to allow for expansion during cooking.
Top each cup with the remaining cheese and crumbled bacon, distributing evenly among all portions. The toppings will create appealing presentation and concentrated flavor.
Bake for 12-15 minutes, until the eggs are set and lightly golden on top. The centers should be firm but still slightly creamy for optimal texture.
Remove from oven and allow to cool for 5 minutes before removing from the muffin cups. Serve warm or at room temperature.
Cooking Tips: Don’t overfill the muffin cups, as the eggs will expand during cooking. Check for doneness by inserting a knife in the center; it should come out clean.
Variations: Different cheeses and cooked meats can create varied flavor profiles. Consider using different cheese varieties or adding cooked sausage for unique combinations.
Recipe 59: Deviled Eggs with Liver
Prep Time: 20 minutes | Cook Time: 10 minutes | Total Time: 30 minutes
This carnivore adaptation of deviled eggs incorporates nutrient-dense liver into the traditional preparation, creating a more nutritionally complete dish while maintaining the appealing presentation and flavors that make deviled eggs so popular.
Ingredients:
- 8 large eggs
- 4 oz chicken liver, cooked and finely chopped
- 4 tablespoons butter, softened
- 1/2 teaspoon salt
- 1/4 teaspoon black pepper
- Optional: paprika for garnish
Place the eggs in a large saucepan and cover with cold water by 1 inch. Bring to a boil over high heat, then remove from heat, cover, and let stand for 10 minutes for perfectly cooked hard-boiled eggs.
Transfer the eggs to an ice bath to stop cooking and cool completely. This prevents overcooking and makes peeling easier. Peel the eggs when cool and cut in half lengthwise.
Remove the yolks carefully and place in a bowl. Mash the yolks with the cooked liver, softened butter, salt, and pepper until smooth and well combined.
The mixture should be creamy and well-seasoned, with the liver adding nutritional density and rich flavor to the traditional yolk mixture.
Spoon or pipe the yolk mixture back into the egg white halves, mounding slightly for attractive presentation. Dust lightly with paprika if desired for color contrast.
Chill for at least 30 minutes before serving to allow flavors to meld and the filling to firm up. Serve cold or at room temperature.
Cooking Tips: Properly cooked hard-boiled eggs are essential for this preparation. The ice bath prevents overcooking and the gray ring around the yolk.
Variations: Different organ meats can create varied flavor profiles. Consider using beef liver or heart for different nutritional profiles and taste experiences.
Recipe 60: Egg Drop Soup (Bone Broth)
Prep Time: 5 minutes | Cook Time: 10 minutes | Total Time: 15 minutes
This carnivore adaptation of egg drop soup uses rich bone broth as the base while maintaining the silky egg texture that characterizes this comforting dish. The result is a warming, nutritious soup that provides both protein and the beneficial compounds found in bone broth.
Ingredients:
- 4 cups rich bone broth
- 4 large eggs, beaten
- 2 tablespoons butter
- 1/2 teaspoon salt
- 1/4 teaspoon white pepper
- Optional: 1 tablespoon fresh chives, chopped
Heat the bone broth in a large saucepan over medium heat until it reaches a gentle simmer. The broth should be hot but not boiling vigorously for proper egg incorporation.
Season the hot broth with salt and white pepper, adjusting to taste based on the saltiness of your bone broth. Different broths will require different amounts of additional seasoning.
Beat the eggs thoroughly until well combined and slightly frothy. This preparation helps create the characteristic silky strands when added to the hot broth.
While stirring the simmering broth in a circular motion with a spoon, slowly drizzle the beaten eggs into the broth in a thin stream. The stirring motion helps create delicate egg strands.
Continue stirring gently for 1-2 minutes until the eggs are cooked and form silky strands throughout the broth. Remove from heat immediately to prevent overcooking.
Stir in the butter and garnish with fresh chives if desired. Serve immediately while hot in warmed bowls.
Cooking Tips: The key to silky egg strands is maintaining gentle heat and stirring while adding the eggs. Boiling broth will create tough, chunky eggs instead of delicate strands.
Variations: Different bone broths will create varied flavor profiles. Consider using beef, chicken, or mixed bone broths for different taste experiences and nutritional profiles.
Meal Planning and Preparation Strategies
Successful implementation of a carnivore diet within the constraints of busy modern life requires strategic planning and efficient preparation methods. The thirty-minute timeframe for these recipes becomes even more achievable when combined with thoughtful meal planning, batch preparation techniques, and strategic shopping approaches that maximize both time efficiency and nutritional outcomes.
Weekly meal planning forms the foundation of successful carnivore diet implementation, particularly when working within time constraints. The key lies in creating a balanced rotation of proteins that ensures nutritional variety while preventing meal fatigue. A well-structured weekly plan might include beef-based meals three times per week, poultry twice, seafood twice, and pork once, with organ meats incorporated at least twice weekly for optimal nutritional density. This rotation ensures adequate variety while allowing for bulk purchasing and preparation strategies that can significantly reduce daily cooking time.
Batch cooking techniques can transform weekend preparation time into weekday convenience without compromising food quality or nutritional value. Ground meats, in particular, respond well to batch cooking approaches, as they can be seasoned differently for various applications throughout the week. Preparing two to three pounds of ground beef on Sunday, for example, can provide the foundation for quick burgers, scrambles, and meatballs throughout the week, with different seasonings applied during final preparation to create varied flavor profiles.
Storage and reheating strategies become crucial when implementing batch cooking approaches. Properly stored cooked meats maintain their quality for three to four days in the refrigerator, while some preparations can be frozen for longer storage periods. The key lies in understanding which preparations reheat well and which are best prepared fresh. Ground meat preparations, braised cuts, and slow-cooked items generally reheat excellently, while delicate fish and perfectly cooked steaks are best prepared fresh for optimal texture and flavor.
Shopping strategies can significantly impact both the efficiency and cost-effectiveness of carnivore meal planning. Developing relationships with local butchers often provides access to higher-quality cuts at better prices, along with valuable advice about preparation methods and seasonal availability. Many butchers are willing to custom-cut portions or prepare specific cuts that can reduce home preparation time while ensuring optimal results.
Seasonal considerations affect both availability and pricing of various animal proteins, making it beneficial to adjust meal planning based on these natural cycles. Certain cuts of beef may be more affordable during specific seasons, while seafood availability fluctuates based on fishing seasons and weather conditions. Understanding these patterns allows for strategic purchasing and menu planning that takes advantage of peak quality and value periods.
Equipment optimization plays a crucial role in achieving thirty-minute meal preparation times consistently. A well-equipped carnivore kitchen should include heavy-bottomed skillets for proper searing, a reliable meat thermometer for accurate doneness assessment, and sharp knives for efficient preparation. Pressure cookers can dramatically reduce cooking times for traditionally slow-cooking cuts, while cast iron cookware provides excellent heat retention and develops superior browning that enhances flavor development.
Preparation timing strategies can further streamline the cooking process by organizing tasks efficiently. Removing proteins from refrigeration twenty to thirty minutes before cooking allows for more even cooking, while this time can be used productively for other preparation tasks. Seasoning meats in advance allows flavors to penetrate more deeply, though this must be balanced against food safety considerations and the specific characteristics of different proteins.
Temperature management becomes particularly important when working with multiple proteins or preparing several components simultaneously. Understanding the resting requirements for different cuts allows for strategic timing that ensures all components finish simultaneously while maintaining optimal temperature and texture. This orchestration of timing and temperature represents one of the most challenging aspects of efficient meal preparation but yields significant rewards in terms of both quality and efficiency.
Leftover utilization strategies can extend the value of initial cooking efforts while providing quick meal solutions for subsequent days. Properly stored cooked proteins can be incorporated into egg dishes, used as bases for quick scrambles, or reheated with different seasonings to create entirely new flavor profiles. This approach maximizes the return on initial cooking time investment while maintaining variety in daily meal planning.
Troubleshooting Common Cooking Challenges
Even experienced cooks encounter challenges when preparing carnivore meals, particularly when working within tight time constraints. Understanding common issues and their solutions can prevent frustration while ensuring consistent, high-quality results that make the carnivore lifestyle both sustainable and enjoyable.
Overcooking represents perhaps the most common challenge in quick carnivore meal preparation, as the desire to cook quickly can lead to excessive heat application that results in tough, dry proteins. The solution lies in understanding the relationship between heat, time, and protein structure, recognizing that moderate heat applied for appropriate durations produces superior results to high heat applied briefly. Investing in a reliable instant-read thermometer eliminates guesswork and provides consistent results across different cuts and cooking methods.
Uneven cooking often occurs when proteins are not properly prepared before cooking or when cooking surfaces are not adequately preheated. Ensuring proteins reach room temperature before cooking promotes even heat penetration, while properly preheated cooking surfaces provide consistent heat application from the moment proteins make contact. Pounding thicker cuts to uniform thickness, particularly with chicken breasts and pork chops, ensures even cooking throughout the protein.
Sticking problems frequently arise when cooking surfaces are not properly prepared or when proteins are moved too early in the cooking process. Proper preheating of cooking surfaces, adequate fat application, and patience during the initial searing phase prevent most sticking issues. Understanding that proteins will naturally release from properly heated surfaces when adequately seared eliminates the temptation to move them prematurely.
Seasoning challenges can result in either under-seasoned or over-seasoned final products, both of which diminish the dining experience. The key lies in understanding how different seasonings interact with various proteins and how cooking methods affect seasoning intensity. Salt, in particular, behaves differently depending on when it’s applied, with immediate pre-cooking application providing surface seasoning while longer contact times allow for deeper penetration and protein modification.
Fat rendering issues commonly occur with fatty cuts like pork belly or duck, where insufficient rendering results in unpleasantly chewy fat while excessive rendering can lead to dry, overcooked meat. Understanding the visual and tactile cues that indicate proper fat rendering, combined with appropriate heat management, ensures optimal texture in fatty cuts. The rendered fat itself becomes a valuable cooking medium for other preparations, making proper rendering technique doubly important.
Temperature control challenges arise particularly when cooking multiple items simultaneously or when transitioning between different cooking methods. Understanding how different cooking surfaces retain and distribute heat allows for strategic heat management that maintains optimal cooking conditions throughout the preparation process. Cast iron, for example, retains heat excellently but requires longer preheating times, while stainless steel responds more quickly to heat adjustments but may create hot spots without proper technique.
Timing coordination becomes increasingly challenging as meal complexity increases, particularly when preparing multiple proteins or incorporating side preparations. The solution lies in understanding the cooking times and resting requirements for different components, allowing for strategic sequencing that ensures all elements finish simultaneously. Creating written timing plans for complex meals eliminates confusion and ensures smooth execution.
Texture issues often result from improper cooking techniques or inadequate understanding of how different cuts respond to various cooking methods. Tender cuts like filet mignon require gentle handling and minimal cooking time, while tougher cuts like chuck roast benefit from longer, slower cooking methods that break down connective tissue. Matching cooking methods to cut characteristics ensures optimal texture in finished dishes.
Flavor development challenges can result in bland or one-dimensional final products, even when using high-quality ingredients. Understanding how different cooking methods contribute to flavor development, particularly through browning reactions and fat rendering, allows for strategic technique application that maximizes flavor potential. Proper searing, for example, creates hundreds of new flavor compounds that significantly enhance the final product.
Safety considerations become particularly important when working quickly, as time pressure can lead to shortcuts that compromise food safety. Understanding proper internal temperatures for different proteins, maintaining clean work surfaces, and preventing cross-contamination ensures safe food preparation without compromising efficiency. Developing systematic approaches to food safety creates habits that become automatic, reducing the mental load during busy preparation periods.
Nutritional Considerations and Benefits
The carnivore diet’s nutritional profile differs significantly from conventional dietary approaches, requiring understanding of how animal-based foods provide essential nutrients and how meal planning can optimize nutritional outcomes. The recipes in this collection have been designed not only for convenience and flavor but also for nutritional completeness within the constraints of carnivore dietary principles.
Protein quality represents one of the carnivore diet’s greatest strengths, as animal proteins provide complete amino acid profiles in optimal ratios for human utilization. Unlike plant proteins, which often lack one or more essential amino acids, animal proteins contain all nine essential amino acids in proportions that closely match human requirements. The variety of proteins featured in these recipes ensures exposure to different amino acid profiles, as beef, poultry, seafood, and organ meats each offer unique nutritional characteristics that contribute to overall dietary completeness.
Fat composition varies significantly among different animal sources, making variety crucial for optimal fatty acid intake. Beef and lamb provide primarily saturated and monounsaturated fats, while seafood offers essential omega-3 fatty acids that are difficult to obtain from terrestrial animal sources. The inclusion of fatty fish like salmon and mackerel in this recipe collection ensures adequate omega-3 intake, while the emphasis on fatty cuts of meat provides the energy density that makes carnivore diets sustainable for many practitioners.
Micronutrient density in animal foods often exceeds that found in plant sources, particularly for nutrients like vitamin B12, heme iron, and zinc. Organ meats, featured prominently in several recipes, provide exceptional concentrations of vitamins A, D, and various B vitamins, along with minerals like copper and selenium. The liver recipes, in particular, provide nutritional density that is difficult to match with any other food source, making them valuable additions to regular meal rotation despite their challenging flavors for some individuals.
Bioavailability considerations favor animal-based nutrients over plant-based alternatives in many cases, as animal foods provide nutrients in forms that are readily absorbed and utilized by human physiology. Iron from meat sources (heme iron) is absorbed much more efficiently than iron from plant sources (non-heme iron), while vitamin A from animal sources is in the active retinol form rather than the precursor carotenoids found in plants. This enhanced bioavailability means that smaller quantities of animal foods can provide equivalent or superior nutritional value compared to larger quantities of plant foods.
Electrolyte balance requires special attention on carnivore diets, particularly during the initial adaptation period when the body adjusts to reduced carbohydrate intake. The elimination of carbohydrates leads to reduced water retention, which can result in the loss of important electrolytes like sodium, potassium, and magnesium. Many of the recipes in this collection incorporate adequate salt, while bone broths provide additional electrolytes in easily absorbed forms.
Hydration needs may increase on carnivore diets due to the reduced water retention associated with low carbohydrate intake. While this is not directly addressed in the recipes, understanding this physiological change helps practitioners maintain optimal hydration status. The inclusion of bone broth-based recipes provides both hydration and electrolytes in forms that support optimal physiological function.
Meal timing flexibility represents one of the practical advantages of carnivore diets, as the high protein and fat content of these meals provides superior satiety compared to carbohydrate-rich alternatives. Many practitioners find that they naturally eat fewer meals per day when following carnivore diets, as the nutritional density and satiety provided by animal foods reduces hunger and cravings between meals. This natural appetite regulation can simplify meal planning and reduce the total time spent on food preparation.
Individual variation in nutritional needs and responses to carnivore diets is significant, with factors like age, activity level, metabolic health, and genetic variations all influencing optimal dietary composition. The variety of recipes provided allows for customization based on individual preferences and needs, whether someone requires higher fat content for energy demands or prefers leaner proteins for specific health goals.
Nutrient timing considerations may be less critical on carnivore diets compared to other dietary approaches, as the steady energy provided by fats and proteins creates more stable blood sugar levels throughout the day. This stability can improve energy levels, mental clarity, and overall well-being for many practitioners, making the carnivore approach particularly appealing for those seeking consistent energy without the fluctuations associated with carbohydrate-based meals.
Long-term sustainability from a nutritional perspective requires attention to variety and quality within the constraints of carnivore principles. The sixty recipes provided offer sufficient variety to prevent nutritional monotony while ensuring exposure to the full spectrum of nutrients available from animal sources. Regular inclusion of organ meats, fatty fish, and different types of muscle meats provides the nutritional diversity necessary for long-term health maintenance.
Conclusion
The journey through sixty carefully crafted carnivore recipes demonstrates that following a meat-based diet need not be monotonous, time-consuming, or nutritionally inadequate. Each recipe in this collection has been designed to respect the thirty-minute time constraint while delivering exceptional flavor, nutritional density, and cooking satisfaction that makes the carnivore lifestyle both practical and enjoyable for modern practitioners.
The diversity showcased across beef, chicken, pork, lamb, seafood, and egg-based preparations illustrates the remarkable variety possible within carnivore dietary constraints. From the rich, satisfying flavors of perfectly seared ribeye steaks to the delicate sweetness of butter-poached lobster, these recipes prove that restriction in food categories does not necessitate restriction in culinary enjoyment. The inclusion of organ meat preparations acknowledges the nutritional superiority of these often-overlooked ingredients while providing approachable methods for incorporating them into regular meal rotation.
The emphasis on quick cooking techniques throughout this collection addresses one of the primary barriers to carnivore diet adoption: the perception that meat-based meals require extensive preparation time. By mastering the fundamental techniques of searing, grilling, braising, and roasting within time-efficient frameworks, practitioners can create restaurant-quality meals in their own kitchens without sacrificing precious time to lengthy cooking processes. The reverse searing method, pressure cooking adaptations, and strategic use of higher temperatures demonstrate how traditional cooking wisdom can be adapted for modern time constraints without compromising quality.
The nutritional considerations explored throughout this guide highlight the unique advantages of animal-based nutrition while acknowledging the importance of variety and quality in food selection. The complete amino acid profiles, superior bioavailability of nutrients, and exceptional micronutrient density found in animal foods provide compelling arguments for the carnivore approach, particularly when implemented with the variety and quality emphasized in these recipes.
The troubleshooting guidance and meal planning strategies provide practical frameworks for overcoming common challenges while building sustainable habits that support long-term success. Understanding how to prevent overcooking, achieve proper seasoning, and coordinate timing across multiple preparations transforms cooking from a source of stress into an enjoyable, creative outlet that nourishes both body and spirit.
For those embarking on their carnivore journey, these recipes provide a comprehensive foundation that eliminates the guesswork and uncertainty that often accompany dietary changes. The detailed instructions, timing guidelines, and technique explanations ensure success regardless of current cooking skill level, while the variety ensures that meal fatigue never becomes a barrier to continued adherence.
Experienced carnivore practitioners will find new techniques, flavor combinations, and preparation methods that can reinvigorate their meal planning while introducing them to cuts and preparations they may not have previously considered. The organ meat recipes, in particular, provide accessible entry points into these nutritionally superior but often intimidating ingredients.
The thirty-minute timeframe proves that convenience and quality are not mutually exclusive when proper techniques and planning are employed. These recipes demonstrate that it is entirely possible to maintain a carnivore lifestyle while meeting the demands of busy modern schedules, family responsibilities, and professional obligations. The key lies not in compromising on quality or nutrition, but in understanding how to work efficiently within the natural characteristics of animal proteins.
Looking forward, the principles and techniques outlined in this collection provide a foundation for continued exploration and creativity within carnivore dietary constraints. Understanding how different cuts respond to various cooking methods, how seasonings interact with different proteins, and how timing and temperature affect final outcomes empowers practitioners to adapt and create their own variations while maintaining the core principles that make these recipes successful.
The carnivore diet represents more than just a dietary choice; it embodies a return to the fundamental relationship between humans and the animal foods that have sustained our species throughout evolutionary history. These recipes honor that relationship by treating animal proteins with the respect and skill they deserve, transforming simple ingredients into memorable meals that nourish, satisfy, and delight.
Success with these recipes requires patience, practice, and attention to detail, but the rewards extend far beyond mere sustenance. The confidence that comes from mastering these techniques, the satisfaction of creating delicious meals from simple ingredients, and the health benefits that many experience from carnivore nutrition combine to create a lifestyle approach that is both sustainable and deeply satisfying.
Whether you are seeking to improve your health, simplify your meal planning, or explore new culinary territories, these sixty recipes provide the tools, techniques, and inspiration necessary for success. The journey of carnivore cooking is one of continuous learning and discovery, where each meal provides an opportunity to refine skills, explore new flavors, and deepen appreciation for the remarkable versatility and nutritional value of animal foods.
The time investment required to master these recipes pays dividends in improved health, enhanced cooking confidence, and the deep satisfaction that comes from nourishing yourself and your loved ones with carefully prepared, nutrient-dense meals. In a world increasingly dominated by processed foods and complex dietary theories, the simplicity and effectiveness of well-prepared animal foods offers a refreshing return to culinary fundamentals that have sustained human health and satisfaction for millennia.
This comprehensive guide to carnivore cooking represents a synthesis of traditional cooking wisdom, modern nutritional understanding, and practical time management strategies. The sixty recipes contained within provide a foundation for lifelong exploration of animal-based nutrition while respecting the time constraints and quality expectations of contemporary life. May these recipes serve as stepping stones on your journey toward optimal health, culinary confidence, and deep satisfaction with the simple pleasure of well-prepared food.