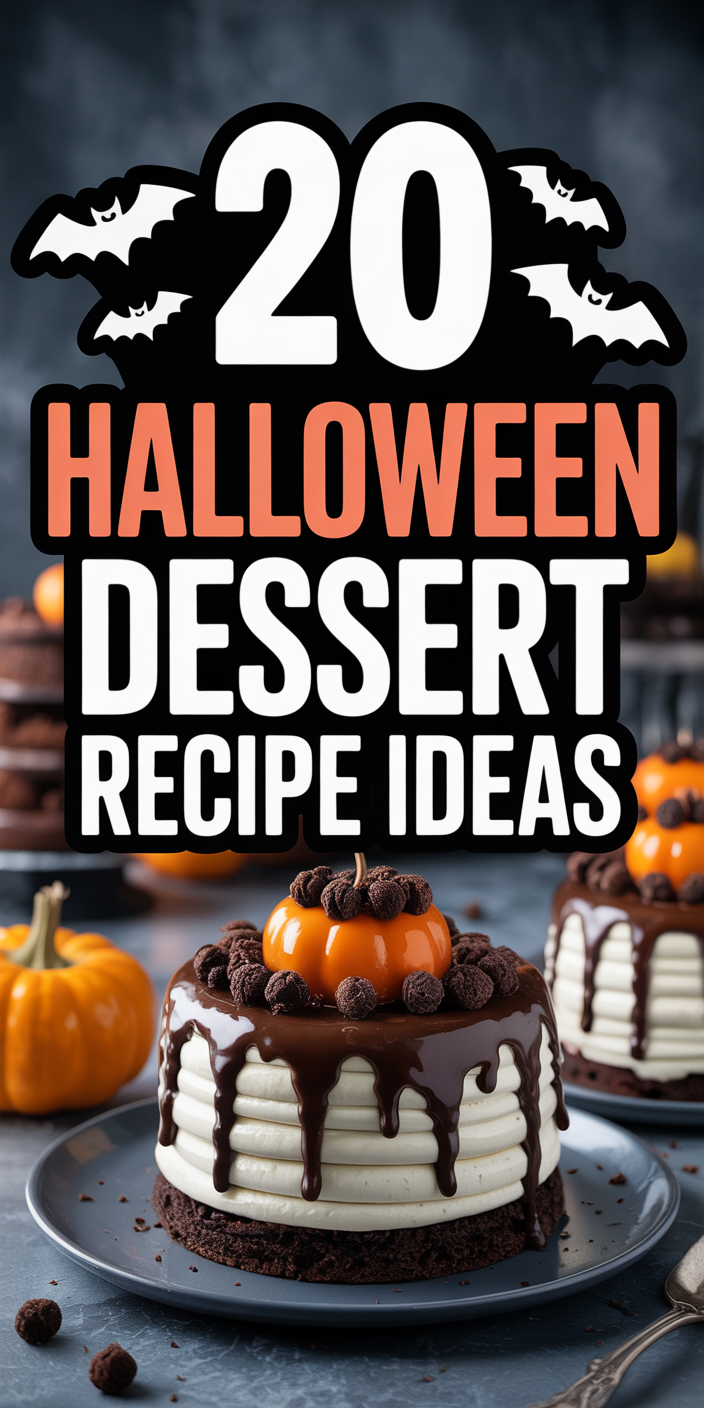
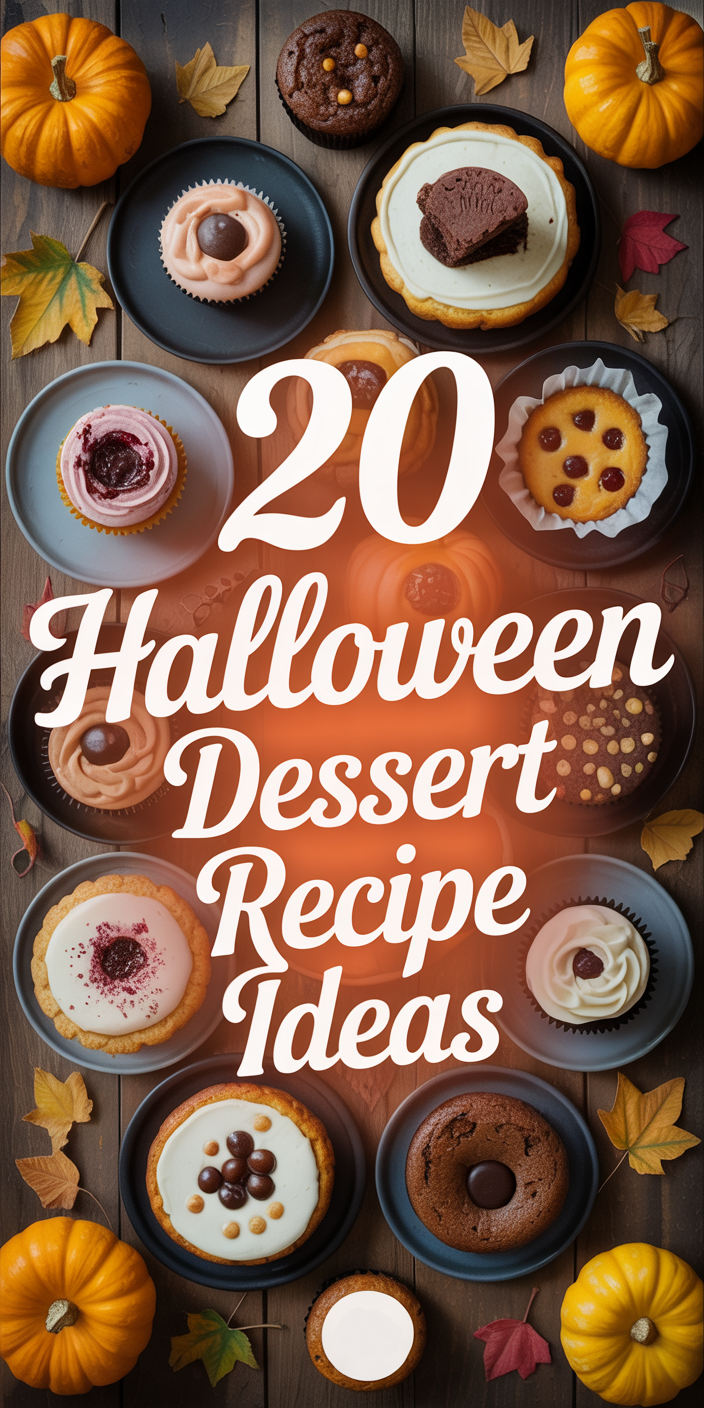
20 Halloween Dessert Recipe Ideas
Halloween is the perfect time to let your creativity run wild in the kitchen, transforming ordinary desserts into spine-tingling treats that will delight both children and adults alike. Whether you’re hosting a haunted house party, preparing treats for trick-or-treaters, or simply wanting to embrace the spooky spirit of the season, these 20 Halloween dessert recipes offer something for every skill level and taste preference.
From eerily elegant ghost-shaped meringues to wickedly delicious witch hat brownies, these recipes combine classic flavors with creative presentation techniques that capture the essence of Halloween. Many of these treats can be prepared in advance, making them perfect for busy hosts who want to create memorable desserts without last-minute stress. The recipes range from simple no-bake options that kids can help create to more elaborate showstoppers that will be the centerpiece of your Halloween celebration.
Each recipe has been carefully selected to represent different aspects of Halloween tradition while ensuring they’re achievable for home bakers of all experience levels. You’ll find options that incorporate seasonal flavors like pumpkin, apple, and cinnamon, alongside classic chocolate and vanilla bases transformed with spooky decorations and creative presentations.
Recipe Categories Overview
Our collection includes five distinct categories of Halloween desserts:
Spooky Cookies & Bars – These handheld treats are perfect for parties and gift-giving, featuring creative decorating techniques that transform simple cookies into Halloween masterpieces.
Haunted Cakes & Cupcakes – From graveyard dirt cakes to ghost-topped cupcakes, these recipes focus on dramatic visual impact while maintaining delicious flavor profiles.
No-Bake Nightmares – Quick and easy options that require no oven time, perfect for last-minute preparations or involving children in the cooking process.
Creepy Candies & Confections – Homemade sweets that rival store-bought Halloween candy, featuring unique flavors and presentations.
Seasonal Specialties – Desserts that celebrate autumn flavors while incorporating Halloween themes, perfect for those who prefer traditional seasonal tastes with spooky twists.
Spooky Cookies & Bars
1. Witch Finger Cookies
These delightfully creepy cookies are guaranteed to make guests do a double-take. The realistic appearance of gnarled witch fingers, complete with almond “fingernails,” creates an unsettling yet delicious treat that perfectly captures the Halloween spirit.
Ingredients:
- 1 cup butter, softened
- 1 cup powdered sugar
- 1 large egg
- 1 teaspoon vanilla extract
- 1 teaspoon almond extract
- 2¾ cups all-purpose flour
- 1 teaspoon baking powder
- 1 teaspoon salt
- ¾ cup whole blanched almonds
- Red food coloring or strawberry jam
Instructions:
Begin by creaming the softened butter and powdered sugar in a large mixing bowl until the mixture becomes light and fluffy, approximately three to four minutes of beating. This creates the foundation for tender, melt-in-your-mouth cookies that will hold their shape during baking. Add the egg, vanilla extract, and almond extract, beating until well combined. The almond extract is crucial here, as it provides a subtle nutty flavor that complements the almond “fingernails” perfectly.
In a separate bowl, whisk together the flour, baking powder, and salt. Gradually add this dry mixture to the butter mixture, mixing on low speed until just combined. Avoid overmixing, as this can result in tough cookies. The dough should be soft but manageable. If it seems too sticky, refrigerate for thirty minutes before shaping.
Preheat your oven to 325°F and line baking sheets with parchment paper. Take portions of dough about the size of a walnut and roll them into finger-like shapes, approximately four inches long. The key to realistic-looking witch fingers lies in the shaping technique. Make each finger slightly different in length and thickness, and use your finger to create knuckle indentations by pressing gently at two points along each cookie. Pinch and twist the dough slightly to create the gnarled, arthritic appearance of an ancient witch’s fingers.
Press a blanched almond firmly into one end of each cookie to create the fingernail. The almond should be pressed deep enough to stay secure during baking but not so deep that it disappears into the dough. Use a knife to score vertical lines along the length of each finger to simulate skin texture and wrinkles.
Bake for 20-25 minutes, or until the cookies are lightly golden but not brown. The cookies should be firm to the touch but still tender. Allow them to cool completely on the baking sheets before attempting to move them, as they’ll be quite fragile when warm.
For the final gruesome touch, carefully remove the almond fingernails and add a small dab of red food coloring or strawberry jam to the nail bed area. Replace the almonds, pressing gently so some of the “blood” shows around the edges. This creates the illusion of freshly severed fingers that will have your guests both horrified and impressed.
2. Spider Web Brownies
These rich, fudgy brownies feature an intricate spider web design created with contrasting chocolate and vanilla glazes. The technique is surprisingly simple but creates a professional-looking dessert that serves as both a delicious treat and an impressive centerpiece.
Ingredients:
For the brownies:
- 1 cup unsalted butter
- 8 oz dark chocolate, chopped
- 2 cups granulated sugar
- 4 large eggs
- 1 teaspoon vanilla extract
- 1 cup all-purpose flour
- ½ cup unsweetened cocoa powder
- ½ teaspoon salt
For the spider web design:
- 1 cup powdered sugar
- 3-4 tablespoons milk
- ½ teaspoon vanilla extract
- 2 tablespoons melted dark chocolate
Instructions:
Start by preparing your brownies, which serve as the canvas for your spider web artistry. Preheat the oven to 350°F and line a 9×13 inch baking pan with parchment paper, leaving some overhang for easy removal. In a double boiler or microwave-safe bowl, melt the butter and chopped dark chocolate together, stirring until smooth and glossy. The quality of chocolate you use here will significantly impact the final flavor, so choose a good-quality dark chocolate with at least 60% cocoa content.
Remove the chocolate mixture from heat and whisk in the granulated sugar until well combined. The mixture will be quite thick at this point. Add the eggs one at a time, beating well after each addition. This gradual incorporation helps create the fudgy texture that makes these brownies so irresistible. Stir in the vanilla extract.
In a separate bowl, whisk together the flour, cocoa powder, and salt. Gradually fold this dry mixture into the chocolate mixture, stirring just until combined. Overmixing can result in tough brownies, so stop as soon as you no longer see streaks of flour.
Pour the batter into your prepared pan, spreading it evenly with an offset spatula. Bake for 28-32 minutes, or until a toothpick inserted in the center comes out with just a few moist crumbs attached. The brownies should be set but still slightly soft in the center. Allow them to cool completely in the pan before attempting to create your spider web design.
For the spider web effect, prepare your vanilla glaze by whisking together the powdered sugar, milk, and vanilla extract until smooth. The consistency should be thick enough to hold its shape but thin enough to spread easily. If it’s too thick, add milk one teaspoon at a time; if too thin, add more powdered sugar.
Spread the vanilla glaze evenly over the cooled brownies using an offset spatula. Working quickly before the glaze sets, use the melted dark chocolate in a squeeze bottle or piping bag to create concentric circles on the surface, starting from the center and working outward. Space the circles about an inch apart.
Using a toothpick or knife tip, draw lines from the center to the edges, like spokes on a wheel. Alternate the direction of your lines—draw every other line from the center outward, and the remaining lines from the edge toward the center. This creates the classic spider web pattern that’s both elegant and spooky.
3. Graveyard Dirt Cake Bars
These decadent bars combine the beloved flavors of chocolate cake, pudding, and crushed cookies to create an edible graveyard scene complete with cookie tombstones and gummy worm “inhabitants.”
Ingredients:
- 1 box chocolate cake mix (plus ingredients called for on box)
- 2 packages (3.4 oz each) instant chocolate pudding mix
- 4 cups cold milk
- 1 container (8 oz) whipped topping, thawed
- 1 package (14.3 oz) chocolate sandwich cookies, crushed
- Gummy worms
- Milano cookies or rectangular cookies for tombstones
- White chocolate or vanilla candy melts for writing
Instructions:
Begin by preparing the chocolate cake according to package directions, baking it in a 9×13 inch pan. The cake serves as the foundation of your graveyard, so ensure it’s completely cooled before proceeding with the assembly. While the cake cools, prepare your chocolate pudding by whisking the pudding mix with cold milk according to package directions. Refrigerate until set, approximately five minutes.
Once the pudding has thickened, gently fold in the whipped topping until the mixture is smooth and uniform in color. This creates a rich, mousse-like layer that adds both flavor and visual appeal to your graveyard bars.
Using a fork, poke holes all over the surface of the cooled cake. This allows the pudding mixture to seep slightly into the cake, creating better flavor integration and preventing the layers from sliding apart when cut. Spread the pudding mixture evenly over the cake, creating a smooth surface that will serve as your graveyard ground.
Crush the chocolate sandwich cookies in a food processor or by placing them in a sealed plastic bag and crushing with a rolling pin. You want a mixture of fine crumbs and slightly larger pieces to simulate realistic-looking dirt. Sprinkle this “dirt” evenly over the pudding layer, covering it completely.
Now comes the fun part—creating your graveyard scene. Insert Milano cookies or other rectangular cookies vertically into the dirt to serve as tombstones. Space them irregularly across the surface for a more authentic cemetery appearance. Using melted white chocolate or vanilla candy melts in a piping bag or squeeze bottle, write “RIP” or other spooky messages on the tombstones.
Scatter gummy worms throughout the graveyard, allowing some to peek out from the dirt and others to appear as if they’re crawling across tombstones. For added realism, you can break some worms in half and position them as if they’re emerging from or disappearing into the ground.
Refrigerate the assembled graveyard for at least two hours before serving to allow all layers to set properly. When ready to serve, cut into squares, ensuring each piece includes some tombstone and worm elements for the full graveyard experience.
4. Black Cat Silhouette Cookies
These elegant cookies feature a striking black cat silhouette against a moonlit background, created using a simple but effective dual-color dough technique that results in professional-looking treats perfect for Halloween entertaining.
Ingredients:
For vanilla dough:
- ½ cup butter, softened
- ½ cup granulated sugar
- 1 large egg
- 1 teaspoon vanilla extract
- 1½ cups all-purpose flour
- ½ teaspoon baking powder
- ¼ teaspoon salt
For chocolate dough:
- ½ cup butter, softened
- ½ cup granulated sugar
- 1 large egg
- 1 teaspoon vanilla extract
- 1¼ cups all-purpose flour
- ¼ cup unsweetened cocoa powder
- ½ teaspoon baking powder
- ¼ teaspoon salt
Instructions:
Creating these striking two-tone cookies requires preparing both vanilla and chocolate doughs separately, then combining them using a template technique that results in perfect cat silhouettes every time.
Start with the vanilla dough by creaming the softened butter and granulated sugar until light and fluffy. This process typically takes three to four minutes with an electric mixer and is crucial for creating tender cookies with the right texture. Beat in the egg and vanilla extract until well combined.
In a separate bowl, whisk together the flour, baking powder, and salt for the vanilla dough. Gradually add this to the butter mixture, mixing on low speed until just combined. The dough should be soft but not sticky. Wrap in plastic wrap and refrigerate while you prepare the chocolate dough.
For the chocolate dough, repeat the creaming process with butter and sugar, then add the egg and vanilla. In another bowl, whisk together the flour, cocoa powder, baking powder, and salt. The cocoa powder should be sifted if it appears lumpy, as this can create uneven coloring in your finished cookies. Gradually add the dry ingredients to the chocolate mixture, mixing until just combined.
Both doughs should be chilled for at least one hour before rolling, as this makes them much easier to handle and prevents spreading during baking. When ready to work with the doughs, roll each between sheets of parchment paper to approximately ¼ inch thickness.
Create a cat silhouette template by drawing or printing a cat shape on cardboard and cutting it out. The template should be approximately three inches tall for best results. Place the template on the vanilla dough and cut around it with a sharp knife. Remove the cat-shaped piece of vanilla dough and set aside.
Place the chocolate dough over the vanilla dough with the cat-shaped hole, aligning the edges carefully. Using your cat template again, cut a cat shape from the chocolate dough that fits perfectly into the hole in the vanilla dough. Press the chocolate cat gently into the vanilla background, ensuring the edges are well-sealed.
Repeat this process to create as many cookies as desired, alternating between chocolate cats on vanilla backgrounds and vanilla cats on chocolate backgrounds for variety. Place the assembled cookies on parchment-lined baking sheets, spacing them about two inches apart.
Preheat your oven to 350°F and bake the cookies for 10-12 minutes, or until the vanilla portions are just beginning to turn golden around the edges. The chocolate portions will not change color significantly, so use the vanilla areas as your guide for doneness.
Allow the cookies to cool on the baking sheets for five minutes before transferring to wire racks. The contrast between the dark and light doughs creates a stunning silhouette effect that looks far more complicated than it actually is to achieve.
Haunted Cakes & Cupcakes
5. Ghost Meringue Cupcakes
These ethereal cupcakes feature towering meringue ghosts that seem to float above rich chocolate bases, creating a dessert that’s both visually stunning and deliciously satisfying. The contrast between the light, airy meringue and dense chocolate cake creates a perfect textural balance.
Ingredients:
For the cupcakes:
- 1¾ cups all-purpose flour
- 2 cups granulated sugar
- ¾ cup unsweetened cocoa powder
- 2 teaspoons baking soda
- 1 teaspoon baking powder
- 1 teaspoon salt
- 2 large eggs
- 1 cup buttermilk
- 1 cup strong black coffee, cooled
- ½ cup vegetable oil
- 1 teaspoon vanilla extract
For the meringue ghosts:
- 4 large egg whites, room temperature
- 1 cup superfine sugar
- ¼ teaspoon cream of tartar
- 1 teaspoon vanilla extract
- Mini chocolate chips for eyes
Instructions:
The success of these cupcakes lies in achieving the perfect balance between a moist, rich chocolate base and light, stable meringue ghosts. Begin by preparing your cupcakes, as they need to be completely cooled before adding the meringue topping.
Preheat your oven to 350°F and line two 12-cup muffin tins with paper liners. In a large bowl, whisk together the flour, sugar, cocoa powder, baking soda, baking powder, and salt. The cocoa powder should be sifted to prevent lumps that could create uneven texture in your finished cupcakes.
In another bowl, whisk together the eggs, buttermilk, coffee, oil, and vanilla extract. The coffee might seem like an unusual addition, but it intensifies the chocolate flavor without making the cupcakes taste like coffee. If you prefer to avoid coffee, you can substitute hot water, though the chocolate flavor won’t be quite as rich.
Pour the wet ingredients into the dry ingredients and whisk until just combined. The batter will be quite thin, which is normal and contributes to the moist texture of the finished cupcakes. Divide the batter evenly among the prepared muffin cups, filling each about two-thirds full.
Bake for 18-22 minutes, or until a toothpick inserted in the center comes out clean. Allow the cupcakes to cool in the pans for five minutes before transferring to wire racks to cool completely. This cooling step is crucial, as any residual heat will cause the meringue to weep or collapse.
While the cupcakes cool, prepare your meringue ghosts. Ensure your mixing bowl and beaters are completely clean and free from any grease, as even a small amount of fat can prevent the egg whites from whipping properly. In the clean bowl, beat the egg whites with an electric mixer on medium speed until foamy.
Add the cream of tartar and continue beating until soft peaks form. Gradually add the superfine sugar, one tablespoon at a time, beating well after each addition. This gradual incorporation is essential for creating stable meringue that won’t collapse. Continue beating until stiff, glossy peaks form and the meringue feels smooth when rubbed between your fingers. Beat in the vanilla extract.
Transfer the meringue to a piping bag fitted with a large round tip. Pipe tall, ghost-like shapes on top of each cooled cupcake, starting from the base and pulling upward to create flowing, ethereal forms. The meringue should be thick enough to hold its shape but smooth enough to pipe easily.
Use mini chocolate chips to create eyes on each ghost, pressing them gently into the meringue. For a more dramatic effect, you can use a kitchen torch to lightly brown the tips of the meringue ghosts, giving them a slightly toasted appearance that adds both flavor and visual interest.
These cupcakes are best served the same day they’re made, as the meringue will begin to weep if stored for too long. However, the dramatic presentation makes them perfect showstoppers for Halloween parties.
6. Pumpkin Spice Graveyard Cake
This impressive layer cake combines the warm, comforting flavors of pumpkin spice with a spooky graveyard scene created from chocolate cookie crumbs and candy decorations. The result is a dessert that tastes like autumn and looks like Halloween.
Ingredients:
For the cake:
- 2 cups all-purpose flour
- 2 teaspoons baking powder
- 1 teaspoon baking soda
- 1 teaspoon salt
- 2 teaspoons ground cinnamon
- 1 teaspoon ground ginger
- ½ teaspoon ground nutmeg
- ¼ teaspoon ground cloves
- 1¾ cups granulated sugar
- 1 cup vegetable oil
- 4 large eggs
- 1 can (15 oz) pumpkin puree
- ⅔ cup water
For the cream cheese frosting:
- 1 package (8 oz) cream cheese, softened
- ½ cup butter, softened
- 4 cups powdered sugar
- 2 teaspoons vanilla extract
- 2-3 tablespoons heavy cream
For the graveyard decoration:
- 2 cups chocolate cookie crumbs
- Rectangular cookies for tombstones
- Candy pumpkins and ghosts
- Green food coloring
- Shredded coconut for grass
Instructions:
This spectacular cake requires some advance planning, as the layers need to be completely cooled before assembly and decoration. The pumpkin spice cake itself is incredibly moist and flavorful, making it delicious enough to stand on its own, but the graveyard decoration transforms it into a true Halloween centerpiece.
Begin by preparing your cake layers. Preheat the oven to 350°F and grease two 9-inch round cake pans. Line the bottoms with parchment paper for easy removal. In a large bowl, whisk together the flour, baking powder, baking soda, salt, and all the spices. The combination of cinnamon, ginger, nutmeg, and cloves creates the classic pumpkin spice flavor profile that makes this cake so appealing.
In another large bowl, whisk together the sugar and oil until well combined. Add the eggs one at a time, beating well after each addition. Stir in the pumpkin puree and water. The pumpkin puree not only provides flavor but also contributes to the cake’s incredibly moist texture.
Add the dry ingredients to the wet ingredients, stirring just until combined. Overmixing can result in a tough cake, so stop as soon as you no longer see streaks of flour. Divide the batter evenly between the prepared pans.
Bake for 25-30 minutes, or until a toothpick inserted in the center comes out clean. Allow the cakes to cool in the pans for 10 minutes before turning out onto wire racks to cool completely. This cooling step is crucial for successful frosting application.
While the cakes cool, prepare your cream cheese frosting. Beat the softened cream cheese and butter together until light and fluffy, approximately three minutes. Gradually add the powdered sugar, beating until smooth. Add the vanilla extract and enough heavy cream to achieve a spreadable consistency.
To assemble the cake, place one layer on your serving plate and spread a generous amount of frosting over the top. Place the second layer on top and frost the entire cake with a smooth layer of the remaining frosting. The frosting serves as both flavor enhancement and the canvas for your graveyard scene.
Create your graveyard landscape by sprinkling chocolate cookie crumbs over the entire surface of the frosted cake, leaving some areas less covered to create variation in the “soil.” Tint some shredded coconut with green food coloring to create grass, and sprinkle this around the edges and in patches across the surface.
Insert rectangular cookies vertically into the cake to serve as tombstones, spacing them irregularly for a more authentic cemetery appearance. You can write “RIP” or other spooky messages on these with melted chocolate or frosting. Scatter candy pumpkins, ghosts, and other Halloween decorations around the graveyard scene.
For added realism, you can create small mounds of extra frosting covered with cookie crumbs to simulate freshly dug graves, or use green-tinted coconut to create patches of grass growing between the tombstones.
7. Witch Hat Brownies
These whimsical brownies are topped with cone-shaped chocolate decorations that perfectly mimic witch hats, complete with colorful bands and buckles. They’re surprisingly simple to make but create an impressive visual impact that’s perfect for Halloween gatherings.
Ingredients:
For the brownies:
- 1 cup unsalted butter
- 8 oz semi-sweet chocolate, chopped
- 2 cups granulated sugar
- 4 large eggs
- 1 teaspoon vanilla extract
- 1 cup all-purpose flour
- ½ teaspoon salt
For the witch hats:
- 24 chocolate ice cream cones (pointed sugar cones)
- 2 cups dark chocolate chips
- 2 tablespoons coconut oil
- Assorted colored candies for decoration
- 24 chocolate sandwich cookies
Instructions:
These delightful brownies combine rich, fudgy chocolate brownies with creative three-dimensional decorations that transform them into miniature witch hats. The key to success lies in creating stable brownie bases and properly tempering the chocolate for the hat decorations.
Start by preparing your brownies, which will serve as the base for your witch hats. Preheat the oven to 350°F and line a 9×13 inch baking pan with parchment paper, leaving some overhang for easy removal. In a double boiler or microwave-safe bowl, melt the butter and chopped chocolate together, stirring until smooth and glossy.
Remove from heat and whisk in the granulated sugar until well combined. The mixture will be quite thick and glossy. Add the eggs one at a time, beating well after each addition to ensure proper incorporation. This gradual addition helps create the dense, fudgy texture that makes these brownies so irresistible. Stir in the vanilla extract.
In a separate bowl, whisk together the flour and salt. Gradually fold this into the chocolate mixture, stirring just until combined. Overmixing can result in tough brownies, so stop as soon as you no longer see streaks of flour.
Pour the batter into your prepared pan, spreading it evenly with an offset spatula. Bake for 25-30 minutes, or until a toothpick inserted in the center comes out with just a few moist crumbs attached. The brownies should be set but still slightly soft in the center for the perfect fudgy texture.
Allow the brownies to cool completely in the pan before cutting. This cooling step is essential, as warm brownies will crumble when cut and won’t provide a stable base for the hat decorations.
While the brownies cool, prepare your witch hat decorations. In a double boiler or microwave-safe bowl, melt the dark chocolate chips with the coconut oil, stirring until smooth. The coconut oil helps create a glossy finish and makes the chocolate easier to work with.
Dip each ice cream cone into the melted chocolate, allowing excess to drip off. Place the coated cones on a parchment-lined baking sheet and immediately decorate with colored candies to create hat bands and buckles. Work quickly, as the chocolate will set rapidly. You can create stripes, polka dots, or other patterns using small candies, mini chocolate chips, or colored sprinkles.
Refrigerate the decorated cones for at least 30 minutes to allow the chocolate to set completely. This ensures the decorations will stay in place when the hats are assembled.
Cut the cooled brownies into 24 squares, each approximately 2 inches. The size should be appropriate for supporting an ice cream cone without the brownie being overwhelmed by the decoration.
To assemble each witch hat brownie, place a chocolate sandwich cookie on top of each brownie square. The cookie serves as the brim of the witch hat and provides additional stability for the cone. Carefully place a decorated cone on top of each cookie, pressing gently to ensure it’s secure.
The finished witch hat brownies can be stored at room temperature for up to three days, though they’re best served within 24 hours of assembly for optimal texture and appearance.
8. Bloody Red Velvet Cupcakes
These dramatically colored cupcakes feature an intensely red velvet base topped with “bloody” cream cheese frosting that’s been artfully drizzled with raspberry sauce to create the appearance of fresh blood. The effect is both horrifying and delicious.
Ingredients:
For the cupcakes:
- 2½ cups all-purpose flour
- 2 tablespoons unsweetened cocoa powder
- 1 teaspoon baking soda
- 1 teaspoon salt
- 2 cups granulated sugar
- 1 cup vegetable oil
- 2 large eggs
- 1 cup buttermilk
- 2 tablespoons red food coloring
- 1 teaspoon vanilla extract
- 1 teaspoon white vinegar
For the “bloody” frosting:
- 1 package (8 oz) cream cheese, softened
- ½ cup butter, softened
- 4 cups powdered sugar
- 1 teaspoon vanilla extract
- ½ cup raspberry preserves
- 2 tablespoons corn syrup
- Red food coloring
Instructions:
These cupcakes take the classic red velvet flavor profile and amplify it for maximum Halloween impact. The key to achieving the perfect “bloody” effect lies in creating the right consistency for your raspberry drizzle and applying it with the proper technique.
Begin by preparing your red velvet cupcakes. Preheat the oven to 350°F and line two 12-cup muffin tins with paper liners. In a large bowl, whisk together the flour, cocoa powder, baking soda, and salt. The small amount of cocoa powder provides subtle chocolate flavor without overwhelming the distinctive red velvet taste.
In another large bowl, whisk together the sugar and oil until well combined. Add the eggs one at a time, beating well after each addition. In a measuring cup, combine the buttermilk, red food coloring, vanilla extract, and vinegar. The vinegar reacts with the baking soda to create the tender crumb that red velvet is famous for.
Alternate adding the dry ingredients and the buttermilk mixture to the sugar and oil mixture, beginning and ending with the dry ingredients. Mix just until combined after each addition. The batter should be smooth and vibrant red.
Divide the batter evenly among the prepared muffin cups, filling each about two-thirds full. Bake for 18-22 minutes, or until a toothpick inserted in the center comes out clean. Allow the cupcakes to cool in the pans for five minutes before transferring to wire racks to cool completely.
While the cupcakes cool, prepare your cream cheese frosting. Beat the softened cream cheese and butter together until light and fluffy, approximately three minutes. Gradually add the powdered sugar, beating until smooth and creamy. Beat in the vanilla extract. The frosting should be smooth and pipeable.
For the “blood” effect, prepare your raspberry drizzle by combining the raspberry preserves and corn syrup in a small saucepan. Heat over low heat, stirring constantly, until the mixture is smooth and slightly thinned. Strain the mixture through a fine-mesh sieve to remove any seeds, then stir in a few drops of red food coloring to intensify the color. The consistency should be thick enough to cling to the frosting but thin enough to drizzle naturally.
Frost the cooled cupcakes with the cream cheese frosting using a piping bag fitted with a large star tip, or simply spread with an offset spatula. The frosting should be generous and slightly peaked to provide good surface area for the blood effect.
Using a spoon or squeeze bottle, drizzle the raspberry “blood” over each frosted cupcake, allowing it to run down the sides naturally. For the most realistic effect, vary the amount and placement of the drizzle on each cupcake. Some should appear heavily “bloodied” while others might have just a few drops.
The contrast between the bright red cupcake, white frosting, and dark red “blood” creates a striking visual effect that’s sure to impress your Halloween guests while delivering the beloved flavors of red velvet cake.
No-Bake Nightmares
9. Mummy Oreo Pops
These adorable treats transform ordinary sandwich cookies into wrapped mummy figures using white chocolate and mini chocolate chips. They’re perfect for parties since they require no baking and can be made well in advance.
Ingredients:
- 1 package (14.3 oz) chocolate sandwich cookies
- 1 package (8 oz) cream cheese, softened
- 2 lbs white chocolate or vanilla candy melts
- 48 lollipop sticks
- Mini chocolate chips for eyes
- 2 tablespoons coconut oil (optional, for thinning)
Instructions:
These charming mummy pops combine the beloved flavors of cookies and cream with a playful presentation that’s sure to delight both children and adults. The key to success lies in achieving the right consistency for your white chocolate coating and mastering the mummy wrapping technique.
Begin by preparing your cookie mixture. Place the entire package of sandwich cookies in a food processor and pulse until they’re finely ground. You want a mixture that resembles fine crumbs with no large pieces remaining. Add the softened cream cheese and pulse until the mixture comes together and can be easily shaped into balls.
Using your hands or a small cookie scoop, form the mixture into balls approximately 1½ inches in diameter. Place these balls on a parchment-lined baking sheet and insert a lollipop stick into each one, pushing it about halfway through. The mixture should hold together well and grip the stick securely.
Refrigerate the cookie balls for at least 30 minutes to firm them up. This chilling step is crucial, as it prevents the pops from falling apart when dipped in the warm chocolate coating.
While the pops chill, prepare your white chocolate coating. Melt the white chocolate or vanilla candy melts in a double boiler or microwave-safe bowl, stirring frequently until smooth. If the chocolate seems too thick for easy dipping, add coconut oil one teaspoon at a time until you achieve the desired consistency. The coating should be fluid enough to create smooth coverage but thick enough to adhere well to the cookie balls.
Remove the chilled pops from the refrigerator and dip each one into the melted white chocolate, allowing excess to drip off. The coating should be even and complete, with no cookie mixture showing through. Place the dipped pops back on the parchment-lined baking sheet.
Before the chocolate sets completely, create the mummy wrapping effect by using a fork or knife to drag lines through the white chocolate coating. Work quickly, as you have only a few minutes before the chocolate hardens. The lines should be irregular and wrap around the pop in different directions, mimicking the appearance of ancient mummy bandages.
While the chocolate is still slightly soft, press two mini chocolate chips into each pop to create eyes. Position them so they peek out between the “bandage” lines for the most authentic mummy appearance. The eyes should be pressed firmly enough to stay in place but not so deep that they disappear into the coating.
Allow the pops to set completely at room temperature, or refrigerate for faster setting. Once the chocolate is firm, you can store these mummy pops in an airtight container for up to one week, making them perfect for advance party preparation.
10. Spider Chocolate Clusters
These creepy-crawly treats combine crunchy chow mein noodles with rich chocolate to create realistic-looking spiders that are both delicious and unsettling. They’re incredibly easy to make and require no special equipment.
Ingredients:
- 2 cups semi-sweet chocolate chips
- 1 cup butterscotch chips
- 4 cups chow mein noodles
- 1 cup salted peanuts
- Red candy-coated chocolates for eyes
- 2 tablespoons coconut oil (optional)
Instructions:
These delightfully creepy clusters prove that sometimes the simplest recipes create the most impressive results. The combination of melted chocolate and crunchy noodles creates a texture that’s both satisfying to eat and visually convincing as spider legs.
In a large microwave-safe bowl, combine the semi-sweet chocolate chips and butterscotch chips. The butterscotch chips add a subtle caramel flavor that complements the chocolate while also helping to create the perfect consistency for coating the noodles.
Microwave the chocolate mixture in 30-second intervals, stirring between each interval, until completely melted and smooth. This gradual melting process prevents the chocolate from scorching and ensures a glossy finish. If the mixture seems too thick, add coconut oil one teaspoon at a time until you achieve a coating consistency that will easily adhere to the noodles.
Add the chow mein noodles and peanuts to the melted chocolate mixture, stirring gently but thoroughly to ensure every piece is well-coated. The noodles will break slightly during mixing, which actually helps create more realistic-looking spider legs of varying lengths.
Using a large spoon, drop portions of the mixture onto parchment-lined baking sheets, forming clusters approximately 3 inches in diameter. Work quickly, as the chocolate will begin to set as it cools. Each cluster should have noodles extending outward in all directions to simulate spider legs.
While the chocolate is still soft, press two red candy-coated chocolates into the center of each cluster to create spider eyes. Position them close together for a more authentic appearance. The candies should be pressed firmly enough to stay in place but not so deep that they sink completely into the chocolate.
Allow the clusters to set at room temperature for about 30 minutes, or refrigerate for faster setting. Once completely firm, these spider clusters can be stored in an airtight container for up to two weeks, though they’re best enjoyed within the first week for optimal texture.
For variation, you can create different types of “spiders” by using different colored candy-coated chocolates for eyes, or by adding a light dusting of cocoa powder to create a more realistic spider coloring.
11. Pumpkin Spice Energy Balls
These healthy Halloween treats combine the warm flavors of pumpkin spice with dates, nuts, and seeds to create bite-sized energy balls that look like tiny pumpkins. They’re naturally sweetened and packed with nutrients.
Ingredients:
- 1 cup pitted dates, softened in warm water
- 1 cup raw cashews
- ½ cup pumpkin puree
- 2 tablespoons almond butter
- 1 teaspoon vanilla extract
- 1 teaspoon ground cinnamon
- ½ teaspoon ground ginger
- ¼ teaspoon ground nutmeg
- ¼ teaspoon ground cloves
- Pinch of salt
- ½ cup rolled oats
- Orange food coloring (optional)
- Pretzel sticks for stems
Instructions:
These nutritious treats prove that Halloween desserts don’t have to be loaded with refined sugar to be delicious and festive. The natural sweetness of dates combined with warming spices creates a satisfying treat that both children and health-conscious adults can enjoy.
Begin by preparing your dates. If they’re not already soft, soak them in warm water for 10-15 minutes until they’re pliable and easy to blend. Drain thoroughly and pat dry with paper towels. Soft dates are crucial for achieving the smooth, cohesive texture that holds these energy balls together.
In a food processor, pulse the cashews until they’re roughly chopped but not completely ground. You want some texture remaining to provide interest in the finished balls. Add the softened dates and process until the mixture forms a paste-like consistency.
Add the pumpkin puree, almond butter, vanilla extract, and all the spices to the food processor. The combination of cinnamon, ginger, nutmeg, and cloves creates the classic pumpkin spice flavor profile that makes these balls taste like autumn. Process until everything is well combined and the mixture holds together when pressed.
Add the rolled oats and pulse just until they’re incorporated but still provide some texture. If you want your pumpkin balls to have a more orange color, add a few drops of orange food coloring and pulse to distribute evenly.
Using your hands or a small cookie scoop, form the mixture into balls approximately 1 inch in diameter. The mixture should hold together easily, but if it seems too dry, add a tablespoon of water or additional almond butter. If it’s too wet, add more oats or a tablespoon of ground almonds.
To create the pumpkin appearance, use the back of a knife or a toothpick to create vertical indentations around each ball, dividing it into sections like a real pumpkin. Make about 6-8 indentations per ball, running from top to bottom.
Break pretzel sticks into small pieces, approximately ½ inch long, and insert one piece into the top of each energy ball to create a pumpkin stem. The pretzel should be pushed in just far enough to stay secure but not so deep that it disappears into the ball.
Refrigerate the finished pumpkin energy balls for at least 30 minutes to firm them up before serving. They can be stored in the refrigerator for up to one week, making them perfect for meal prep or advance party preparation.
These energy balls provide sustained energy from healthy fats and natural sugars, making them an excellent alternative to traditional Halloween candy for both children and adults.
12. Ghostly Coconut Macaroons
These naturally gluten-free treats are shaped like friendly ghosts and require no baking, making them perfect for hot weather Halloween celebrations or when oven space is at a premium.
Ingredients:
- 4 cups sweetened shredded coconut
- ⅔ cup sweetened condensed milk
- 2 large egg whites
- 1 teaspoon vanilla extract
- ¼ teaspoon salt
- Mini chocolate chips for eyes and mouths
- White chocolate chips for extra decoration (optional)
Instructions:
These delightful coconut macaroons prove that gluten-free desserts can be just as impressive and delicious as their traditional counterparts. The natural binding properties of egg whites and condensed milk create a chewy, satisfying texture that’s enhanced by the tropical flavor of coconut.
In a large bowl, combine the shredded coconut, sweetened condensed milk, vanilla extract, and salt. Stir until the mixture is well combined and evenly moistened. The coconut should hold together when pressed but not be overly wet or sticky.
In a separate clean bowl, whisk the egg whites until they form soft peaks. This doesn’t require the stiff peaks needed for meringue, just enough structure to help bind the coconut mixture and create the right texture in the finished macaroons.
Gently fold the whipped egg whites into the coconut mixture, being careful not to deflate them completely. The egg whites help create a lighter texture and provide additional binding power to hold the ghost shapes together.
Using your hands or a large spoon, form the mixture into ghost shapes approximately 2 inches tall. Start with an oval base and then pull the mixture upward and outward to create the flowing, ethereal shape characteristic of cartoon ghosts. The mixture should hold its shape well, but if it seems too loose, refrigerate for 15-20 minutes before shaping.
Place the shaped ghosts on parchment-lined baking sheets, spacing them about 2 inches apart. The shapes don’t need to be perfect, as slight irregularities actually make them look more ghost-like and natural.
Refrigerate the shaped macaroons for at least 2 hours, or until they’re firm to the touch. This chilling process is essential for the macaroons to hold their shape and develop the proper texture.
Once the macaroons are firm, add the facial features using mini chocolate chips. Press two chips into each ghost for eyes, positioning them about one-third of the way down from the top. Add a small chip or piece of chip for the mouth, creating either a surprised “O” shape or a wavy line for a more traditional ghost expression.
For extra decoration, you can melt white chocolate chips and drizzle them over the ghosts to create additional flowing effects or to repair any cracks that might have developed during chilling.
These ghostly macaroons can be stored in the refrigerator for up to one week, though they’re best enjoyed within the first few days for optimal texture and freshness. They’re naturally gluten-free and can easily be made dairy-free by substituting coconut condensed milk for the regular version.