
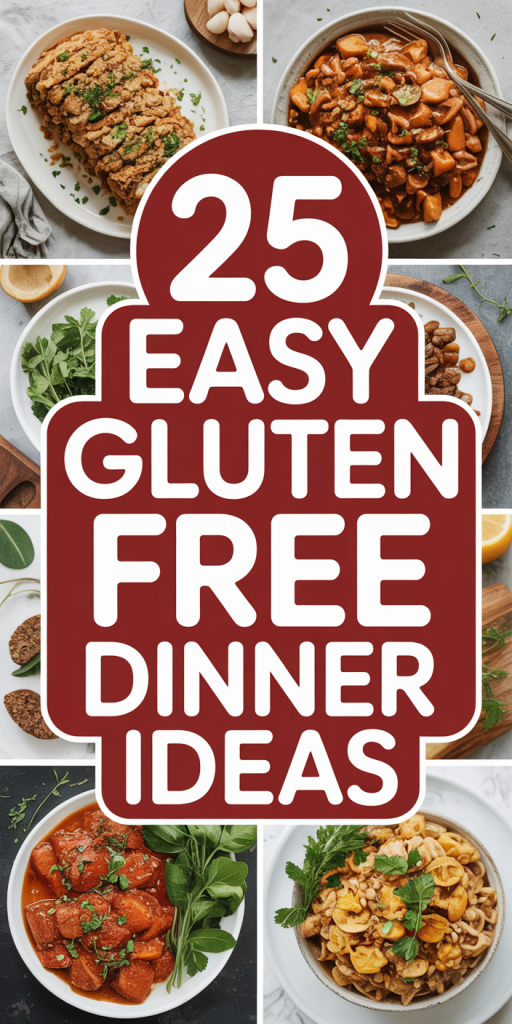
25 Easy Gluten-Free Dinner Ideas
In recent years, the gluten-free diet has transitioned from a niche dietary requirement to a widespread lifestyle choice, embraced by millions worldwide. For individuals diagnosed with celiac disease, an autoimmune disorder triggered by gluten consumption, adhering to a strict gluten-free diet is a medical necessity. Beyond celiac disease, many others experience non-celiac gluten sensitivity, finding relief from digestive issues, fatigue, and other symptoms by eliminating gluten from their meals. Furthermore, a growing number of people choose a gluten-free lifestyle for perceived health benefits, including improved digestion, increased energy, and weight management. Regardless of the motivation, navigating the world of gluten-free eating, especially when it comes to dinner, can sometimes feel daunting. The good news is that a gluten-free diet doesn’t mean sacrificing flavor, variety, or ease. This article aims to demystify gluten-free dinner preparation by presenting 25 easy, delicious, and diverse gluten-free dinner ideas, complete with detailed recipes, cooking tips, and nutritional insights. We’ll explore a range of options, from hearty chicken dishes and savory beef meals to fresh seafood and vibrant vegetarian creations, proving that gluten-free cooking can be both simple and satisfying.
Understanding Gluten-Free Cooking
Embarking on a gluten-free culinary journey requires a foundational understanding of its principles and practical considerations. Gluten is a protein found in wheat, barley, and rye, acting as a
binding agent that gives elasticity to dough and structure to baked goods. Therefore, the key principle of gluten-free cooking is to avoid all ingredients containing these grains and their derivatives. This means being vigilant about reading food labels and understanding common hidden sources of gluten.
Essential gluten-free pantry staples are crucial for seamless meal preparation. These include a variety of naturally gluten-free grains and flours such as rice (brown, white, wild), quinoa, corn, millet, buckwheat, and gluten-free oats. For baking, a blend of gluten-free flours (e.g., rice flour, tapioca starch, potato starch, almond flour, coconut flour) is often used to mimic the texture and structure provided by wheat flour. Gluten-free pasta, bread, and tortillas are also widely available. When it comes to sauces and condiments, always check labels, as many contain wheat-based thickeners or soy sauce (which typically contains wheat, unless specified as tamari).
Tips for avoiding cross-contamination are paramount, especially for those with celiac disease. In a shared kitchen, use separate cutting boards, utensils, toasters, and cooking surfaces for gluten-free foods. Clean all cooking equipment thoroughly before preparing gluten-free meals. Store gluten-free ingredients in clearly marked containers, separate from gluten-containing items, to prevent accidental exposure. Being mindful of these practices ensures the safety and integrity of gluten-free dishes.
The 25 Easy Gluten-Free Dinner Ideas
Here are 25 diverse and easy-to-prepare gluten-free dinner recipes, designed to bring flavor and convenience to your weeknight meals. Each recipe is accompanied by a brief description, key ingredients, and a link to the full instructions.
A. Chicken Dishes
- Instant Pot Taco Pasta (Gluten-Free, Dairy-Free)
A quick and flavorful one-pot meal that combines the ease of an Instant Pot with the comforting taste of taco-seasoned pasta. Perfect for busy weeknights.
Key Ingredients: Gluten-free pasta, ground chicken or turkey, taco seasoning, diced tomatoes, dairy-free milk.
This quick and easy Instant Pot Taco Pasta is a flavorful and comforting meal that comes together in one pot with minimal cleanup. It’s a gluten-free and dairy-free twist on a classic comfort food.
Prep Time: 5 minutes
Cook Time: 5 minutes
Total Time: 10 minutes
Yield: 4 servings
Ingredients:
- 12-ounces dried gluten-free pasta (brown rice, cassava, or chickpea)
- 3 cups Skillet Queso (from Danielle Walker’s Healthy in a Hurry pg. 226) or store-bought dairy-free queso
- 2 cups beef bone broth
- 1/2 cup store-bought salsa of choice
- 1 teaspoon Healthy in a Hurry Taco Seasoning
- Optional toppings: avocado, shredded lettuce, diced tomatoes, pickled jalapeños, cilantro
Instructions:
- Add the pasta to the insert of the Instant Pot. Add the broth, the salsa, then the queso. Sprinkle Taco Seasoning on top. Do not stir.
- Secure the lid and set the valve to sealing. Select manual pressure on high and set the timer for 5 minutes.
- When the timer is finished, immediately release (or “quick release”) the pressure. Remove the lid and stir the pasta well. Serve hot with desired toppings.
Notes:
- If using store-bought dairy-free queso, brown 1/2 pound ground meat of choice, and mix with 2 teaspoons tomato paste + 2 tablespoons Taco Seasoning. Stir it into the store-bought queso before adding to the pot.
- The Skillet Queso can be added fresh, defrosted, or as frozen “pucks” from silicone muffin molds. The cook time will not change.
- For a richer flavor, consider adding browned ground beef or turkey to the pasta before cooking.
- Buffalo Chicken Spaghetti Squash Pasta
A healthier take on buffalo chicken, using spaghetti squash as a gluten-free pasta alternative. Spicy, tangy, and satisfying.
Key Ingredients: Spaghetti squash, cooked chicken, buffalo sauce, ranch or blue cheese dressing (dairy-free options available).
This Buffalo Chicken Spaghetti Squash Pasta is an easy, healthy, and flavorful dinner that comes together quickly on a single sheet pan. It\’s a paleo and gluten-free meal that\’s a hit with the whole family.
Prep Time: 10 minutes
Cook Time: 35 minutes
Total Time: 45 minutes
Yield: 4-6 servings
Ingredients:
- 1 medium spaghetti squash (about 3 pounds)
- 2 pounds boneless, skinless chicken breasts
- 2 tablespoons avocado oil
- Fine sea salt and freshly ground black pepper
- ⅓ cup Buffalo Sauce (Primal Kitchen’s or homemade)
- 1⁄2 cup Herb Ranch Dressing
- Chopped parsley, scallions, or cilantro, for garnish
- Carrot and celery sticks, for serving
Instructions:
- To soften the squash enough to slice it, place the squash directly on the middle rack of the oven and turn on the heat to 400°F. Once the oven preheat timer goes off (about 10 minutes), carefully remove the squash.
- Meanwhile, line a large sheet pan with parchment paper. Arrange the chicken in a single layer. Drizzle the chicken with 1 tablespoon of the oil and sprinkle with ¾ teaspoon salt and ¼ teaspoon pepper.
- Once the squash has cooled enough to handle, slice off both ends, and cut crosswise into four or five rounds. Scoop out the seeds from the center of each round. Drizzle both sides of the rounds with 1 tablespoon of the oil, then arrange the rounds in a single layer on the prepared sheet pan.
- Place the pan on the middle rack in the oven and bake for 20 to 25 minutes, until the chicken is cooked through and the squash is fork-tender.
- Dice the chicken and return it to the pan.
- Use a fork to pull the flesh into noodle-like strands from the sides of the squash rounds. Heap the noodles on the pan, and discard the skins.
- Toss the squash noodles with ¼ cup of the ranch dressing.
- Toss the diced chicken in the buffalo sauce. Serve the buffalo chicken over the squash noodles with fresh parsley, carrots, and celery. Serve additional ranch on the side.
Notes:
- For a detailed tutorial on how to cut spaghetti squash, refer to Danielle Walker\’s blog.
- Both homemade and Primal Kitchen\’s buffalo sauce are paleo, gluten-free, vegan, and Whole30 compliant.
- Chicken Tray Bake with Potatoes and Meyer Lemon Olive Salsa
An effortless sheet pan dinner featuring tender chicken and potatoes, brightened with a fresh Meyer lemon olive salsa. Minimal cleanup and maximum flavor.
Key Ingredients: Chicken pieces, potatoes, Meyer lemons, olives, herbs.
This Mediterranean-inspired Chicken Tray Bake is an impossibly easy one-pan meal that brings bright, tangy flavors to your table. It\’s gluten-free, paleo, and perfect for a weeknight dinner or entertaining guests.
Prep Time: 5 minutes
Cook Time: 30 minutes
Total Time: 35 minutes
Yield: 6 servings
Ingredients:
- 6 bone-in, skin-on chicken thighs (about 2 pounds)
- 1 teaspoon Cajun Seasoning blend
- 1 teaspoon Tagine Seasoning blend
- 1 pound red potatoes, scrubbed and quartered (Hannah or other white sweet potatoes would work well here too)
- 2 tablespoons avocado oil
- 1 teaspoon Himalayan salt
For the lemon-olive salsa:
- 1/2 cup Castelvetrano green olives, pitted and roughly chopped
- 2 tablespoons extra-virgin olive oil
- Zest of one Meyer lemon (about 1 to 2 teaspoons)
- Juice of one Meyer lemon
- 1 garlic clove, minced
- 1 tablespoon chopped flat leaf parsley
- 1 tablespoon fresh chopped mint
- 1 tablespoon fresh chopped dill
- 1 pinch coarse sea salt
Instructions:
- Preheat the oven to 400°F.
- Lightly grease a half sheet pan (18×13) with oil or line the pan with parchment paper. Place the chicken thighs in the center of the pan.
- Mix 1 tablespoon of the avocado oil with the Cajun Seasoning blend and the Tagine Seasoning blend. Rub the mixture on the tops and bottoms of the chicken.
- Toss the potatoes in the remaining avocado oil and Himalayan salt. Scatter them around the chicken.
- Roast for 28 to 30 minutes, until the chicken reads 165°F and the skin is crispy, and the potatoes are fork tender. Toss the potatoes and rotate the tray halfway through.
- While the chicken roasts, make the salsa by stirring together the chopped olives, extra-virgin olive oil, lemon juice, lemon zest, minced garlic, fresh herbs (parsley, mint, dill), and coarse sea salt.
- Serve the chicken and potatoes immediately, topped with the Meyer Lemon-Olive Salsa.
Notes:
- Meyer lemons are slightly sweeter than regular lemons; if using regular lemons, the salsa may be more tart.
- Castelvetrano olives have a meaty bite and buttery quality; if unavailable, other green olives can be substituted.
- Cajun and Tagine seasoning blends can be homemade or purchased.
- Balsamic Roasted Chicken With Peaches
A delightful combination of savory chicken and sweet, caramelized peaches roasted with balsamic glaze. A sophisticated yet simple dish.
Key Ingredients: Chicken thighs or breasts, fresh peaches, balsamic vinegar, herbs.
This recipe features boneless chicken thighs, shallots, peaches, and cherry or grape tomatoes coated in a simple balsamic marinade and roasted until crispy, sweet, and juicy. The pan juices combine with extra marinade to create a thick, tangy sauce.
Yield: 4 servings
Total Time: 45 minutes
Prep Time: 5 minutes
Cook Time: 40 minutes
Ingredients:
- ¼ cup balsamic vinegar
- ¼ cup honey
- 2 tablespoons Dijon mustard
- Kosher salt (such as Diamond Crystal) and black pepper
- 1½ pounds boneless skinless chicken thighs (5 to 6 thighs)
- 2 medium shallots, peeled and halved
- 2 peaches, quartered
- 16 ounces cherry or grape tomatoes
- Basil leaves, for serving
Instructions:
- Preheat oven and prepare pan: Heat the oven to 425 degrees F (220 C). Line a sheet pan with parchment paper.
- Make the marinade: In a small bowl, combine the balsamic vinegar, honey, mustard, and 1 teaspoon each salt and pepper. Set aside.
- Marinate chicken and shallots: Place the chicken and shallots in a large bowl with half of the marinade (reserve the remainder to use later) and toss to coat. Cover and let sit for 15 minutes. This step can be done in advance; refrigerate, covered, for up to 2 days.
- First roast: Place the chicken and shallots on the sheet pan in a single layer, drizzling any leftover marinade from the bowl on top. Bake for 12 minutes.
- Second roast: Remove the pan from the oven and flip the chicken and shallots over. Add tomatoes and peaches to the pan. Baste everything with the juices in the pan and bake until the chicken is cooked through, about 12 minutes more.
- Finish and serve: Remove the pan from the oven and drizzle with the reserved marinade. Let the chicken rest for a few minutes, and then toss to combine chicken, shallots, peaches, and tomatoes with the pan juices, creating a sauce. Serve warm, garnished with basil.
Notes:
- Larger tomatoes can be used in this recipe; just be sure to halve or quarter them so they cook as fast as cherry or grape tomatoes.
- This recipe works well with any peaches, even those that may not be perfectly ripe or sweet, and can be made with other stone fruits like nectarines or plums.
- Chicken Broccoli Rice Casserole (Gluten-Free)
A classic comfort food made gluten-free, featuring creamy chicken, tender broccoli, and rice baked to perfection. A family favorite.
Key Ingredients: Cooked chicken, broccoli, rice, gluten-free cream of mushroom soup (or homemade sauce), cheese (optional).
This comforting and cheesy Chicken Broccoli Rice Casserole is made all in one pan in less than 30 minutes, making it perfect for a busy weeknight. It\’s packed with lean chicken and broccoli, and uses affordable ingredients.
Ingredients:
- 1 lb chicken breasts
- 1 1/2 cup broccoli florets, chopped
- 1 cup basmati rice
- 2 cups chicken bone broth or chicken stock
- 2-4 slices Cheddar cheese (use dairy-free cheese for a dairy-free recipe)
- 1 tsp Garlic
- 1 tbsp Parsley
- Salt and pepper to taste
- Olive oil
Instructions:
- Season the chicken breasts with garlic, salt, and pepper.
- Heat the olive oil in a large skillet over medium-high heat. Add the seasoned chicken and cook until browned. Continue to cook on medium heat, covered, until chicken is fully cooked through (reaches an internal temperature of 165°F), and the broccoli and rice are warmed.
- Remove chicken and set aside.
- Reduce heat to medium. Pour in bone broth and scrape up browned bits from the pan.
- Add rice to the skillet, following rice package directions. Bring to a simmer, then reduce heat, cover, and cook until rice is done.
- If broccoli is fresh, chop into small florets and add to rice when there is about 7 minutes remaining. If broccoli is frozen, wait to add it until there is only 2 minutes left.
- Once the rice is done, add back the chicken.
- Top each chicken piece with a slice of cheddar cheese.
- Place the lid back on and turn down to low until the cheese is melted and bubbly. Option to add to oven and broil for 2-3 minutes to melt the cheese.
- Remove from stove top. Season with salt, pepper, and parsley. Serve and enjoy!
Notes:
- You can use boneless skinless chicken thighs or a rotisserie chicken instead of chicken breasts.
- Ground chicken, turkey, or beef can also be used.
- Basmati rice can be substituted with jasmine rice or brown rice. If using frozen, instant, or microwavable rice, reduce the amount of liquid.
Source: Kayla Cappiello
- Thai Red Curry with Chicken (Gluten-Free)
An aromatic and vibrant curry with tender chicken and vegetables in a rich coconut milk base. Easily customizable with your favorite veggies.
Key Ingredients: Chicken, red curry paste (ensure gluten-free), coconut milk, vegetables (e.g., bell peppers, bamboo shoots), fish sauce.
This 30-minute Thai Red Curry with Chicken is packed with bold, fragrant, and creamy classic Thai flavors. It\’s naturally gluten-free and a faster alternative to traditional Thai cooking methods.
Ingredients:
For the Sauce:
- 1 tablespoon vegetable oil
- 2 cloves garlic, minced
- 1 tablespoon fresh ginger, minced
- 2-3 tablespoons red curry paste
- 1 13.5-ounce can coconut milk
- 1 tablespoon gluten-free soy sauce, coconut aminos, or liquid aminos
- 1-2 tablespoons lime juice
- Optional: pinch of sugar
For the Curry:
- 1 tablespoon vegetable oil
- 1 pound boneless, skinless chicken breasts, cut into bite-sized pieces
- 1 bell pepper (any color), sliced
- 1 onion, sliced
- 1/2 cup fresh Thai basil leaves
- Cooked rice for serving
Instructions:
- Prepare the sauce: Heat 1 tbsp oil in a saucepan over medium heat. Add garlic and ginger, cook until fragrant (about 1 minute). Stir in red curry paste, cook for 1 minute more. Pour in coconut milk, bring to a simmer. Stir in soy sauce and lime juice (and sugar, if using). Simmer for a few minutes, then set the sauce aside.
- Cook the chicken: In a large skillet or wok, heat 1 tbsp oil over medium-high heat. Add the chicken and cook until browned and cooked through. Remove chicken from the skillet and set aside.
- Sauté vegetables: Add the sliced bell pepper and onion to the same skillet. Sauté until the vegetables are tender-crisp, about 5-7 minutes.
- Combine and simmer: Pour the red curry sauce back into the skillet with the peppers and onions. Add the cooked chicken back into the sauce. Stir in the fresh Thai basil leaves until they wilt slightly.
- Serve: Spoon the red chicken curry over cooked rice. Enjoy immediately!
Notes:
- Ensure your red curry paste and soy sauce (or alternatives) are certified gluten-free.
- Adjust the amount of red curry paste to your preferred spice level.
Source: Kayla Cappiello
- Pesto Chicken Parm (Gluten-Free)
A delicious twist on chicken parmesan, featuring pesto-coated chicken baked with marinara and mozzarella. Serve with gluten-free pasta or zucchini noodles.
Key Ingredients: Chicken breasts, gluten-free breadcrumbs, pesto, marinara sauce, mozzarella cheese.
This Pesto Chicken Parm offers a delicious, flavorful twist on a classic Italian dish, swapping marinara for herby pesto. Pounded chicken breasts are pan-fried until golden brown, then topped with creamy pesto and mozzarella, and finished in the oven until bubbly.
Ingredients:
- Boneless, skinless chicken breasts (or boneless chicken thighs, chicken cutlets, or gluten-free chicken tenders)
- Olive oil
- Gluten-free breadcrumbs (seasoned, or season with garlic, salt, pepper, basil, oregano)
- Mozzarella cheese (sliced or shredded; use plant-based for dairy-free)
- Creamy pesto sauce (homemade or store-bought; ensure it\’s creamy enough)
Optional Homemade Creamy Pesto Sauce (3 ingredients):
- 1/2 cup pesto
- 1/4 cup heavy cream (or dairy-free substitute)
- ½ cup grated Parmesan cheese
Instructions:
- Prepare the chicken: Preheat the oven. Pound the chicken breasts to an even thickness of about ½ inch for even cooking.
- Coat the chicken: Dip each piece of chicken in olive oil, coating all sides thoroughly. Then dredge in gluten-free breadcrumbs, pressing gently to help the crumbs stick.
- Sear the chicken: Place the breaded chicken in an oven-safe skillet over medium heat. Cook for 3 to 5 minutes per side, or until golden brown and mostly cooked through.
- Add cheese and pesto: Top each chicken breast with mozzarella cheese. Spoon the creamy pesto sauce over the cheese.
- Bake: Transfer the skillet to the oven and bake for 15 to 20 minutes, or until the cheese is fully melted and the pesto sauce is hot and bubbling.
Notes:
- For the homemade creamy pesto sauce: In a small saucepan, combine pesto and heavy cream. Heat over low-medium heat, stirring constantly, until warmed through and well combined (do not boil). Stir in Parmesan cheese.
- Ensure all ingredients, especially pesto and breadcrumbs, are certified gluten-free.
Source: Kayla Cappiello
- Chicken Caesar Pasta Salad (Gluten-Free)
A refreshing and hearty salad combining gluten-free pasta with grilled chicken, crisp romaine, and a creamy Caesar dressing. Perfect for a lighter dinner.
Key Ingredients: Gluten-free pasta, cooked chicken, romaine lettuce, Caesar dressing, Parmesan cheese (optional).
This easy Chicken Caesar Pasta Salad is loaded with juicy chicken and crispy romaine lettuce, combining the best of a classic chicken Caesar with a pasta salad. It\’s a 20-minute recipe, perfect for meal prep, lunch, or dinner.
Ingredients:
- Cooked, shredded or diced chicken breast (rotisserie chicken is a great shortcut)
- Gluten-free pasta (sturdy shapes like brown rice, corn-quinoa fusilli or penne)
- Romaine or cos lettuce, chopped
- Parmesan cheese (grated, plus extra for dressing)
- Garlic powder, salt, and pepper (for seasoning chicken)
Homemade Caesar Dressing:
- Mayonnaise
- Spicy brown mustard (instead of anchovies)
- Olive oil (good quality)
- Lemon juice (freshly squeezed)
Instructions:
- Season and cook chicken: Place the chicken in a shallow dish. Season both sides with garlic powder, salt, and pepper. Heat olive oil in a large skillet over medium-high heat. Add the seasoned chicken and cook until browned and cooked through (internal temperature of 165°F).
- Cool and slice chicken: Remove the chicken from the pan and let it cool slightly. Slice into thin strips or dice.
- Make the dressing: In a small bowl, whisk together the mayonnaise, spicy brown mustard, olive oil, lemon juice, parmesan, salt, and pepper until smooth and creamy.
- Cook and chill pasta: Cook the gluten-free pasta according to package directions. Rinse under cold water to stop cooking, then drain well. For an extra-cold salad, chill the pasta in the refrigerator for about an hour. (Optional: add a little olive oil to prevent sticking).
- Assemble the salad: In a large bowl, combine the cooked pasta, sliced chicken, chopped lettuce, and parmesan.
- Dress and serve: Drizzle with the homemade Caesar dressing. Toss gently to coat and serve immediately.
Expert Tips and Tricks:
- Al dente pasta: Don’t overcook the gluten-free pasta. Rinse with cold water to stop cooking and prevent overcooking.
- Rest chicken: Let cooked chicken rest before slicing to keep it juicy.
- Chill salad: Chill ingredients before assembling for a crispier salad.
- Dress before serving: To avoid soggy pasta or wilted lettuce, add dressing just before serving.
- Add lemon: A squeeze of fresh lemon juice can brighten flavors.
Storage and Meal Prepping:
- Store components separately in the fridge and assemble just before eating for meal prep.
- Leftovers can be stored in an airtight container in the fridge for up to 3 days. Add extra dressing to refresh.
Variations:
- Italian version: Add olives, banana peppers, sliced pepperoncini, turkey pepperoni, artichokes, or sun-dried tomatoes.
- Vegetarian: Substitute chicken with crispy chickpeas, toasted nuts, or seeds.
- Extra cheesy: Fold in mini mozzarella balls or torn burrata cheese.
Source: Kayla Cappiello
- Gluten-Free Chicken Pot Pie
A comforting classic with a flaky gluten-free biscuit topping, filled with creamy chicken and mixed vegetables. No rolling out pie crust required!
Key Ingredients: Cooked chicken, mixed vegetables, gluten-free flour, chicken stock, milk, gluten-free biscuit mix.
This gluten-free chicken pot pie features an easy, gluten-free biscuit topping, eliminating the need for rolling or shaping pie crust. The filling is a classic, cozy mix of creamy chicken, diced potatoes, and mixed vegetables.
Yield: Not explicitly stated, but typically 6-8 servings for a pot pie.
Ingredients:
For the Gluten-Free Biscuit Topping:
- 1 ¾ cups (262g) gluten-free measure-for-measure flour
- 4 teaspoons baking powder
- ½ teaspoon kosher salt
- 1 tablespoon granulated sugar
- 1 cup (240ml) milk of choice (unsweetened)
- 1 large egg, whisked
- 3 tablespoons butter, melted
For the Chicken Pot Pie Filling:
- ¼ cup butter
- 1 medium yellow onion, diced
- ¼ cup gluten-free measure-for-measure flour
- ¾ teaspoon kosher salt
- ¾ teaspoon ground pepper
- 1 teaspoon smoked paprika
- ¼ teaspoon ground mustard
- ⅛ teaspoon dried thyme
- 3 cups chicken stock
- ½ cup heavy cream
- 3 cups diced peeled russet potatoes (about 1-2 potatoes, diced into smaller than 1” cubes)
- 2 carrots, chopped
- 3 cups frozen mixed vegetables
- 3 cups shredded chicken (the meat of 1 rotisserie chicken)
Instructions:
Pre-Bake the Biscuits:
- Preheat the oven to 400°F (200°C) and line a baking sheet with parchment paper or a silicone baking mat.
- In the bowl of a stand mixer, combine gluten-free flour, baking powder, salt, and sugar. Mix until combined. Add milk, egg, and melted butter and mix until combined.
- Working quickly, scoop 8 large spoonfuls of the batter onto the baking sheet. Using wet fingers, gently smooth/form the tops into a biscuit shape. Whisk together an egg wash (if desired, not explicitly listed in ingredients but implied for brushing) then brush the top of each biscuit with the wash.
- Bake for 10 minutes until set. Remove from the oven and set aside until the filling is ready.
Make the Filling:
- Melt ¼ cup butter in a large pot or Dutch oven over medium heat. Add the chopped onion and cook until softened, about 5-7 minutes.
- Sprinkle ¼ cup gluten-free flour over the onion mixture and whisk until smooth. Stir in salt, pepper, smoked paprika, ground mustard, and dried thyme until well-combined.
- Gradually stir in the chicken stock and heavy cream. Add the potatoes and carrots, and bring the mixture to a boil over medium heat, stirring frequently until the liquid has thickened and the potatoes and carrots are tender (about 15-20 minutes). Stir in the frozen mixed vegetables and cook for another 5-10 minutes until tender.
- Remove from heat and stir in the shredded chicken.
Bake the Pie:
- Top the gluten-free pot pie filling with the pre-baked biscuits.
- Bake for 20-25 minutes or until biscuits are beginning to turn a light golden brown and are cooked through. Serve and enjoy!
Notes:
- Using a rotisserie chicken can significantly cut down on prep time.
- Ensure all ingredients, especially flour and chicken stock, are certified gluten-free.
Source: Meaningful Eats
B. Beef Dishes
- Thai Basil Beef (Paleo & Whole30)
A quick and flavorful stir-fry featuring tender beef and aromatic basil, perfect for a healthy and satisfying meal. Naturally gluten-free and dairy-free.
Key Ingredients: Ground beef, fresh basil, bell peppers, onions, gluten-free tamari or coconut aminos.
This one-pan Thai Basil Beef is a paleo and Whole30-compliant dish that comes together in just 15 minutes from prep to table. It offers authentic Thai flavors and can be made with various ground meats.
Prep Time: 8 minutes
Cook Time: 6 minutes
Total Time: 14 minutes
Yield: 4-6 servings
Ingredients:
- 1/2 cup beef bone broth
- 1/2 cup coconut aminos
- 2 tablespoons fish sauce
- 2 tablespoons coconut sugar* (omit for Whole30)
- 2 tablespoons avocado oil
- 8 garlic cloves, crushed in a garlic press
- 1 to 5 red chiles, thinly sliced, seeded for mild flavor
- 4 scallions, white and tender green parts thinly sliced
- 2 1/2 pounds ground beef
- 3/4 teaspoon sea salt
- 1/4 teaspoon fresh cracked black pepper
- 2 cups packed fresh Thai basil leaves**
Instructions:
- Prepare the sauce: Whisk together the broth, coconut aminos, fish sauce, and coconut sugar.
- Sauté aromatics: Heat the avocado oil in a large skillet over high heat. Add garlic, the white parts of the scallions, and half the chile slices and stir-fry for 20 seconds, until fragrant.
- Brown the beef: Add ground beef, season with sea salt and black pepper, and press down into a packed disc in the pan. Brown on one side for 2 to 3 minutes, then flip in pieces and cook another 1 to 2 minutes to brown the other side.
- Cook through: Break apart the pieces and sauté 1 to 2 minutes longer, until cooked through. Drain off any liquid then return to the stove.
- Add sauce and thicken: Add the sauce mix and bring to a boil. Stir-fry for 1 minute, until the sauce thickens and coats the meat.
- Add basil and scallions: Stir in half the basil and the green parts of the scallions and let wilt for 30 seconds.
- Serve: Remove from the heat. Sprinkle the remaining fresh basil on top and the remaining chile slices over top (if desired). Serve hot.
Notes:
- If using regular basil instead of Thai basil, use 3 cups of basil and add 1/4 tsp ground anise or fennel when you add the chile, scallion, and garlic.
- Adjust the number of chiles to customize the heat level.
Source: Danielle Walker\’s Against All Grain
- Paleo BBQ Bacon Burger Bowls
All the deliciousness of a BBQ bacon burger, served in a bowl without the bun. A low-carb, gluten-free, and flavorful option.
Key Ingredients: Ground beef patties, bacon, BBQ sauce (ensure gluten-free), lettuce, tomato, onion, pickles.
These Paleo BBQ Bacon Burger Bowls are a delicious and customizable meal, perfect for those following a paleo or Whole30 diet. They feature seasoned ground bison or beef patties, fresh vegetables, and a tangy BBQ sauce.
Prep Time: 15 minutes
Cook Time: 12 minutes
Total Time: 27 minutes
Yield: 6-8 Servings
Ingredients:
- 3 pounds ground bison or beef
- ¼ cup grated red onion
- 3 tablespoons extra-virgin olive oil
- ½ teaspoon fine sea salt
- ¼ teaspoon freshly ground black pepper
- 1 ½ tablespoons Healthy in a Hurry BBQ Rub (or your preferred BBQ rub)
- ⅓ cup Primal Kitchen Classic BBQ Sauce (or your preferred gluten-free BBQ sauce)
For serving:
- 10 cups chopped romaine lettuce
- 1 cup halved cherry tomatoes
- ¼ cup dill pickle slices
- 8 slices Baked Bacon, chopped
- 3 avocados, halved, pitted, peeled, and sliced
- Primal Kitchen Honey Mustard Vinaigrette and Marinade (or a sugar-free dressing with apple cider vinegar, mustard, extra virgin olive oil, salt, and pepper for Whole30)
Instructions:
- Preheat grill: Preheat the grill to medium-high heat for indirect-heat cooking.
- Prepare patties: In a large bowl, combine the bison (or beef), onion, olive oil, salt, and pepper. Mix gently until evenly distributed; do not overmix. Shape the mixture into eight 3-inch patties, not too tightly packed. Sprinkle the BBQ rub on both sides of each patty.
- Grill burgers: Sear the patties over direct heat for 1 minute on each side. Then, move the patties to indirect heat (as far from the coals or gas jets as possible) and cook for 5 minutes more per side, until a meat thermometer inserted into the center reads 160°F for medium. During the final few minutes, brush the top of each burger with BBQ sauce. Transfer the burgers to a cutting board and tent with aluminum foil to keep warm.
- Assemble bowls: To serve, set out the burgers, lettuce, tomatoes, pickles, bacon, and avocados buffet-style so diners can build their bowls. Drizzle with honey mustard vinaigrette or your chosen dressing.
Notes:
- For leaner meats like bison or grass-fed beef, searing first and then cooking over indirect heat helps keep them juicy.
- Uncooked patties can be frozen for later use; defrost overnight in the refrigerator before grilling.
- Ensure all sauces and rubs used are certified gluten-free and compliant with Paleo/Whole30 if following those diets.
Source: Danielle Walker\”s Against All Grain
- Coconut Beef Curry (Keto & Gluten Free)
A rich and creamy beef curry made with coconut milk, perfect for those following a keto or gluten-free diet. Full of warming spices.
Key Ingredients: Beef stew meat, coconut milk, curry powder, ginger, garlic, vegetables.
This easy, creamy Coconut Curry Beef recipe is loaded with spice and flavor, featuring sweet peppers, coconut milk, and tomato paste. It\’s naturally gluten-free and can be served over rice or cauliflower rice for a low-carb and keto-friendly meal.
Prep Time: 10 minutes
Cook Time: 45 minutes
Total Time: 55 minutes
Yield: 4 servings
Calories: 658kcal (estimated)
Ingredients:
- 2 tablespoons extra virgin olive oil
- 2 tablespoons curry powder
- 2 sweet bell peppers, diced
- 1 yellow onion, diced
- 2 cloves garlic, minced
- 1 tablespoon tomato paste
- 1 1/2 pounds beef, cut into bite-size pieces (tender cuts like sirloin, ribeye, tenderloin, or flat iron recommended)
- 1/2 teaspoon salt
- 1/4 teaspoon pepper
- 1 13.5 ounce can coconut milk (full fat)
- 1 tablespoon sugar (or sugar substitute like monk fruit for low-carb/keto)
Instructions:
- Sauté curry powder: Heat the olive oil in a Dutch oven or large, deep skillet over medium-high heat. Add the curry powder and cook, stirring often, for 1 minute until fragrant.
- Sauté vegetables: Stir in the bell peppers, onion, garlic, and tomato paste. Cook until the peppers and onion are just starting to soften, about 3-4 minutes.
- Brown beef: Season the beef with salt and pepper and add it to the pan. Brown on all sides. It\\’s okay if the beef isn\\’t cooked through at this point.
- Simmer curry: Pour in the coconut milk and add the sugar (or sugar substitute). Cover, leaving one end slightly open to vent, and cook for about 30-35 minutes, stirring occasionally. Leaving the lid cracked allows the liquid to reduce, which thickens the sauce and amplifies the flavor.
- Serve: Serve hot over rice, or cauliflower rice for a low-carb option.
Tips and Techniques:
- Use tender cuts of beef for the best results.
- Fresh or ground ginger can be added: ground ginger with curry powder, or fresh ginger with garlic, onions, and pepper.
- Store leftovers in an airtight container in the refrigerator for 3-4 days.
Source: Delicious Little Bites
- Chile-Garlic Steak and Zucchini
A simple yet robust dish featuring tender steak and zucchini tossed in a spicy chile-garlic sauce. Quick to prepare and packed with flavor.
Key Ingredients: Steak (e.g., flank, sirloin), zucchini, garlic, chili flakes, gluten-free soy sauce or tamari.
This recipe pairs umami-rich steak with mild zucchini, enhanced by a simple, bright, and slightly spicy sauce. The steak is cooked hot and fast, while the zucchini is steamed until tender-firm, creating a flavorful and quick meal.
Yield: 4 servings
Total Time: 25 minutes
Prep Time: 5 minutes
Cook Time: 20 minutes
Ingredients:
- 2 garlic cloves, minced
- 1 teaspoon crushed red pepper, divided
- Salt and black pepper
- 2 teaspoons red wine vinegar
- 1¼ pounds hanger steak, skirt steak, or flap meat, sliced ¼-inch thick against the grain
- 2 tablespoons olive oil
- 2 medium zucchini (about 1 pound), halved lengthwise and sliced ¼-inch thick
- ¼ cup fresh mint leaves, torn
Instructions:
- Prepare the marinade: In a medium bowl, combine the minced garlic, ½ teaspoon crushed red pepper, ½ teaspoon salt, ¼ teaspoon black pepper, and red wine vinegar. Add the sliced steak and toss to coat. Let marinate for at least 10 minutes, or up to 30 minutes at room temperature.
- Cook the steak: Heat 1 tablespoon of olive oil in a large skillet (preferably cast iron) over medium-high heat until shimmering. Add half of the marinated steak in a single layer and cook, undisturbed, for 2 minutes until browned. Flip the steak and cook for another 1 minute for medium-rare. Transfer to a plate. Repeat with the remaining 1 tablespoon of olive oil and steak.
- Cook the zucchini: Add the sliced zucchini to the same skillet. Season with salt and pepper. Cook, stirring occasionally, for 5 to 7 minutes, until tender-crisp and lightly browned. Add the remaining ½ teaspoon crushed red pepper and cook for 1 minute more.
- Combine and serve: Return the cooked steak to the skillet with the zucchini. Toss to combine. Stir in the fresh mint leaves. Serve immediately.
Notes:
- Hanger steak, skirt steak, or flap meat are recommended for this recipe due to their flavor and texture when sliced thin.
- Adjust the amount of crushed red pepper to your preferred spice level.
Source: NYT Cooking
C. Pork Dishes
- Skillet Pork Cutlets With Fresh Peach Butter
Pan-seared pork cutlets served with a sweet and savory fresh peach butter. A delightful and elegant meal that comes together quickly.
Key Ingredients: Pork cutlets, fresh peaches, butter, herbs.
Thin pork cutlets cook quickly and are topped with a rich brown butter sauce brightened by fresh summer peaches. This dish is perfect for a fast weeknight meal.
Yield: 4 servings
Total Time: 30 minutes
Prep Time: 10 minutes
Cook Time: 20 minutes
Ingredients:
- 1 medium-ripe peach, halved, pitted and grated on the large holes of a box grater (½ cup peach pulp and juices, skin discarded)
- 3 oregano sprigs, plus ½ teaspoon chopped oregano leaves
- 4 tablespoons unsalted butter, at room temperature
- Kosher salt and pepper
- 1 tablespoon extra-virgin olive oil
- 4 (5-ounce) boneless pork loin chops or cutlets, pounded ¼-inch thick
Instructions:
- Prepare peach mixture: In a medium heatproof bowl, combine the grated peach and chopped oregano.
- Make brown butter: In a small saucepan over medium-low heat, melt the butter. Cook, stirring occasionally, until butter is browned and nutty smelling and the sizzling sound stops, about 3 minutes. (Be careful not to burn the butter.) Pour the browned butter over the grated peach — and be careful, as it may splatter. Season with salt and pepper and mix until well combined.
- Cook pork cutlets: In a 12-inch cast-iron skillet, heat oil over medium. Season pork with salt and pepper and add to skillet. Top with oregano sprigs and cook until golden on both sides and cooked through, about 3 minutes per side.
- Serve: Transfer pork to 4 serving plates. Top each with some of the peach butter and garnish with more black pepper. Serve warm.
Notes:
- Grating the peach helps release its juices and eliminates the need for peeling.
- Steamed or grilled corn makes a great accompaniment.
Source: NYT Cooking
D. Seafood Dishes
- Pili Pili Shrimp with Braised Cannellini Beans
Spicy pili pili shrimp served alongside tender, braised cannellini beans. A flavorful and protein-rich meal with a kick.
Key Ingredients: Shrimp, pili pili sauce (or chili flakes), cannellini beans, tomatoes, herbs.
This spiced shrimp and white bean skillet is flavorful and saucy, but most important, simple and fast. Thanks to quick-cooking shrimp, the dish comes together in less than an hour, and since it’s cooked and served out of a single pan, cleanup couldn’t be easier. The mixture of warm spices and tomato paste is a loose approximation of harissa, bringing gentle heat and bold color to the shrimp and creamy white beans. Take the time to cook the tomato paste thoroughly—it deepens the flavor and ensures the spices are well imbued into the sauce. Warm flatbread, like naan or pita, is ideal for swiping through the sauce. Toasted baguette or sourdough would also be great.
Total Time: 40 minutes
Yield: 4 servings
Ingredients:
- 1 lb. large shrimp, peeled, deveined
- 2 tsp. Diamond Crystal or 1 tsp. Morton kosher salt, divided, plus more
- Freshly ground pepper
- ¼ cup extra-virgin olive oil
- 1 large shallot, quartered, thinly sliced
- 5 garlic cloves, finely chopped
- 1 Tbsp. ground coriander
- 1 Tbsp. ground cumin
- 1 Tbsp. smoked paprika
- 1 tsp. sugar
- ½ tsp. crushed red pepper flakes
- ¼ cup double-concentrated tomato paste
- 1 15.5-oz. can white beans (such as cannellini), rinsed
- Coarsely chopped mint and dill and warm flatbread (for serving)
Instructions:
- Step 1: Pat 1 lb. large shrimp, peeled, deveined, dry with paper towels; season with 1 tsp. Diamond Crystal or ½ tsp. Morton kosher salt and a large pinch of freshly ground pepper. Set aside.
- Step 2: Heat ¼ cup extra-virgin olive oil in a large skillet over medium. Add 1 large shallot, quartered, thinly sliced, 5 garlic cloves, finely chopped, and 1 tsp. Diamond Crystal or ½ tsp. Morton kosher salt and cook, stirring often, until shallot is softened and just starting to turn golden, 5–7 minutes.
- Step 3: Add 1 Tbsp. ground coriander, 1 Tbsp. ground cumin, 1 Tbsp. smoked paprika, 1 tsp. sugar, ½ tsp. crushed red pepper flakes, and ¼ cup water (eyeballing is fine); cook, stirring often, until water is almost completely evaporated and spices are fragrant, about 2 minutes. Add ¼ cup double-concentrated tomato paste and ¼ cup water (again, eyeballing is fine). Cook, stirring often, until tomato paste darkens slightly in color and oil begins to bead on the surface, 6–8 minutes.
- Step 4: Add one 15.5-oz. can white beans (such as cannellini), rinsed, and 1 cup water. Cook, stirring occasionally, until sauce is reduced by half and oil pools on the surface, 6–8 minutes. Taste and season with more salt if needed.
- Step 5: Add reserved shrimp and cook, stirring occasionally, until cooked through, about 4 minutes. Remove pan from heat; scatter coarsely chopped mint and dill over shrimp and beans and serve with warm flatbread.
Source: Bon Appétit
- Grilled Shrimp Ceviche
A fresh and vibrant ceviche featuring grilled shrimp, citrus, and crisp vegetables. A light and refreshing dinner option.
Key Ingredients: Shrimp, lime juice, red onion, cilantro, avocado, jalapeño.
This fresh Grilled Shrimp Ceviche is packed with the sweet flavor of shrimp, marinated in a habanero spice mixture, grilled, and then folded into a fresh salsa. It\’s a perfect appetizer or light meal, served with tortilla chips.
Yields: 6 servings
Prep Time: 30 minutes
Cook Time: 6 minutes
Total Time: 36 minutes
Ingredients:
For the Marinated and Grilled Shrimp:
- ⅓ cup Vegetable Oil
- ½ Large Habanero Pepper, Seeded And Minced
- 3 cloves (Large) Garlic, Minced
- 1 Tbsp. Brown Sugar
- 2 tsp. Smoked Paprika
- 1 tsp. Chili Powder
- 1 tsp. Garlic Powder
- 1 tsp. Onion Powder
- 1 tsp. Mexican Oregano
- 1 tsp. Kosher Salt
- ½ tsp. Freshly Ground Black Pepper
- 1 lb. Raw